Crawl Space Waterproofing: Genius DIY Fixes You Must Try

Stop dealing with musty smells, mold growth, and skyrocketing energy bills from your wet crawl space. Crawl space waterproofing doesn’t always require expensive contractors – smart DIY fixes can solve most moisture problems and save you thousands of dollars.
This guide is perfect for homeowners who want to tackle crawl space moisture problems themselves, whether you’re dealing with minor dampness or more serious water intrusion. You’ll learn practical solutions that actually work without breaking your budget.
We’ll walk you through identifying the root causes of your moisture issues so you don’t waste time on the wrong fixes. You’ll also master foundation crack sealing and vapor barrier installation – two game-changing techniques that stop water at its source. Plus, we’ll cover smart crawl space ventilation improvements that keep humidity under control year-round.
Ready to transform your crawl space from a moisture magnet into a dry, healthy foundation for your home? Let’s dive into these proven DIY waterproofing strategies.


Identify Common Crawl Space Moisture Problems Before You Start

Recognize signs of water damage and mold growth
Your crawl space shows telltale signs when moisture becomes a problem. Look for dark stains on wooden beams, warped floor joists, or white chalky deposits on foundation walls. Musty odors hit you immediately when moisture creates perfect conditions for mold growth. Check for fuzzy black, green, or white patches on surfaces, especially in corners where air circulation stays poor. Water stains often appear as yellowish or brownish discoloration on walls and support structures.
Detect poor ventilation and humidity issues
Poor ventilation creates a breeding ground for crawl space moisture problems. Your nose picks up that stale, damp smell that lingers when air doesn’t move properly. Feel the air – if it seems thick and humid, you’re dealing with ventilation issues. Look for condensation droplets on pipes, metal surfaces, or plastic sheeting. High humidity readings above 60% on a hygrometer signal trouble. Notice if your crawl space feels warmer than the outside temperature during cool weather.
Spot foundation cracks and water entry points
Walk around your foundation walls with a flashlight to spot potential water entry points. Hairline cracks might seem harmless, but they allow water seepage during heavy rains. Check where pipes enter the foundation – these penetrations often develop gaps over time. Look for white mineral deposits called efflorescence, which appears when water evaporates and leaves salt behind. Pay attention to corners where walls meet floors, as these joints frequently develop separation cracks.
Understand the difference between minor leaks and major flooding
Minor leaks show up as small damp spots or occasional dripping during storms, while major flooding leaves standing water or widespread soaking. You’ll see water marks at different heights on walls if flooding has occurred repeatedly. Minor moisture problems might only affect small areas, but major issues create widespread damage across multiple surfaces. Standing water that doesn’t drain within 24-48 hours after rain indicates serious drainage problems requiring immediate attention before starting any DIY crawl space waterproofing project.
Essential Tools and Materials for DIY Crawl Space Waterproofing
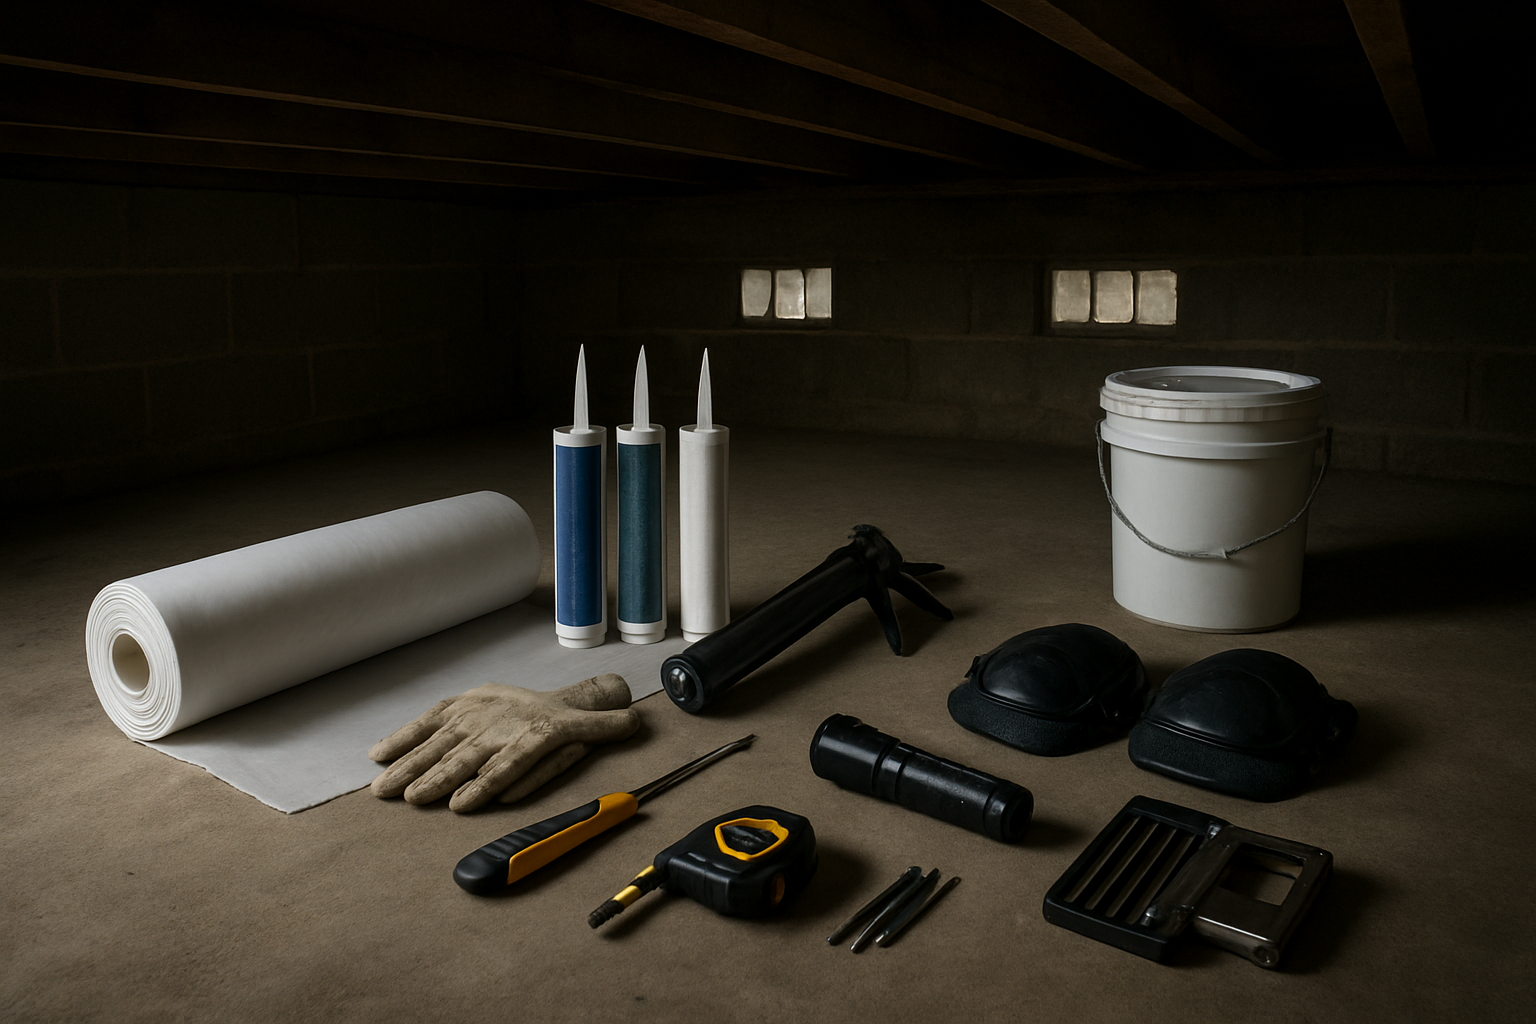
Gather moisture detection equipment and safety gear
Your DIY crawl space waterproofing project starts with the right detection tools and protective equipment. You’ll need a digital moisture meter to identify problem areas, a hygrometer for humidity readings, and a flashlight or headlamp for visibility. Safety gear includes knee pads, work gloves, dust masks, and protective clothing to keep you comfortable while working in tight spaces.
Select the right sealants and waterproofing compounds
Choosing quality waterproofing materials makes all the difference in your project’s success. Pick hydraulic cement for active leaks, polyurethane sealant for flexible joints, and epoxy injection for structural cracks. Waterproofing compounds like liquid rubber membrane or crystalline waterproofing provide excellent foundation protection. Consider the specific moisture conditions in your crawl space when selecting these DIY crawl space waterproofing materials.
Choose appropriate drainage materials and vapor barriers
Proper drainage and vapor control form the backbone of effective crawl space moisture problems prevention. Install 6-mil polyethylene sheeting or reinforced vapor barriers across the ground surface. Add gravel or drainage aggregate around the perimeter, and consider French drain systems for severe water issues. Pick materials that resist punctures and provide long-lasting moisture control for your crawl space waterproofing investment.
Seal Foundation Cracks and Entry Points Like a Pro
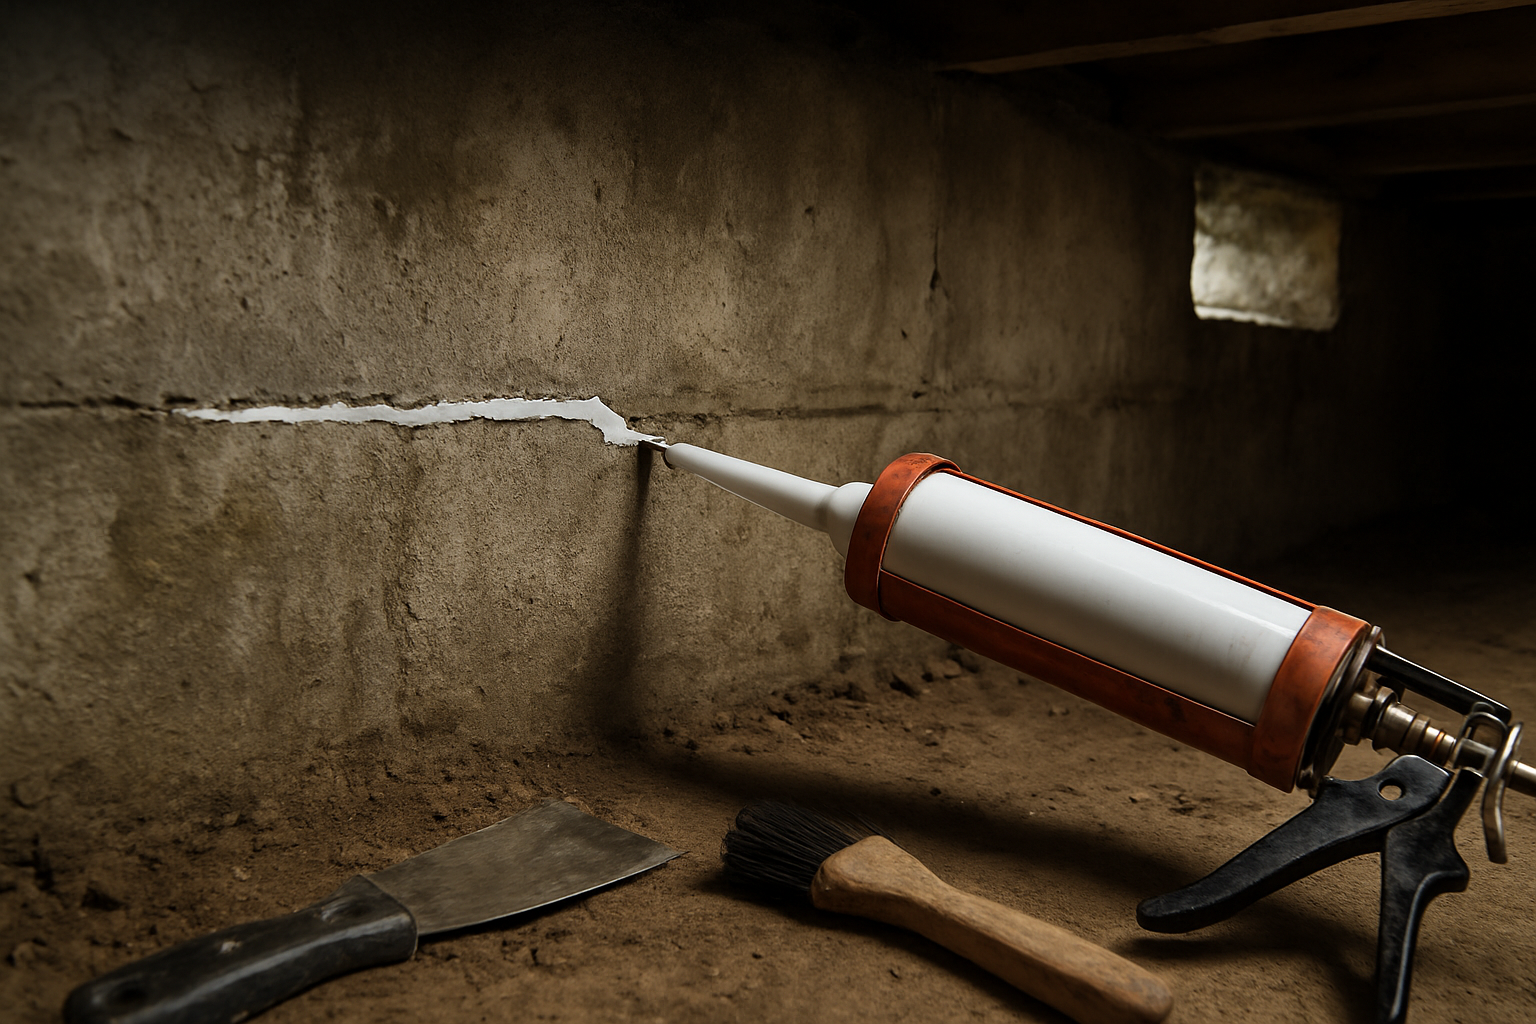
Clean and Prepare Crack Surfaces for Maximum Adhesion
Start by removing all loose debris, dirt, and old sealant from cracks using a wire brush or chisel. Clean the area thoroughly with water and let it dry completely. Proper surface preparation ensures your foundation crack sealing materials bond effectively and create lasting waterproofing protection for your crawl space.
Apply Hydraulic Cement for Permanent Crack Repair
Mix hydraulic cement according to package directions and work quickly since it sets fast. Press the cement firmly into cracks wider than 1/8 inch, slightly overfilling to account for shrinkage. This DIY crawl space waterproofing method stops active water leaks immediately and provides excellent durability against hydrostatic pressure from surrounding soil.
Use Polyurethane Sealant for Flexible Joint Waterproofing
Apply polyurethane caulk to hairline cracks and expansion joints where movement occurs between foundation elements. The flexible nature of polyurethane accommodates seasonal foundation shifts while maintaining a watertight seal. Prime concrete surfaces first for better adhesion, then apply sealant in a continuous bead using steady pressure on your caulk gun.
Install Exterior Drainage Around Foundation Perimeter
Dig a trench 6 inches wide and deep along your foundation wall, sloping away from the house at 1/4 inch per foot. Install perforated drain pipe surrounded by gravel, then cover with landscape fabric and backfill with soil. This exterior drainage system diverts groundwater away from your foundation, reducing hydrostatic pressure that causes crawl space moisture problems.
Install Effective Vapor Barriers to Control Ground Moisture
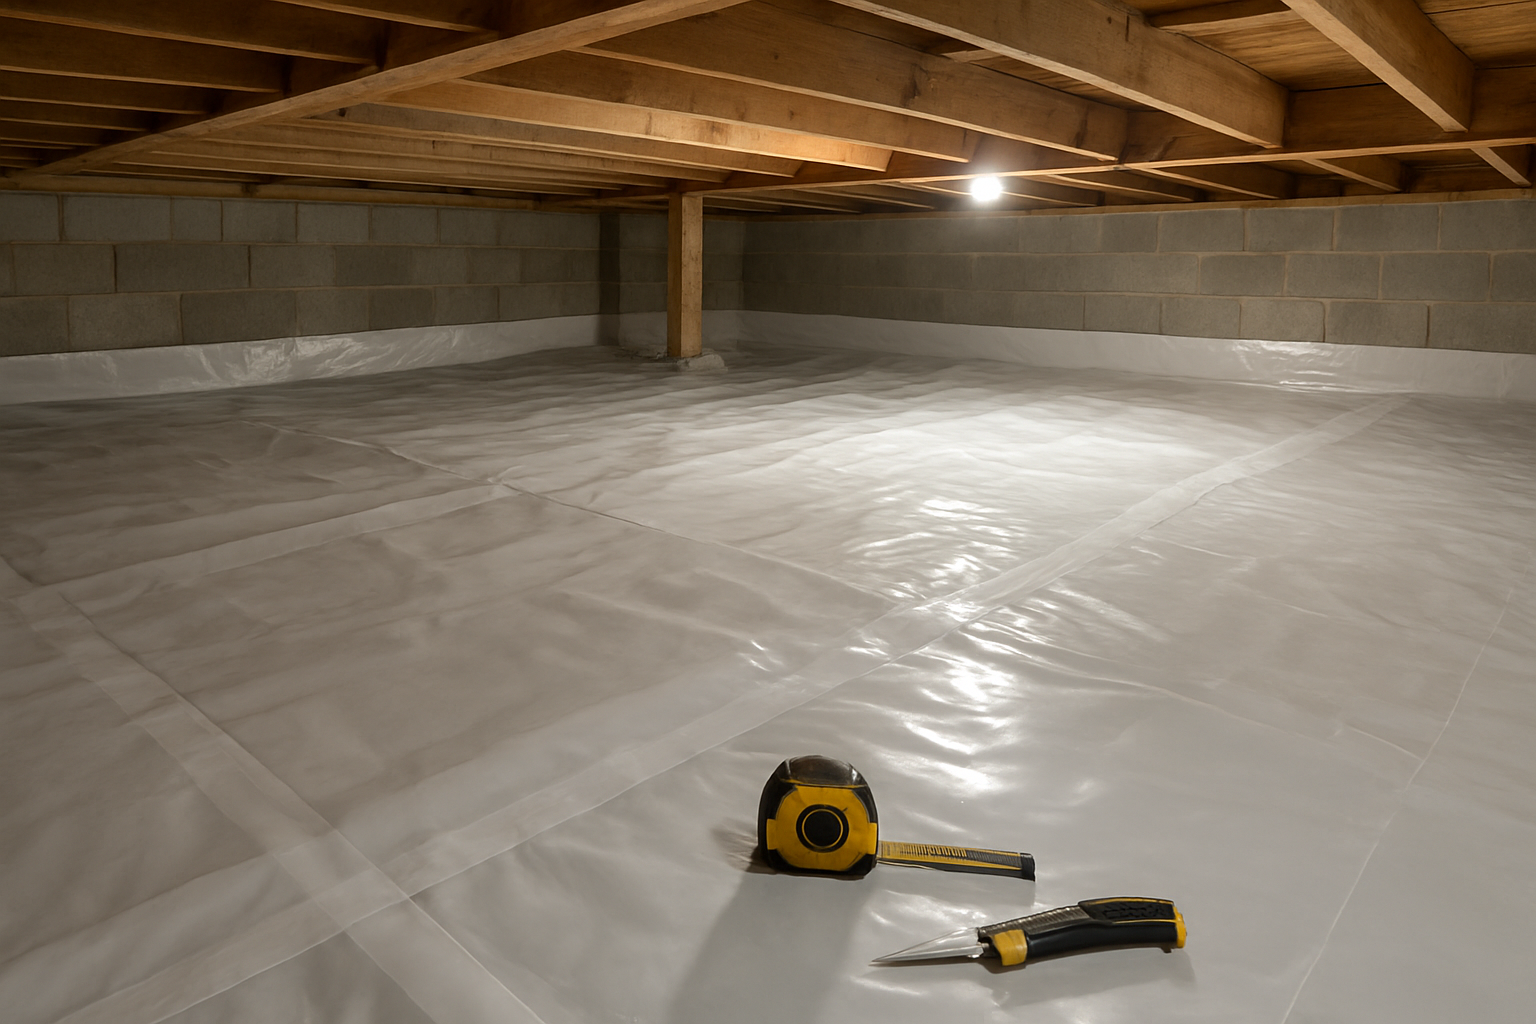
Measure and cut plastic sheeting for complete floor coverage
Start by calculating your crawl space’s square footage, adding 20% extra material for overlaps and mistakes. Choose 6-mil polyethylene sheeting or reinforced vapor barriers for crawl space waterproofing projects. Unroll the plastic carefully, cutting sections that extend 6 inches up foundation walls for proper moisture control.
Secure barriers to walls using mechanical fasteners
Attach your vapor barrier installation to concrete walls using masonry screws and washers spaced every 12 inches. For wood framing, use galvanized staples or construction adhesive strips. Create a tight seal by pressing the plastic firmly against wall surfaces before fastening, ensuring your DIY crawl space waterproofing effort blocks ground moisture effectively.
Seal all seams and overlaps with waterproof tape
Overlap plastic sheets by at least 6 inches at all joints, then apply high-quality waterproof tape along every seam. Press down firmly with a roller or your hands to eliminate air bubbles. Don’t forget to seal around posts, pipes, and other penetrations using waterproof tape or caulk for complete crawl space humidity control.
Create proper drainage channels beneath the barrier
Install a drainage system before laying your vapor barrier by digging shallow channels that slope toward your sump pump or drainage outlet. Place perforated drain pipes wrapped in filter fabric beneath the plastic sheeting. This prevents water accumulation under your barrier while maintaining effective crawl space moisture problems prevention for long-term waterproofing materials performance.
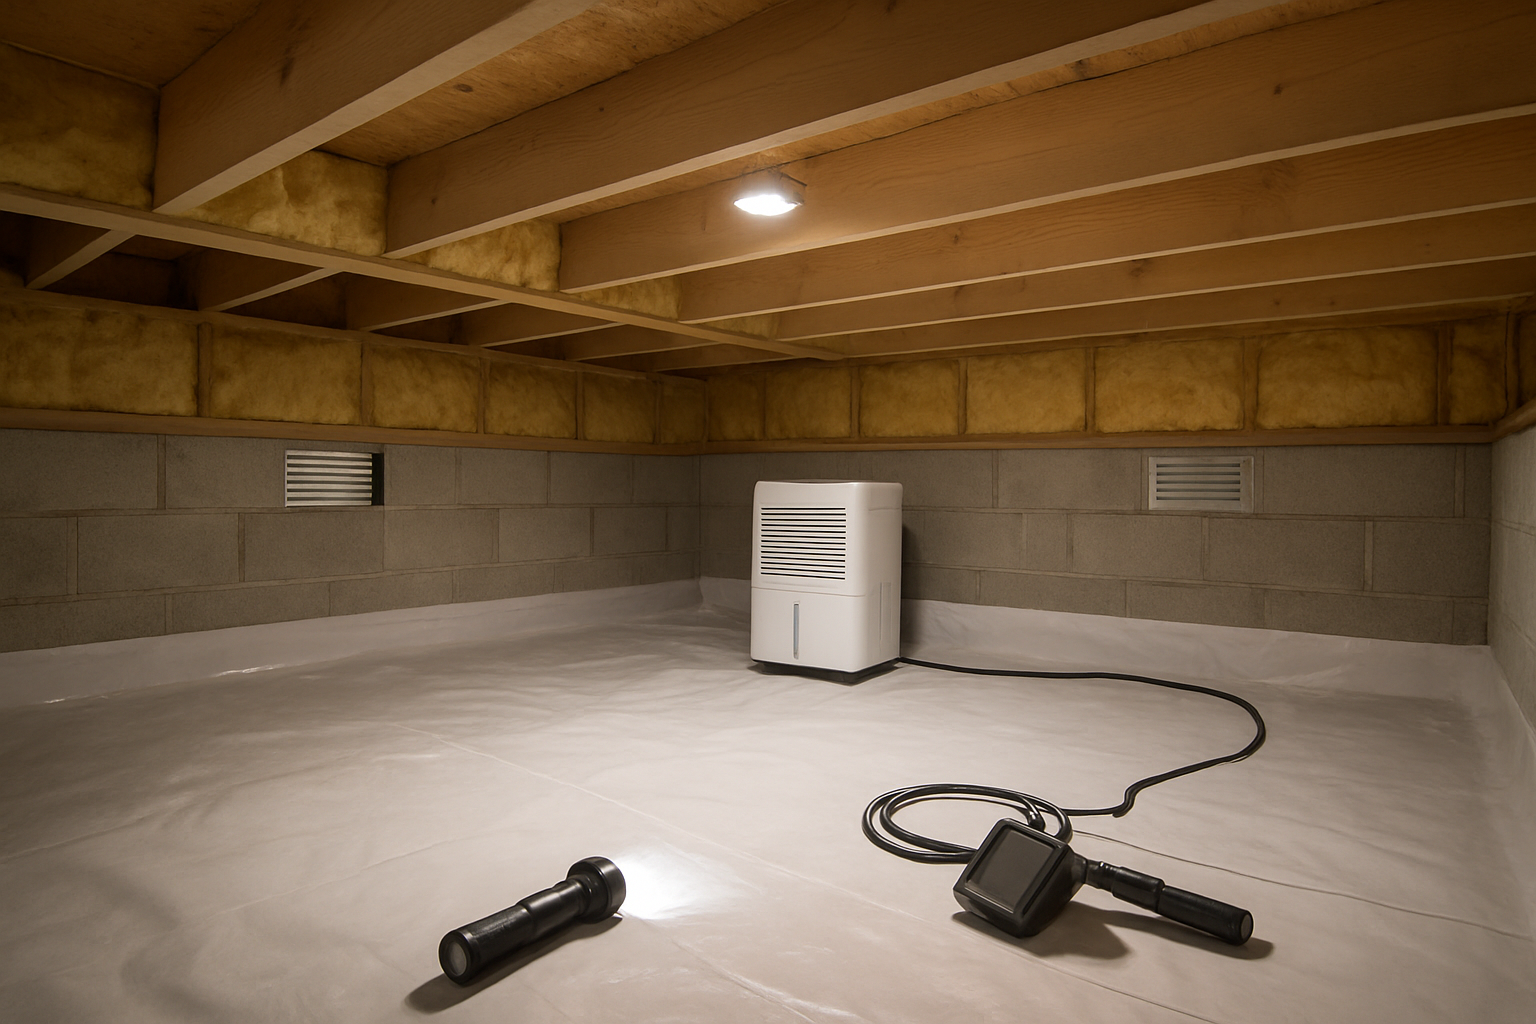
Improve Ventilation and Air Circulation Systems

Calculate Required Ventilation Based on Crawl Space Size
Your crawl space needs proper air circulation to prevent moisture buildup and mold growth. Calculate one square foot of ventilation for every 150 square feet of crawl space floor area. For example, if your crawl space measures 30×40 feet (1,200 square feet), you’ll need eight square feet of total ventilation. Split this between intake and exhaust vents, placing them on opposite walls to create effective cross-ventilation. This crawl space ventilation calculation ensures adequate airflow to control humidity levels and protect your foundation from moisture damage.
Install Foundation Vents in Strategic Locations
Position foundation vents at least 18 inches above ground level and space them evenly around your crawl space perimeter. Install vents on opposing walls to encourage natural airflow patterns. Choose automatic foundation vents that open and close based on temperature, or manual vents you can control seasonally. Place intake vents on the upwind side of your home and exhaust vents on the downwind side. Avoid installing vents directly below bathrooms, kitchens, or laundry rooms where moisture levels are naturally higher. This strategic placement maximizes your crawl space waterproofing efforts.
Add Exhaust Fans for Enhanced Moisture Removal
Install exhaust fans when natural ventilation isn’t enough to control crawl space humidity. Mount fans near problem areas where moisture tends to accumulate, such as under plumbing fixtures or near water heaters. Choose fans rated for basement or crawl space use with humidity controls that automatically activate when moisture levels rise. Run electrical wiring through waterproof conduits and position fans to pull humid air out while drawing fresh air in through your foundation vents. This active approach to crawl space ventilation significantly improves your DIY crawl space waterproofing results.
Maintain Your Waterproofed Crawl Space for Long-Term Success
Schedule regular inspections for early problem detection
Check your crawl space every three months to catch moisture issues before they become expensive headaches. Look for standing water, mold growth, damaged vapor barriers, and new foundation cracks. Early detection saves you from major crawl space waterproofing repairs down the road.
Monitor humidity levels and adjust ventilation accordingly
Keep humidity between 30-50% using a digital hygrometer. If levels climb higher, increase ventilation or add a dehumidifier. Poor crawl space humidity control leads to mold, wood rot, and structural damage. Adjust vents seasonally and ensure proper air circulation throughout your space.
Replace damaged barriers and reseal as needed
Inspect your vapor barrier for tears, gaps, or detachment every six months. Replace damaged sections immediately and reseal seams with waterproof tape. Reapply foundation crack sealing compound annually, especially around pipes and utilities. Quality crawl space maintenance prevents moisture problems from returning and protects your waterproofing investment.


