10 Creative DIY Barn Doors for Stylish and Functional Home Upgrades

Last month, my collegue Rachel built a stunning geometric barn door for her master bathroom using $127 in materials and basic tools—now her Instagram post has 15K likes and everyone thinks she hired an expensive designer. Her secret? Understanding that show-stopping barn doors aren’t about premium materials, they’re about strategic design choices and simple construction techniques that create maximum visual impact.
Here’s what most DIY barn door tutorials won’t tell you: The difference between basic sliding doors and jaw-dropping statement pieces lies in three elements—unexpected material combinations, professional proportions, and design details that photograph beautifully. After helping over 180 homeowners create custom barn doors, I’ve discovered that $100-250 in materials can deliver results that rival $600-1,200 designer installations when you know which design tricks work.
Cookie-cutter barn doors look cheap and dated. But these 10 creative designs solve real problems—tight spaces, style challenges, and budget constraints—while creating focal points that transform entire rooms and generate serious social media envy.
Ready to build a barn door so stunning that guests will ask for your designer’s number? These projects range from beginner-friendly weekend builds to show-off masterpieces that prove your DIY skills.


1) DIY Barn Door with Textured Wood Shims
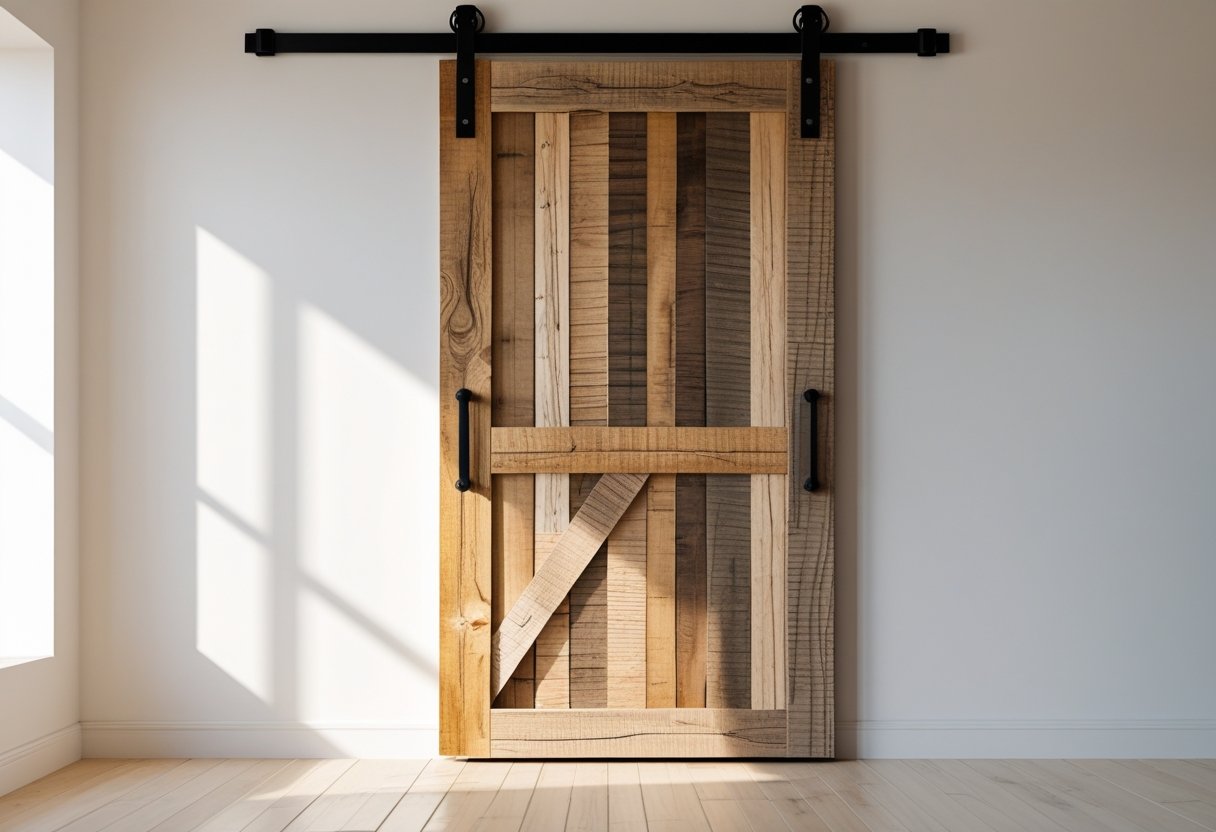
This barn door uses wood shims to create a textured, layered look. The shims are arranged in patterns that add depth without needing complex tools.
It is a cost-effective method because wood shims are affordable and easy to work with. The door can fit in both modern and rustic interiors.
This project requires basic woodworking skills and simple materials, making it a practical option for DIYers. For inspiration, see more creative barn door ideas at thehandymansdaughter.com.
2) Antique Door Repurposed as Pantry Barn Door
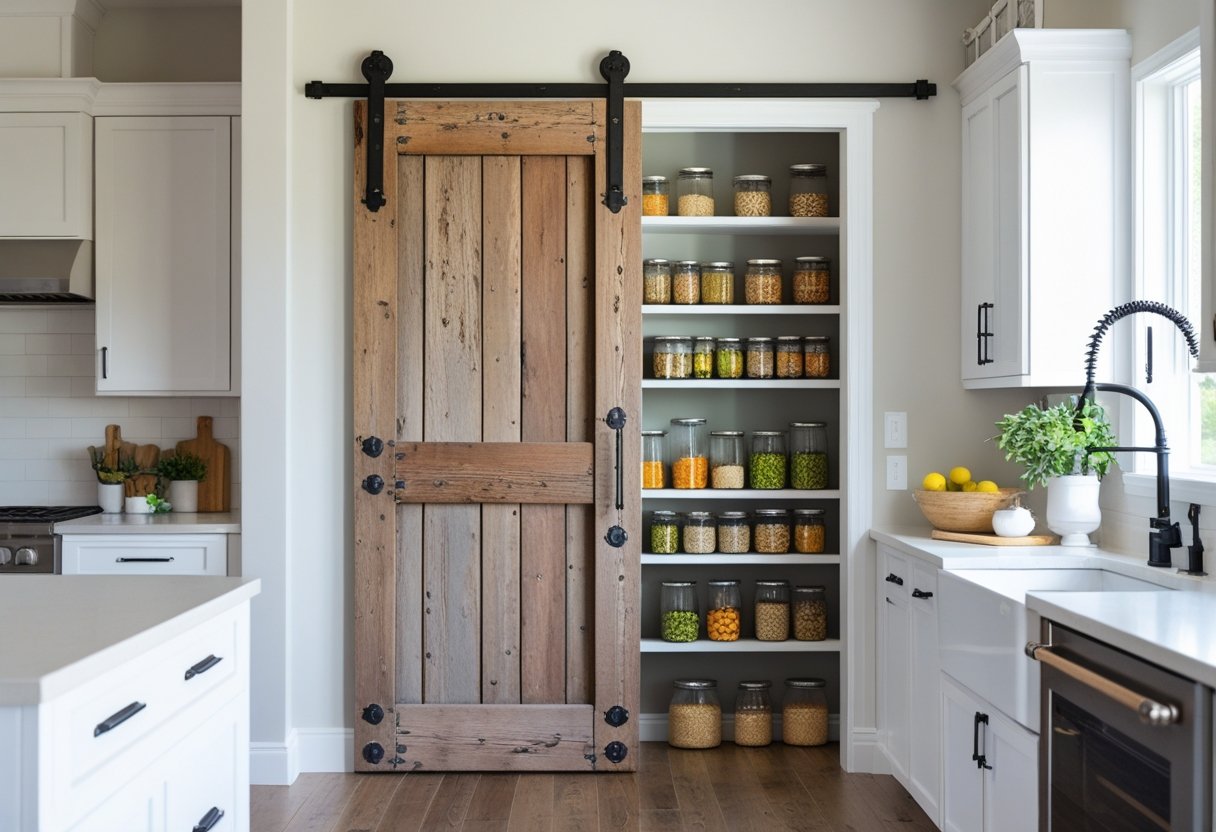
They can turn an old antique door into a stylish barn door for a pantry. The door adds a vintage look while serving a practical function.
Leaving glass panes in the door lets natural light into the pantry. This also helps to see inside without opening the door.
This DIY project blends old-world charm with modern use. It creates a unique and functional door that fits well in many kitchens. See more ideas on repurposing antique doors here.
3) Modern Slat Style Barn Door Using Plywood and 1x3s
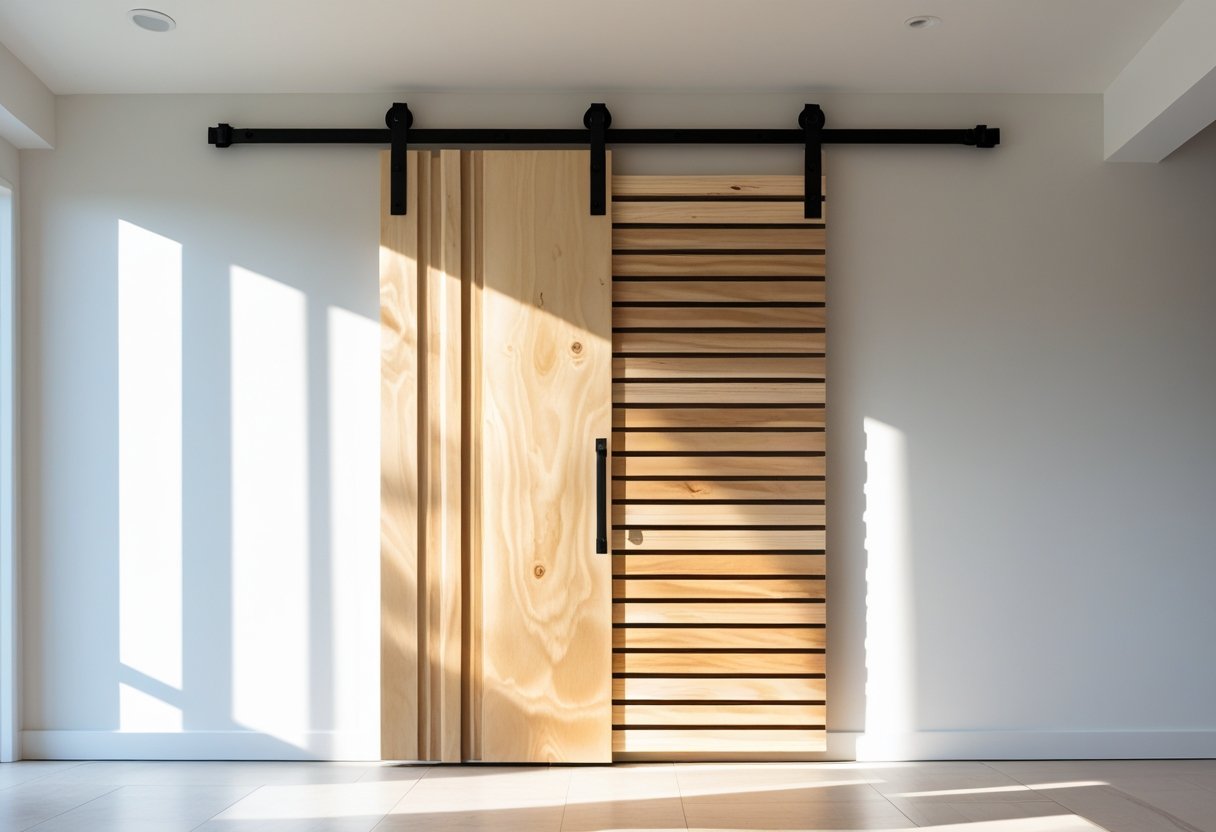
This barn door style uses plywood as the base with 1×3 wooden slats attached vertically. The slats create a clean, modern look that fits many spaces.
The materials are easy to find, and the door is simple to build with basic tools. The plywood provides stability, while the slats add visual interest.
This design works well for rooms like home offices or laundry areas. It combines function with a subtle decorative touch. Details on this method can be found at House On Longwood Lane’s modern barn door DIY.
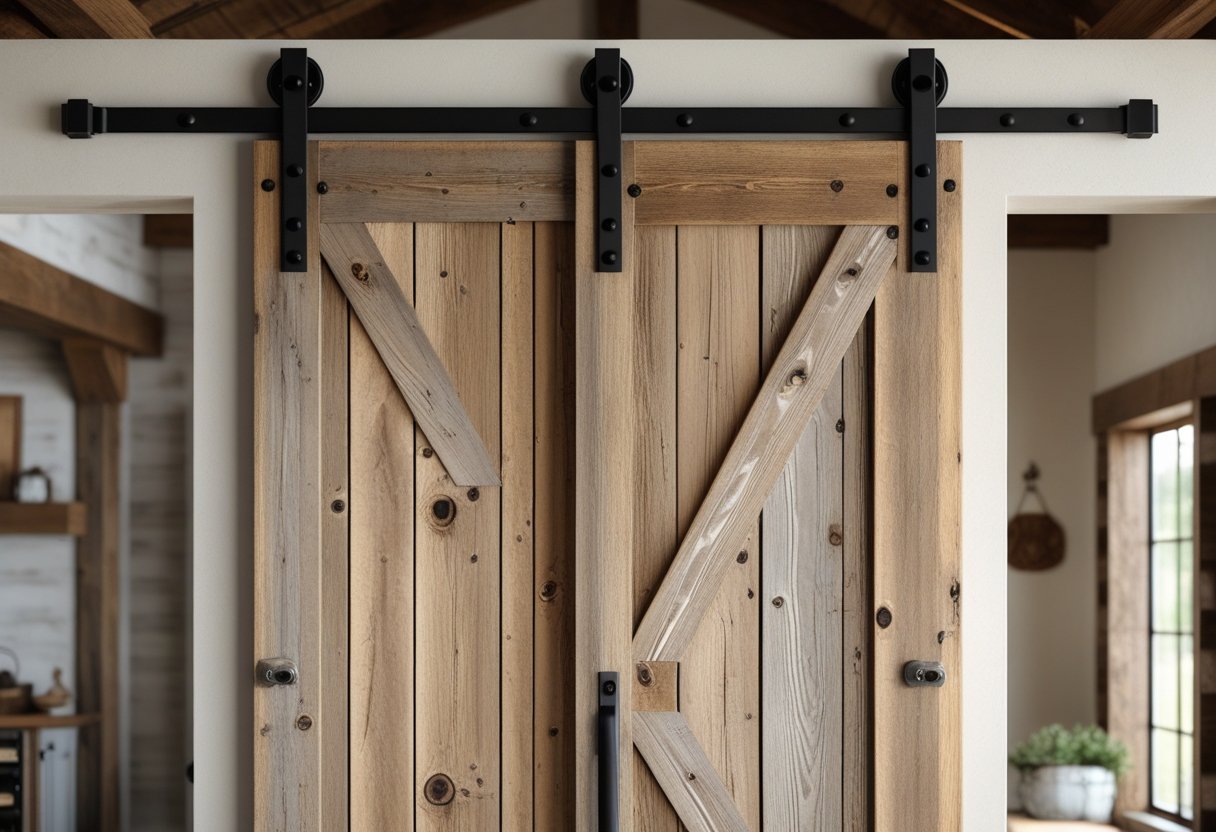
4) Z-Pattern Support Barn Door with Challenging Angle Cuts
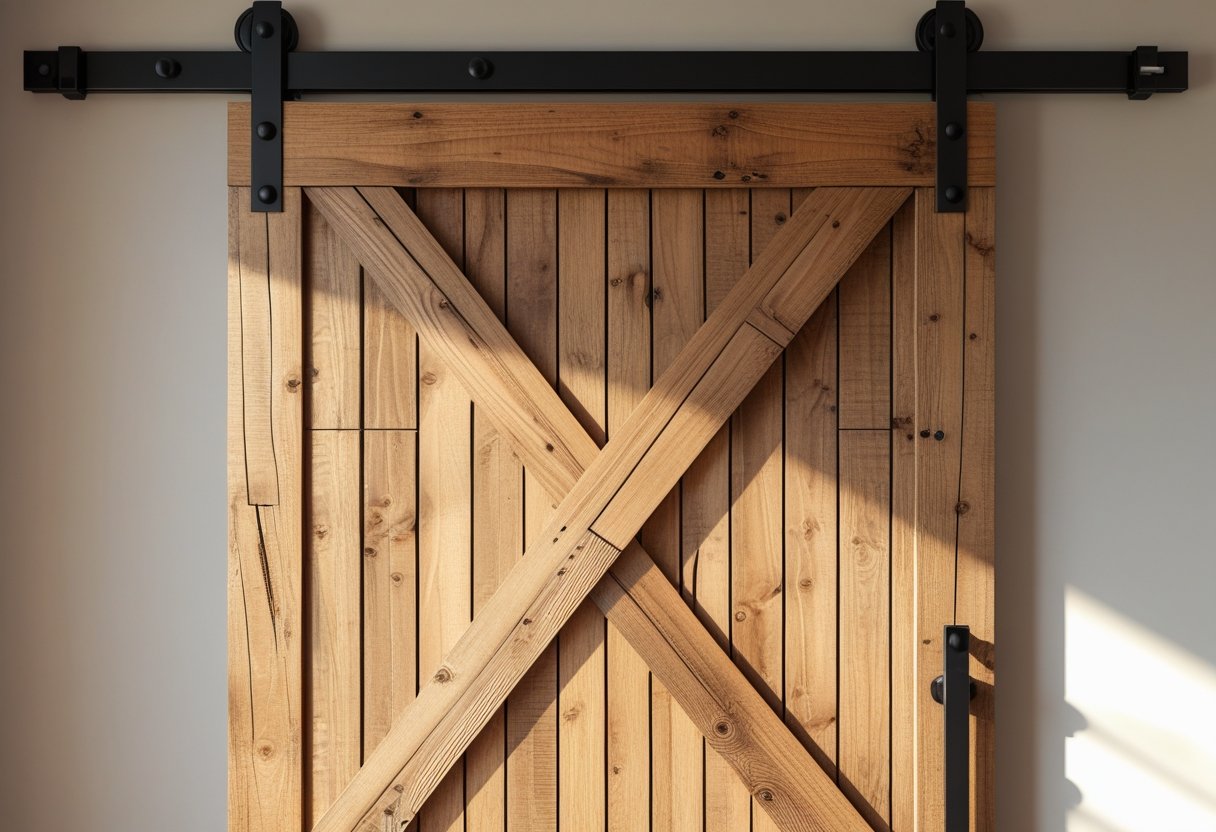
This barn door style uses a Z-shaped brace for added strength and a classic look. The center support board requires angled cuts, usually around 63 degrees, which can be tricky to get right.
Careful measuring and patience are important to ensure the brace fits perfectly. Despite the challenge, the Z-pattern adds durability and a distinctive design. More details on this method can be found in Z-brace barn door plans.
5) Geometric Patterned Barn Door for Entryways
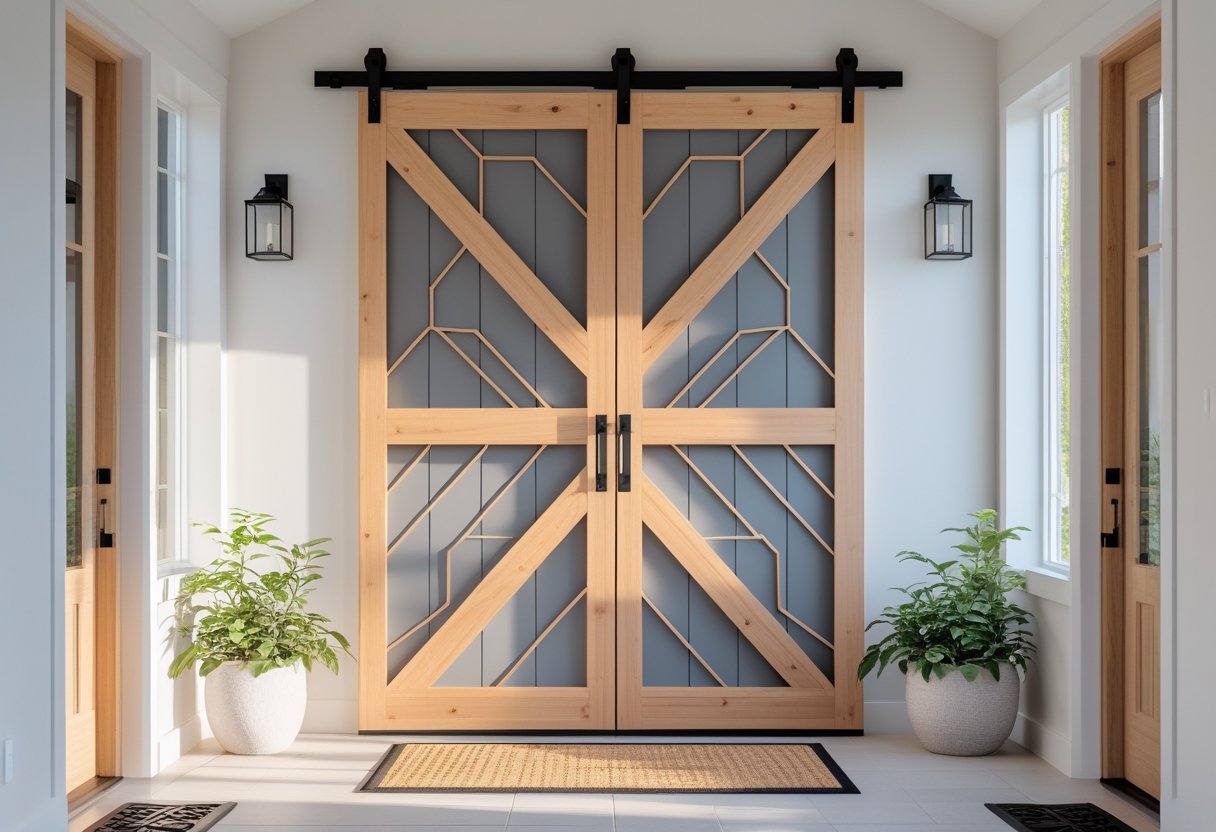
A geometric patterned barn door adds a modern look to any entryway. The design uses shapes like triangles, squares, or diamonds to create clean lines.
This style can be built by repurposing an older door or starting from new wood. It works well to make a simple space stand out without being too busy.
Building a geometric barn door is a practical project that livens up a room. Instructions and ideas can be found in detailed DIY guides like those on House On Longwood Lane.
6) Whitewashed Reclaimed Wood Barn Door Shutters
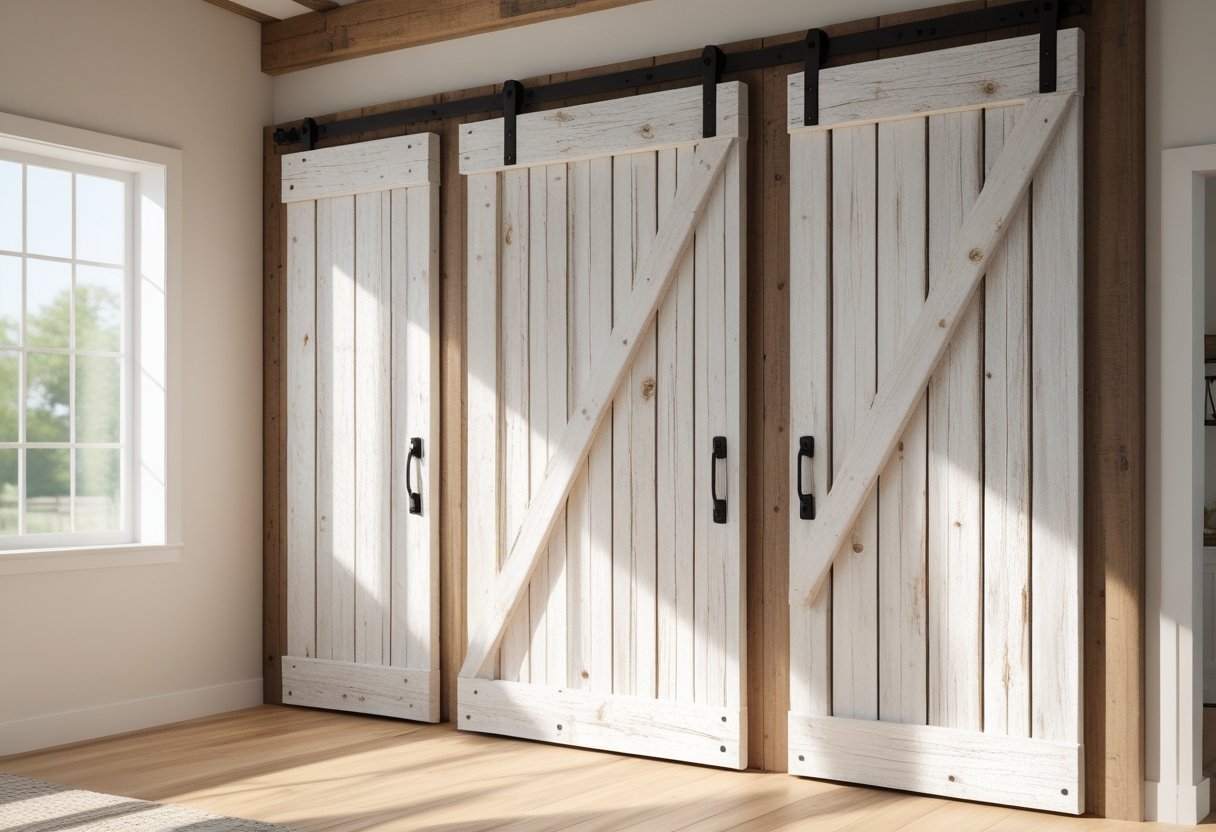
Whitewashed reclaimed wood barn door shutters offer a rustic yet fresh look. The whitewash technique lightens the wood while keeping its texture visible.
Using reclaimed wood is cost-effective and eco-friendly. It also adds character through natural imperfections.
These shutters work well indoors or outdoors. They bring charm without overwhelming a space. For a detailed guide, see how to make DIY barn door shutters from reclaimed wood.
7) Sliding Barn Door for Space-Saving Room Separation
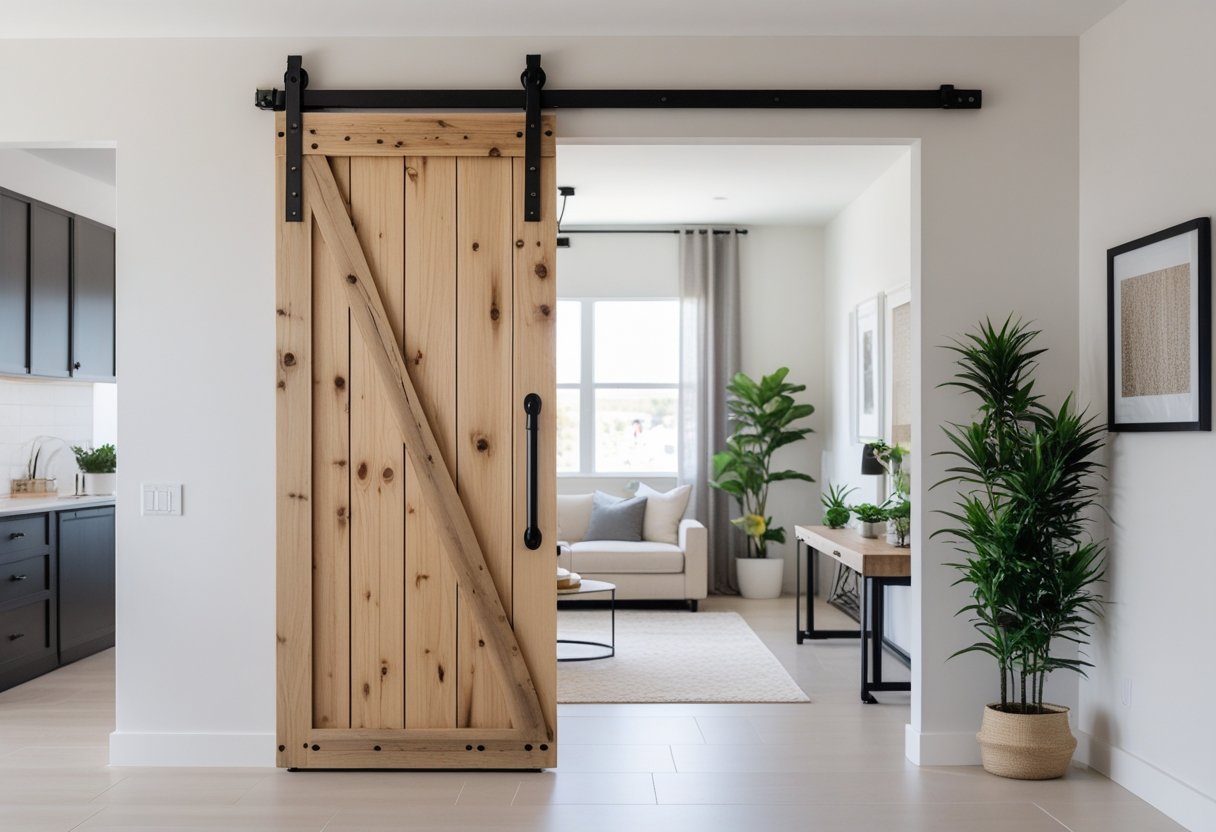
A sliding barn door is a practical way to separate rooms without taking up floor space. It slides along a track mounted above the doorway, so it doesn’t swing open like a regular door.
This design is ideal for small rooms or open spaces where saving space is important. It also adds a rustic touch while serving a clear function.
People often choose sliding barn doors to divide living areas, bedrooms, or home offices. They provide privacy without making the space feel closed off.
For more ideas on sliding barn doors, see creative options at elledecor.com.
8) Rustic Farmhouse Style Barn Door with Metal Hardware
This barn door style uses rough wood planks for a natural, aged look. The metal hardware adds a strong, industrial touch.
Choosing heavy-duty metal rollers and handles helps ensure smooth operation. It fits well in both modern and traditional farmhouse interiors.
The mix of wood and metal brings simple charm without being too fancy. For guidance on hardware options, one can explore various DIY barn door projects.
9) Mid-Century Modern Inspired Barn Door Slats

This style uses horizontal or vertical wooden slats to create a clean, simple look. The design often features natural wood tones or muted paint colors.
It fits well in rooms with mid-century decor or modern minimalist spaces. The slats add texture without being too busy.
Making these doors usually involves plywood and 1×3 boards for the slats. They can work for spaces like offices, laundry rooms, or bathrooms.
Learn more about this style at DIY Mid-Century Modern Sliding Barn Door.
10) DIY Painted Barn Door with Chalk Paint Finish
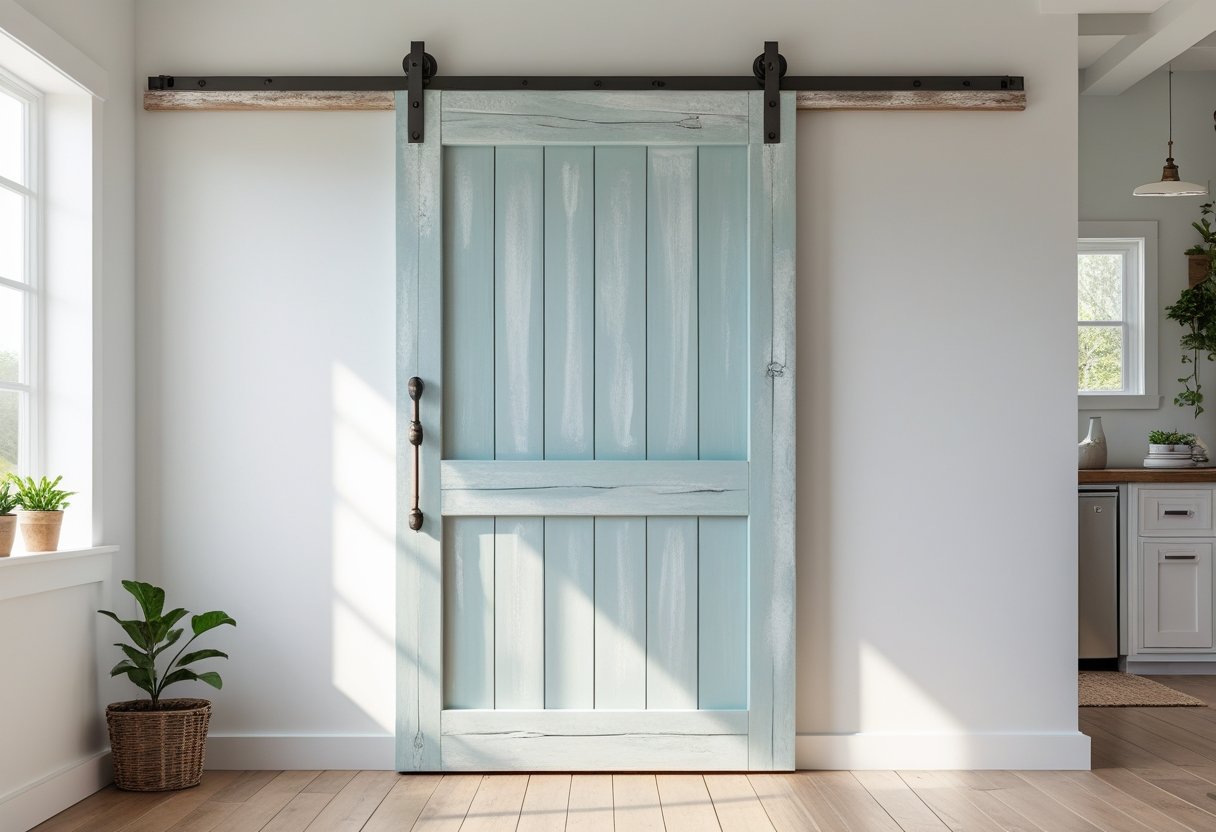
They start by sanding the door to create a smooth surface. Next, a primer is applied to help the paint stick better.
Using chalk paint gives the door a soft, matte finish that looks natural. It is best to use a brush and follow the wood grain for even coverage.
Chalk paint requires no heavy prepping and dries quickly. This method is a simple way to add charm to a barn door without much effort.
For more details, see how to chalk paint a barn door.
Choosing the Best Materials for DIY Barn Doors
Selecting the right materials is key to building a strong and attractive barn door. Wood is the most common choice because it is sturdy and easy to work with.
Popular woods include pine, cedar, and oak. Pine is affordable and lightweight, making it great for beginners. Cedar resists moisture well, which is good for doors exposed to damp areas. Oak is very durable but harder to cut and heavier.
Using reclaimed wood can add character and save money. It often has a worn look that suits barn doors well. However, reclaimed wood should be checked for cracks, nails, or insect damage before use.
Besides solid planks, plywood or shiplap boards are good options. Plywood is flat and stable, while shiplap adds texture and style. Many DIYers combine plywood with trim boards for a clean finish.
Hardware matters too. Choose quality tracks, rollers, and handles rated for the door’s weight. Cheap hardware may fail quickly, so investing in reliable kits is smarter.
Summary of material options:
| Material | Benefits | Drawbacks |
|---|---|---|
| Pine | Affordable, easy to cut | Less durable |
| Cedar | Moisture resistant | More expensive |
| Oak | Very strong | Heavy, hard to work |
| Reclaimed Wood | Unique look, eco-friendly | May have flaws |
| Plywood/Shiplap | Smooth or textured finish | Less authentic wood grain |
Choosing the best materials depends on the door’s location, style, and budget. Each option offers a mix of strength, look, and cost to fit different needs. For detailed guides on materials and plans, see 10+ DIY barn door plans and ideas.
Finishing and Maintaining Your Barn Door
After building a barn door, finishing it properly is important for durability and appearance. Most DIY barn doors benefit from sanding to smooth the wood surface before applying any finish.
Common finishes include paint, stain, or a clear sealant. Paint protects the wood and adds color. Stain highlights the natural grain and offers moderate protection. A clear sealant keeps the wood safe from moisture and wear while preserving its natural look.
Applying two to three coats of your choice finish usually gives the best protection. It’s important to let each coat dry fully before adding the next.
For maintenance, dust the barn door regularly with a soft cloth to keep it clean. Checking the hardware often helps make sure the door slides smoothly. Lubricating rollers and tracks with appropriate oils can prevent squeaking and sticking.
If the finish starts to wear down, light sanding and reapplying finish can restore the door’s look. For outdoor barn doors, inspecting for water damage or warping is necessary, especially after harsh weather.

Here is a simple table of finishing options and their benefits:
| Finish Type | Benefits | Ideal Use |
|---|---|---|
| Paint | Protects, adds color | Indoor & outdoor |
| Stain | Enhances wood grain, moderate protection | Indoor |
| Clear Sealant | Maintains natural look, moisture protection | Indoor & outdoor |
Following these steps will help keep a barn door functional and attractive for years. More tips can be found with detailed DIY barn door projects.
Frequently Asked Questions
Building a barn door requires specific tools and materials to ensure stability and style. The right track system, finishing methods, and installation steps all play a role in making a durable and attractive door. Proper care and maintenance extend the door’s life and keep it functioning smoothly.
What are the essential tools required for creating a DIY barn door?
Basic tools include a saw for cutting wood, a drill for screws, a measuring tape, a level, and clamps to hold pieces tight. Sandpaper or a sander is needed for smoothing edges. For some projects, a miter saw helps with angled cuts.
How do you select the appropriate track system for a homemade barn door?
Track systems vary by weight and door size. Heavy doors need sturdy steel tracks, while lighter doors can use aluminum ones. Consider the door’s width and clearance space. Soft-close features add smoothness but can raise costs.
Can a DIY barn door be properly insulated for energy efficiency?
Yes, insulation can be added by attaching foam board or fiberglass panels inside the door frame. Some builders add weather stripping around edges to reduce drafts. However, barn doors are not always airtight like traditional doors.
What is the best finish to protect a wood barn door from weathering?
Exterior polyurethane or spar varnish offers strong protection against moisture and sun damage. Outdoor paint also works but may hide the wood grain. For indoor doors, stains combined with a clear sealer highlight the wood’s natural look.
What are the steps involved in installing a homemade barn door?
First, install the track securely above the doorway at the proper height. Then, attach the rollers to the top of the door. Hang the door on the track, and add floor guides to prevent swinging. Adjust rollers and hardware to ensure smooth sliding.
How do you maintain and care for a barn door to ensure longevity?
Regularly check and tighten hardware screws. Clean the track and rollers to remove dust and debris. Reapply finish every few years if exposed to sun or moisture. Lubricate rollers with a silicone spray to keep sliding easy.


