Installing Energy-Efficient Windows in Your Mobile Home: Step by Step

Your mobile home’s old, drafty windows are costing you money every month through higher energy bills and poor temperature control. Installing energy-efficient windows in your mobile home can cut your heating and cooling costs by up to 25% while making your home more comfortable year-round.
This mobile home window installation guide is perfect for DIY enthusiasts, budget-conscious homeowners, and anyone looking to upgrade their mobile home’s energy efficiency without hiring expensive contractors. You don’t need professional experience – just basic tools and the willingness to follow step-by-step instructions.
We’ll walk you through the complete mobile home window replacement process, starting with how to assess your current windows and choose the right energy efficient windows for your mobile home’s unique needs. You’ll also learn the proper techniques for removing old windows safely and installing your new energy saving windows mobile home upgrade with professional-quality results. By the end, you’ll have the skills and confidence to complete this valuable DIY mobile home windows project that will pay for itself through lower energy bills.
Assess Your Mobile Home’s Current Window Situation

Identify problem areas causing energy loss
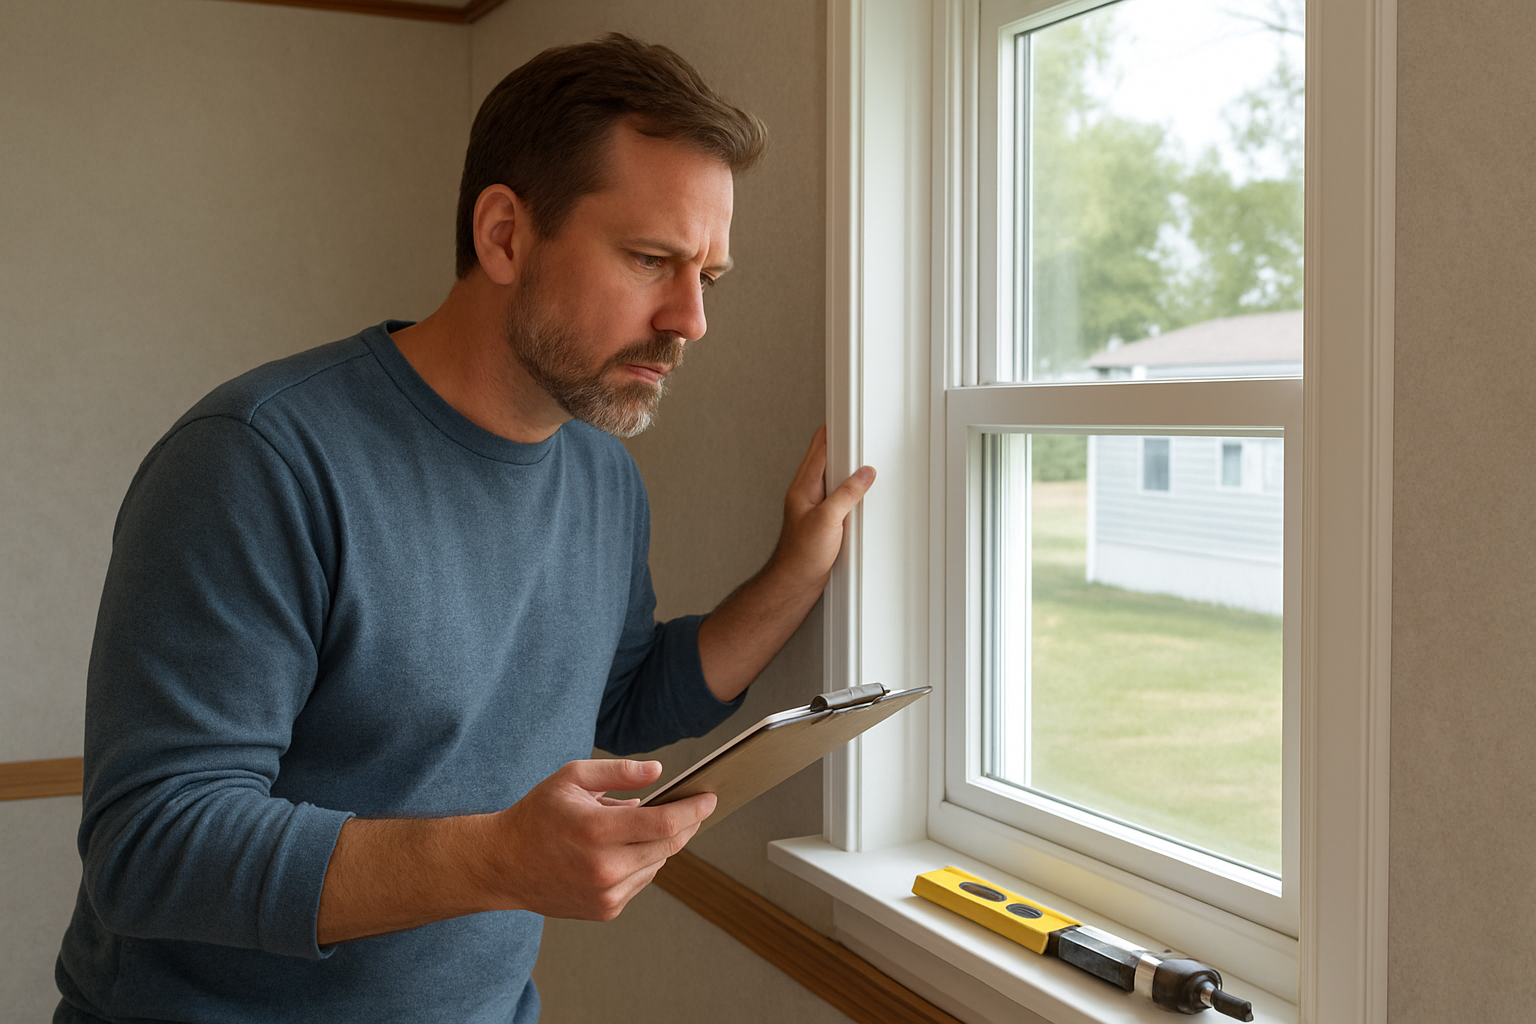
Walk around your mobile home and check each window for drafts, condensation, and visible damage. Feel for cold air leaking through gaps around frames, especially during windy days. Look for fogged glass between panes, cracked seals, or windows that won’t close properly. These issues signal where your mobile home window replacement efforts will have the biggest impact on energy efficiency.
Calculate potential savings from window replacement
Your current energy bills reveal how much you’re losing through inefficient windows. Compare your heating and cooling costs to similar-sized homes with energy efficient windows mobile home installations. Most homeowners see 15-25% reductions in energy costs after upgrading. Factor in your local utility rates and climate conditions to estimate annual savings from your mobile home window upgrade project.
Measure existing window frames and openings
Grab a measuring tape and record the width, height, and depth of each window opening from inside your home. Measure at three points for accuracy – top, middle, and bottom for width, and left, center, and right for height. Note any irregularities or structural issues around frames. These precise measurements ensure you order the correct sizes for your mobile home window installation without costly delays or returns.
Determine your budget and timeline requirements
Set a realistic budget that covers windows, tools, materials, and potential unexpected repairs. Quality energy saving windows mobile home installations range from $200-800 per window depending on size and features. Plan your DIY mobile home windows project during mild weather when you can work comfortably. Most homeowners complete one window per day, so schedule accordingly and consider tackling the project room by room.
Choose the Right Energy-Efficient Windows for Mobile Homes
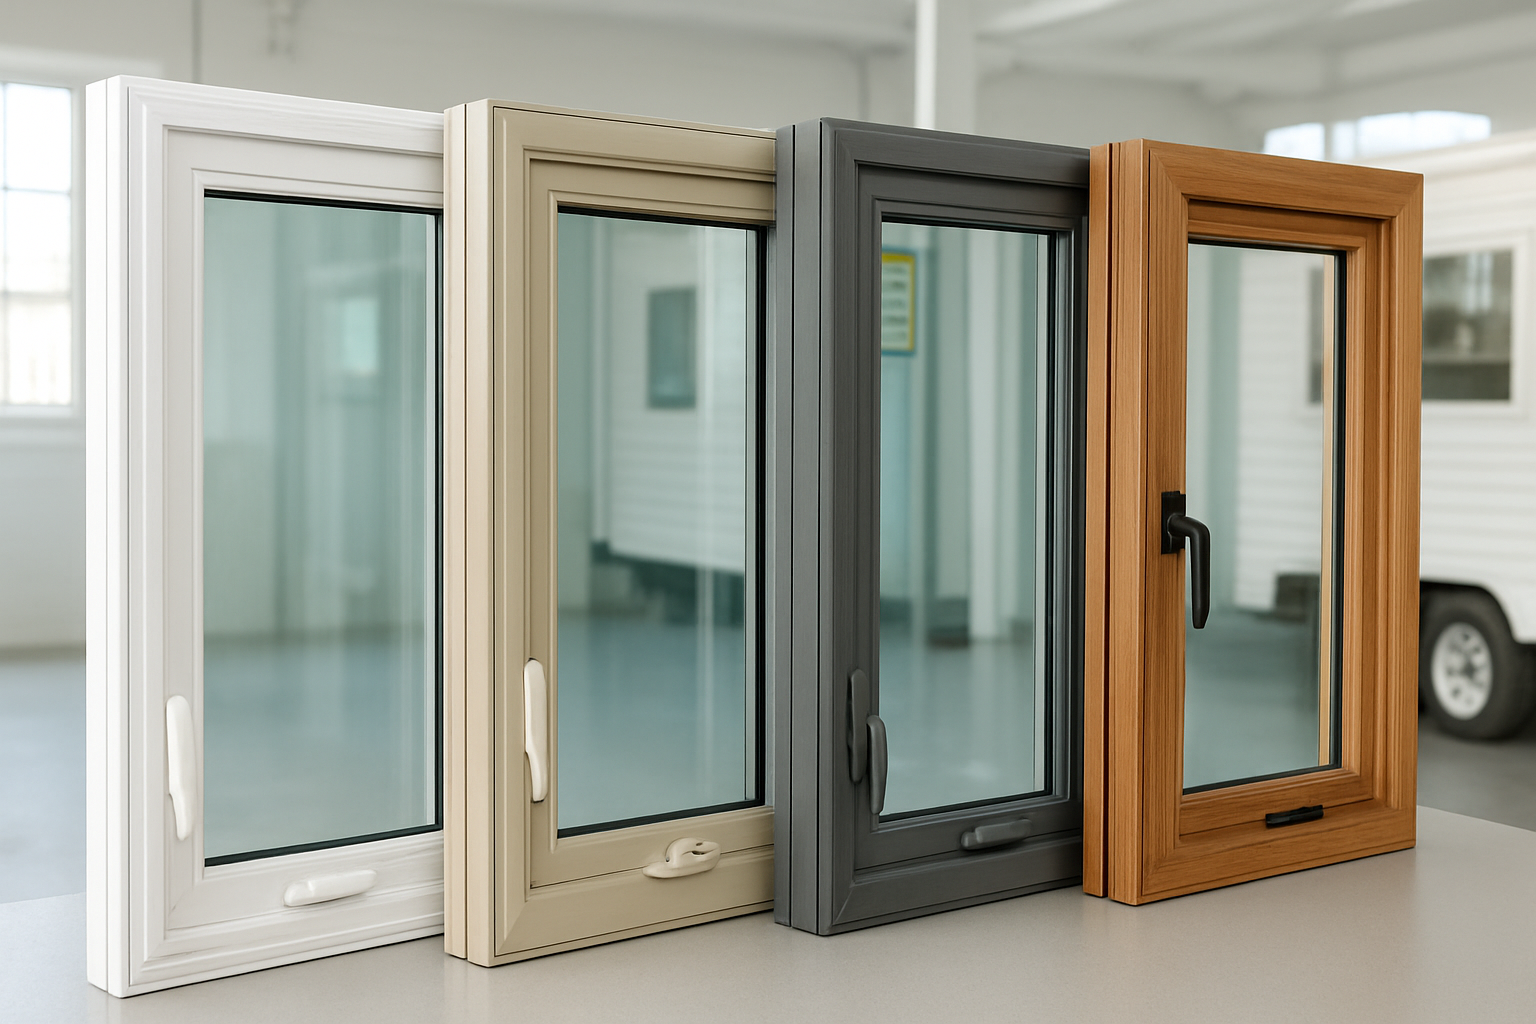
Compare double-pane versus triple-pane glass options
When selecting energy efficient windows mobile home upgrades, you’ll face the choice between double-pane and triple-pane glass. Double-pane windows offer solid insulation with two glass layers separated by gas-filled space, making them cost-effective for most mobile home window replacement projects. Triple-pane windows provide superior energy efficiency with three glass layers but cost significantly more. For mobile home energy efficiency, double-pane windows typically deliver the best value, reducing heating and cooling costs while staying within budget constraints.
Select appropriate frame materials for durability and insulation
Your frame material choice impacts both durability and energy performance in mobile home window installation. Vinyl frames offer excellent insulation properties, resist moisture damage, and require minimal maintenance – perfect for mobile homes. Aluminum frames conduct heat and cold, reducing energy efficiency despite their durability. Wood frames provide good insulation but need regular maintenance in mobile environments. Fiberglass frames combine durability with energy efficiency but cost more. For DIY mobile home windows, vinyl frames deliver the best balance of performance, affordability, and ease of installation.
Understand Energy Star ratings and U-factor measurements
Energy Star ratings help you identify the most efficient options for energy saving windows mobile home installations. Look for windows with Energy Star certification specific to your climate zone. The U-factor measures heat transfer – lower numbers mean better insulation. For mobile homes, aim for U-factors below 0.30. Solar Heat Gain Coefficient (SHGC) indicates how much solar heat passes through. In hot climates, choose lower SHGC ratings. These ratings ensure your mobile home window upgrade maximizes energy savings and comfort year-round.
Gather Essential Tools and Materials for Installation

Acquire specialized tools for window removal and installation
Your mobile home window installation project demands specific tools that differ from standard residential work. You’ll need a reciprocating saw for cutting through stubborn caulk and sealants, a pry bar set for careful frame removal, and a cordless drill with various bits for securing new windows. Get measuring tools including a level, square, and tape measure to ensure proper alignment. Don’t forget utility knives, hammers, and screwdrivers in multiple sizes.
Purchase weatherproofing and insulation materials
Quality weatherproofing materials are crucial for energy efficient windows mobile home projects. Stock up on exterior-grade caulk, specifically silicone-based sealants that flex with your mobile home’s movement. Buy foam backer rod for large gaps, weatherstripping for movable parts, and spray foam insulation for cavity filling. Purchase flashing tape and house wrap to create proper moisture barriers around your new window installations.
Secure safety equipment and protective gear
Safety gear protects you during mobile home window replacement work. Invest in safety glasses, work gloves with good grip, and sturdy work boots with ankle support. Get a first aid kit nearby and ensure you have proper ladder or scaffolding rated for your weight plus materials. Dust masks become essential when removing old windows that may contain lead paint or debris.
Remove Old Windows Safely and Efficiently
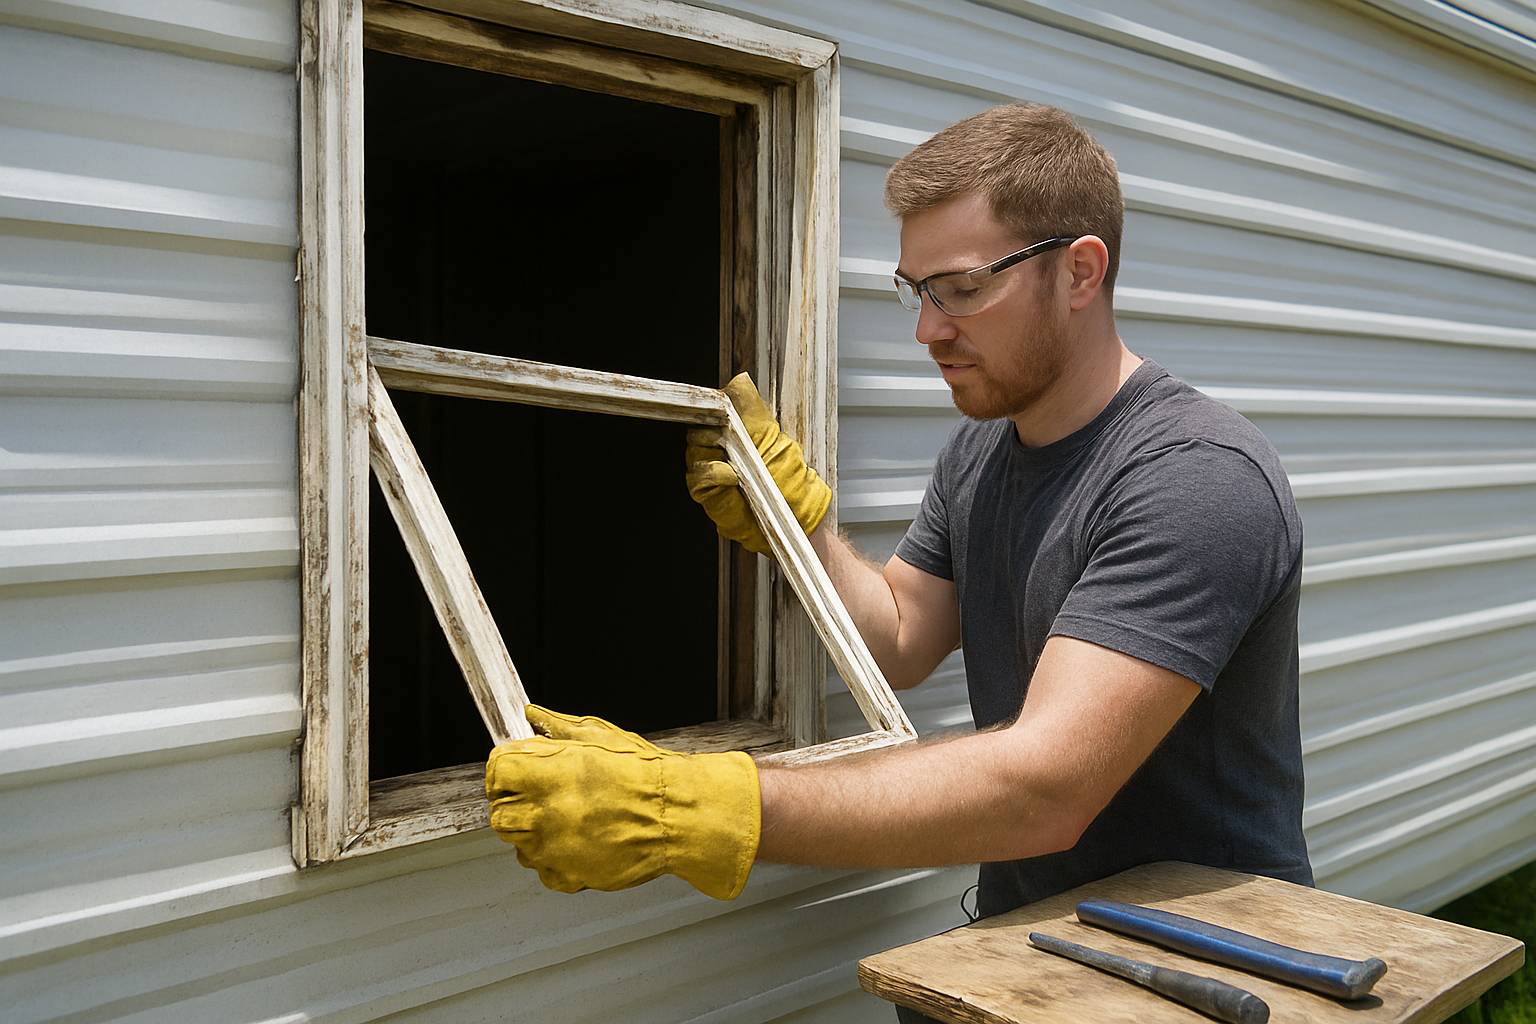
Disconnect Interior Trim and Casing Carefully
Start by removing interior window trim using a pry bar and hammer. Score paint lines with a utility knife to prevent chipping. Work slowly around each piece, inserting shims behind the pry bar to avoid wall damage. Save trim pieces if you plan to reuse them for your mobile home window replacement project.
Extract Existing Window Units Without Damaging Frames
Cut through any caulk or sealant around the window frame using a sharp knife. Remove screws or nails securing the window to the frame. For older mobile home windows, you may need to break the seal carefully. Have a helper ready to support the weight as you lift out the unit. This prevents frame damage that could complicate your energy efficient windows mobile home installation.
Clean and Inspect Window Openings for Repairs
Once the old window is out, vacuum debris from the opening and wipe surfaces clean. Check for rot, water damage, or structural issues that need fixing before installing windows mobile home style. Look for gaps or cracks that could affect your new window’s performance. Repair any damage with wood filler or replacement lumber. This preparation ensures your DIY mobile home windows project delivers maximum energy efficiency and longevity.
Prepare Window Openings for New Installation
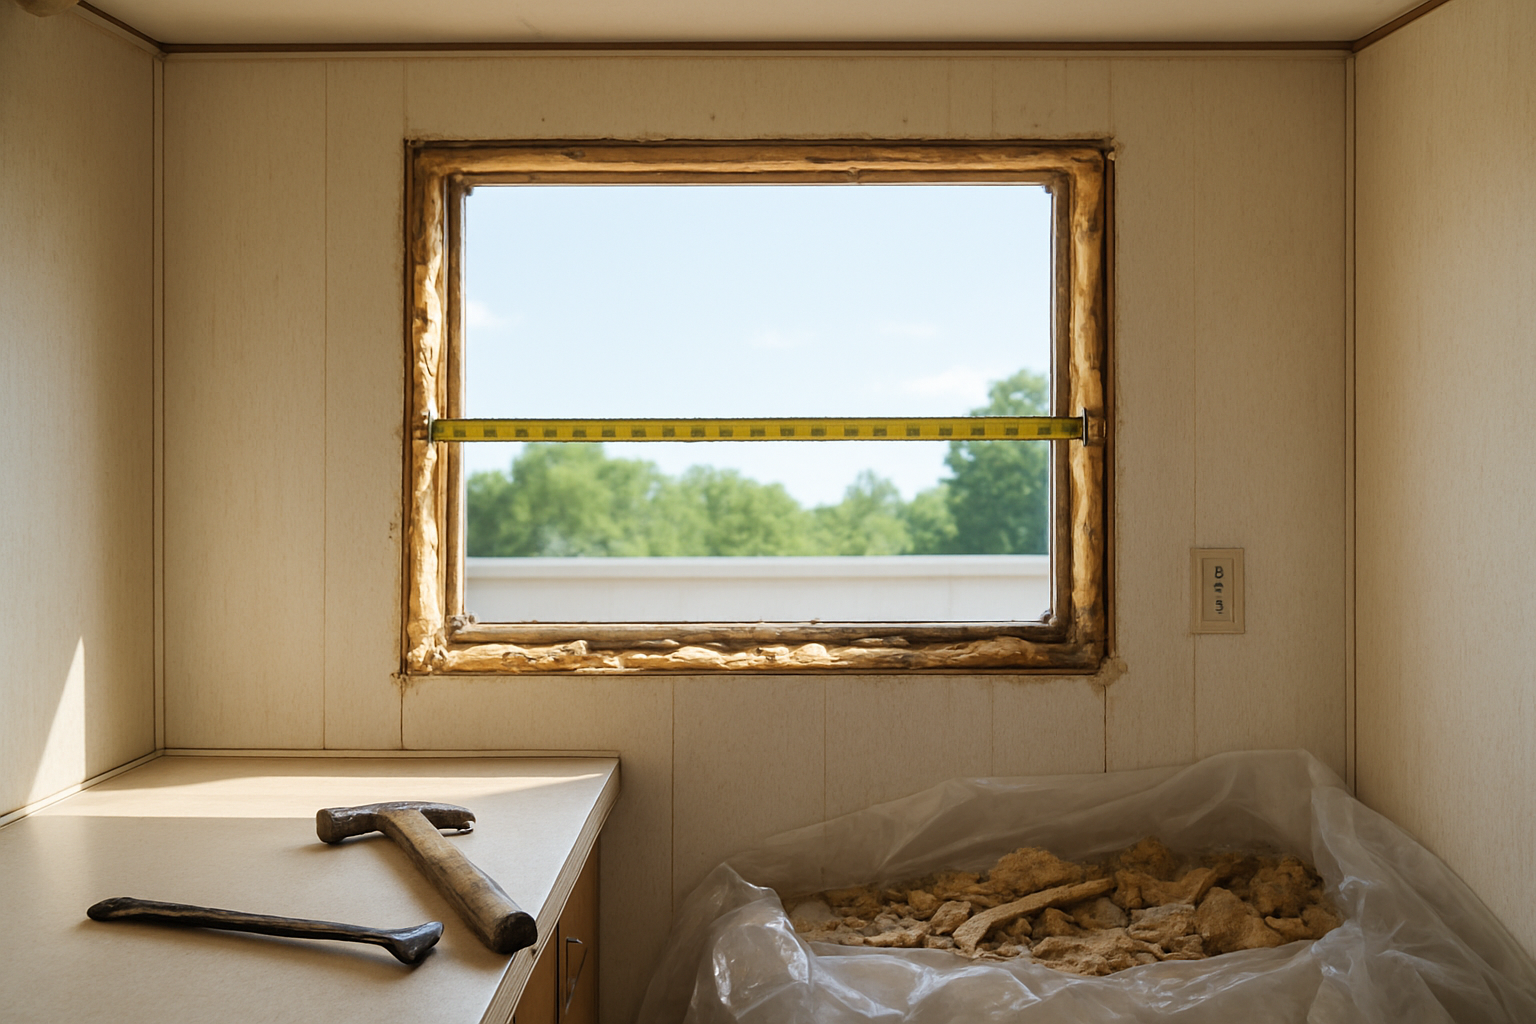
Level and square rough openings for proper fit
Before installing your new energy-efficient windows in your mobile home, grab your level and square to check the rough opening dimensions. Mobile home frames can shift over time, creating uneven openings that prevent proper window seating. Use wooden shims to adjust any gaps and create perfectly level sills and plumb sides for your mobile home window installation.
Apply weatherproof barrier and insulation materials
Wrap the rough opening with a high-quality house wrap or weatherproof membrane, extending it at least 6 inches beyond each side of the opening. This barrier protects your mobile home from moisture infiltration and air leaks. Fill any gaps around the opening with expanding foam insulation, being careful not to over-expand and bow the frame. This step is crucial for maximizing your energy efficient windows mobile home performance.
Install flashing to prevent water infiltration
Cut and install head flashing above the window opening, ensuring it extends under the house wrap and overlaps the sides by at least 2 inches. Apply sill flashing at the bottom, angled slightly outward to direct water away from your mobile home. Use butyl tape or compatible sealant at all flashing joints to create watertight seals that protect your mobile home window replacement investment from costly water damage.
Check measurements one final time before installation
Double-check your window opening measurements against your new window specifications one last time. Measure the width at the top, middle, and bottom of the opening, then check the height on both sides and center. Your opening should be approximately 1/2 inch wider and taller than your window frame to allow for proper shimming and adjustment during your DIY mobile home windows project.
Install Your New Energy-Efficient Windows
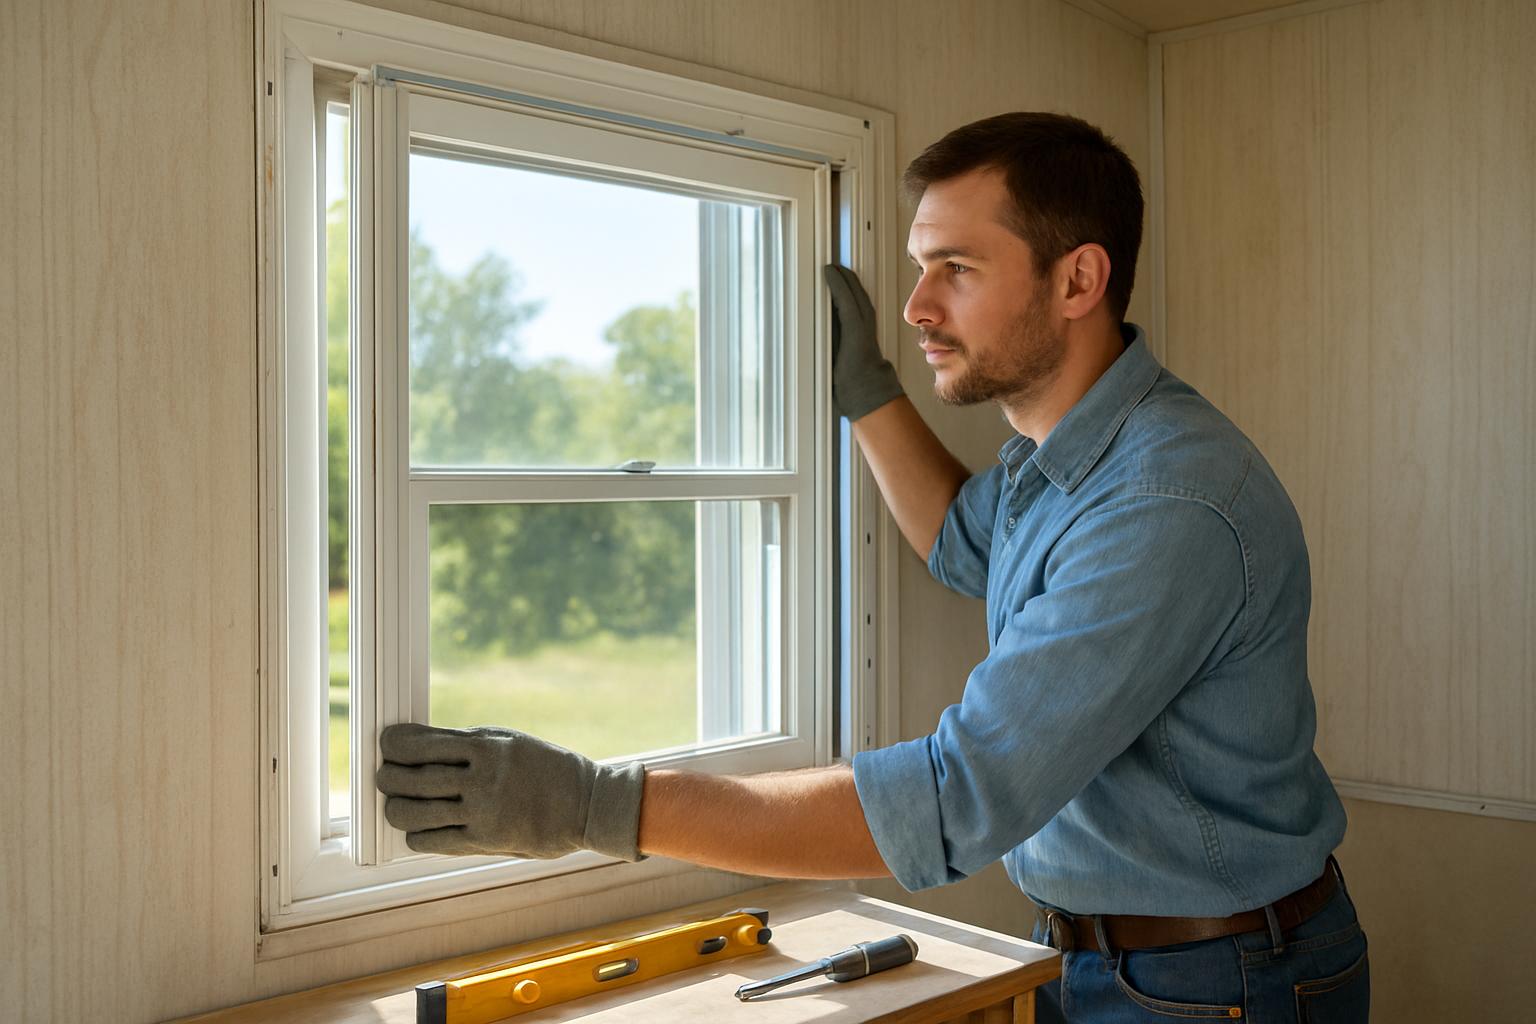
Position and secure window units in openings
Carefully lift your new energy-efficient windows into the prepared openings, ensuring they sit flush against the exterior flange. Use shims to level and plumb each unit before securing with screws through the mounting holes. Check that the window sits square in the opening and maintains proper spacing on all sides.
Ensure proper alignment and seal all gaps
Double-check that your mobile home window installation maintains consistent gaps around the perimeter – typically 1/4 to 1/2 inch. Apply weatherstripping along the interior stops and use high-quality caulk to seal any remaining gaps between the window frame and opening. This step is crucial for maximizing your energy efficient windows mobile home performance and preventing air leaks.
Test window operation and adjustment mechanisms
Open and close each window several times to verify smooth operation of sashes, locks, and any adjustment mechanisms. Check that the window seals properly when closed and that all hardware functions correctly. Make any necessary adjustments to ensure your mobile home window replacement operates flawlessly and provides optimal energy savings for years to come.
Complete Finishing Touches and Quality Checks
Install Interior and Exterior Trim for Professional Appearance
Your mobile home window installation reaches its final stages with proper trim installation. Cut interior trim pieces to fit snugly around each window frame, ensuring clean 45-degree miter joints at corners. Secure trim with finishing nails, countersinking heads slightly below the surface. For exterior trim, use weather-resistant materials and apply exterior-grade wood glue before nailing. This step transforms your energy efficient windows mobile home project from functional to professionally finished, eliminating gaps that could compromise your mobile home energy efficiency efforts.
Apply Final Caulking and Weatherstripping
Grab your high-quality exterior caulk and seal any remaining gaps between the window frame and your mobile home’s siding. Run a continuous bead along all exterior joints, smoothing with your finger for a clean finish. Inside, apply weatherstripping around the window sash to prevent air infiltration. Check all corners and connection points where different materials meet. This critical step ensures your mobile home window replacement delivers maximum energy savings by creating an airtight seal that keeps conditioned air inside where it belongs.
Conduct Thorough Inspection for Air Leaks and Proper Function
Test each window’s operation by opening and closing it multiple times to verify smooth movement. Hold a lit candle or incense stick around all window edges on a windy day to detect air leaks – any flickering indicates problem areas requiring additional sealing. Check that locks engage properly and weatherstripping makes full contact when windows close. Inspect both interior and exterior caulk lines for any gaps or voids. Your mobile home window installation guide success depends on this thorough quality check to guarantee optimal performance.
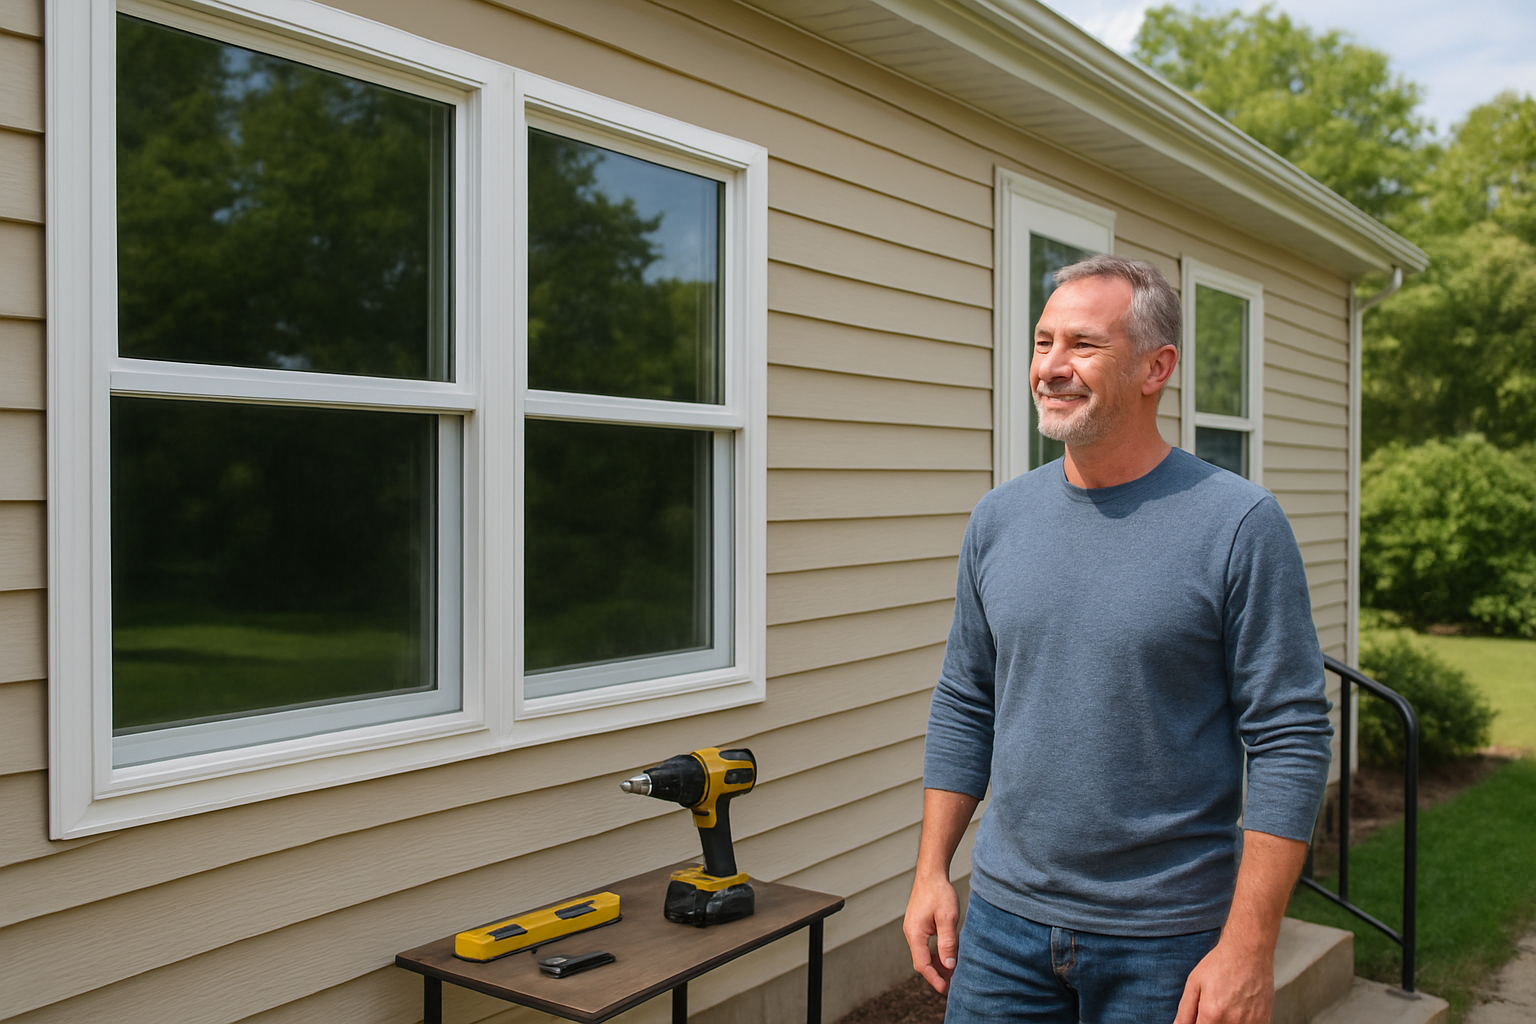
Clean New Windows and Remove Installation Debris
Remove all protective films from glass surfaces and wipe down frames with appropriate cleaners. Vacuum debris from window tracks and sills, ensuring smooth operation. Clean glass with streak-free window cleaner for crystal-clear visibility. Dispose of old windows, packaging materials, and construction waste responsibly. Pack away your tools and sweep the work area thoroughly. Your DIY mobile home windows project concludes with a spotless installation that showcases your new energy saving windows mobile home upgrade while maintaining your property’s curb appeal and functionality.
Upgrading your mobile home with energy-efficient windows isn’t just about saving money on utility bills – it’s about creating a more comfortable living space year-round. By following the step-by-step process from assessment to final quality checks, you’ll transform your home’s energy performance while boosting its value. The careful removal of old windows, proper preparation of openings, and precise installation of new units will pay dividends for years to come.
Now that you know the complete process, it’s time to take action. Start by assessing your current windows and researching the best energy-efficient options for your specific mobile home model. Remember, this project requires patience and attention to detail, but the improved comfort and lower energy costs make every step worthwhile. Your future self will thank you every time you receive a reduced heating or cooling bill.


