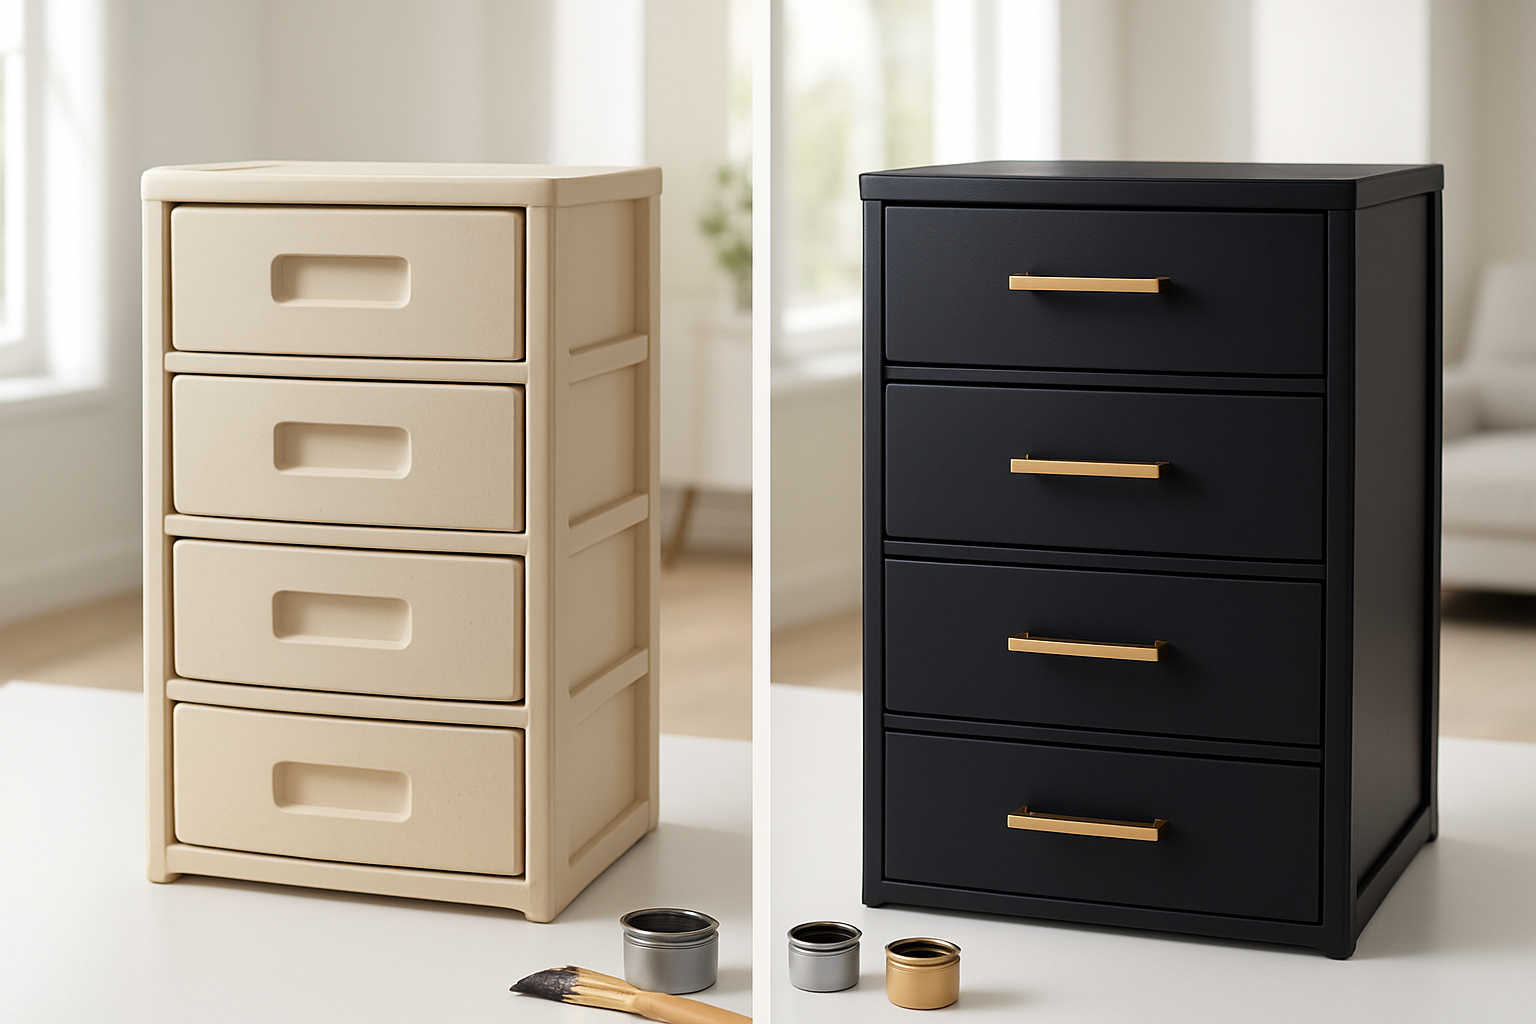
This $5 Trick Transforms Ugly Plastic Drawers Into Designer Storage (Before & After Photos Will Shock You!)

Tired of staring at those ugly plastic drawers that scream “cheap dorm room”? You can turn them into stunning designer storage that looks like it came from an expensive boutique – and it only costs about $5. This plastic drawer makeover works for anyone dealing with basic plastic storage bins, whether you’re a college student, renter, or homeowner who wants cheap storage solutions that don’t look cheap.
This DIY plastic storage transformation guide is perfect for you if you want to upgrade your space without breaking the bank. You’ll discover how to paint plastic drawers using techniques that actually stick and look professional, plus learn which budget home decor materials make the biggest impact.
We’ll cover how to prep your plastic surfaces so the paint won’t chip or peel, which spray paint plastic storage methods create that smooth, expensive finish, and how simple hardware swaps can make your drawer organization ideas look custom-built. Get ready for a plastic furniture makeover that will have everyone asking where you bought your “designer” storage.


Assess Your Plastic Drawers for Maximum Transformation Potential
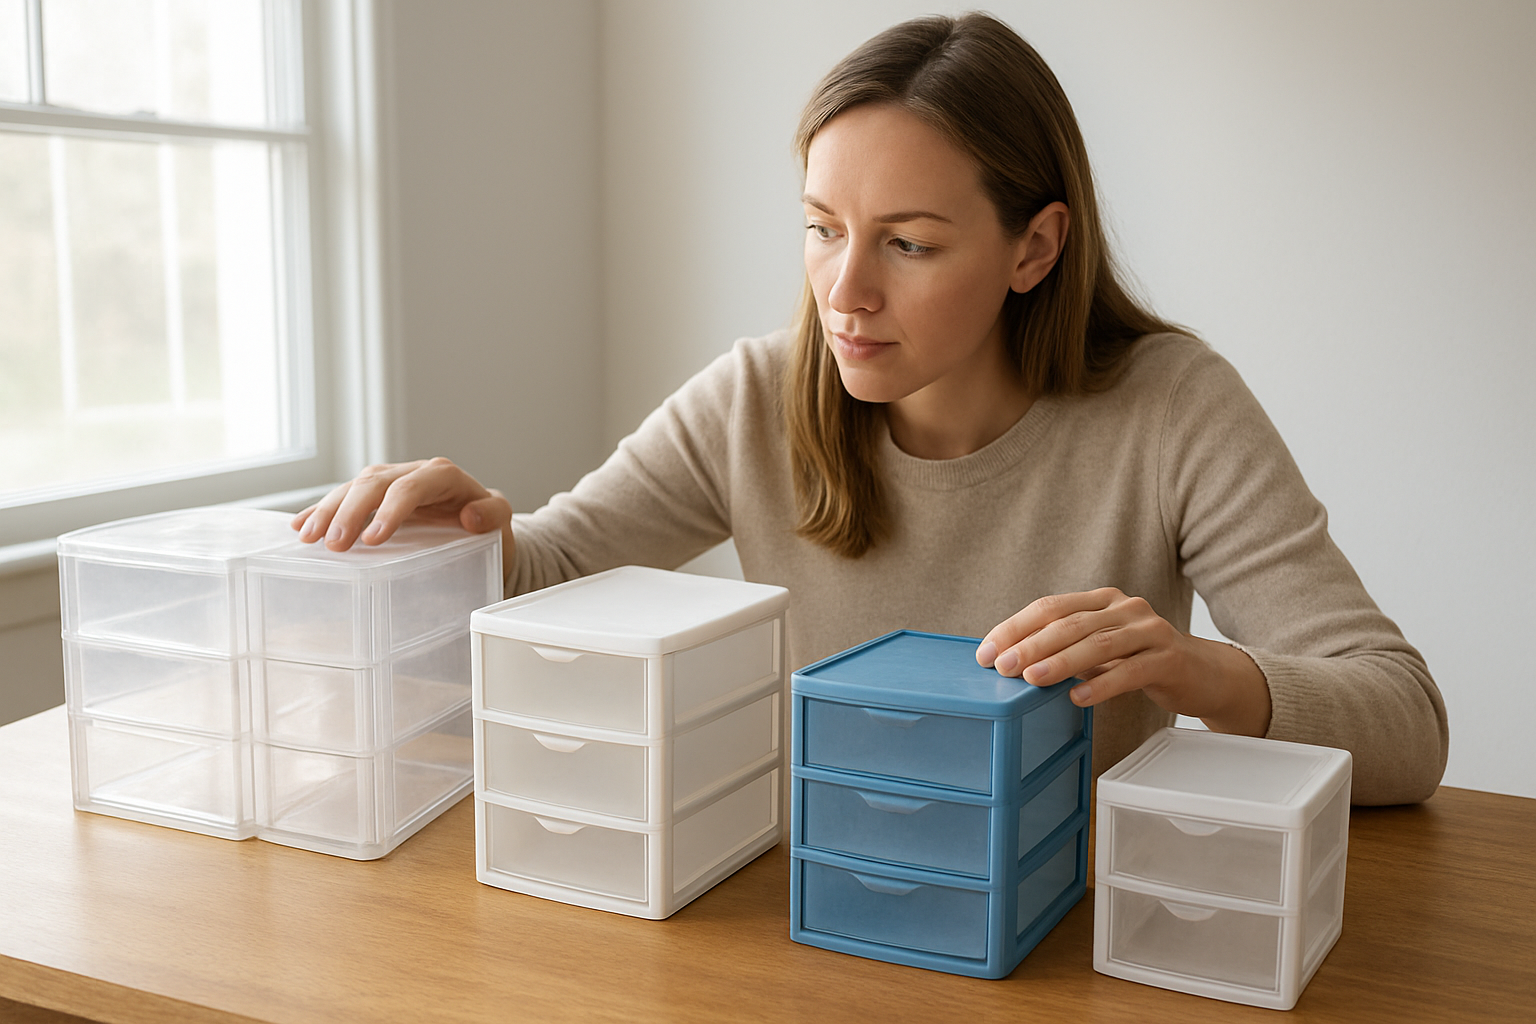
Identify the drawer material and surface texture
Before starting your plastic drawer makeover, you need to know what type of plastic you’re working with. Check if your drawers are made from smooth polypropylene, textured polyethylene, or rigid polystyrene – each requires different prep techniques. Run your hand across the surface to feel for ridges, bumps, or glossy finishes that will affect paint adhesion.
Determine structural integrity and repair needs
Examine your drawers for cracks, loose corners, or wobbly joints that could compromise your DIY plastic storage transformation. Press gently on all sides to test stability and look for stress marks around handles or mounting points. Small cracks can be repaired with plastic adhesive, but severely damaged drawers won’t hold up to the makeover process and daily use.
Measure dimensions for accurate material planning
Grab a tape measure and record the exact height, width, and depth of each drawer, including any protruding handles or decorative elements. Don’t forget to measure the drawer fronts separately if they’re removable. Write down these measurements to calculate how much primer, paint, and hardware you’ll need for your budget home decor project – accurate planning prevents costly material shortages mid-project.
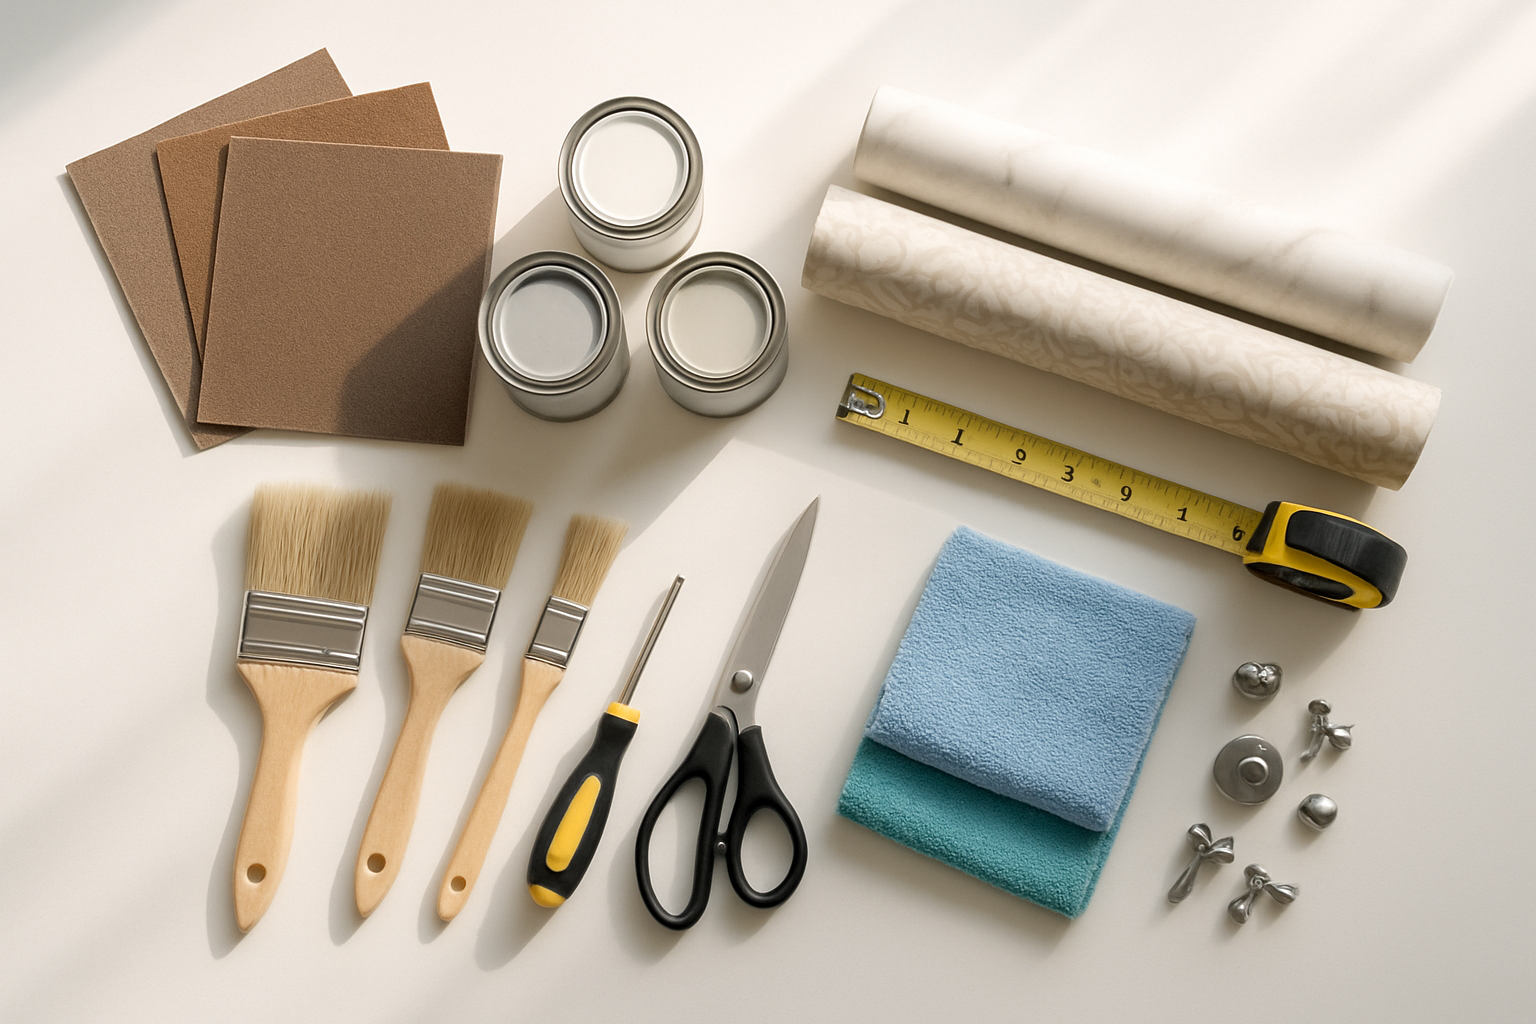
Gather Essential Makeover Tools and Materials
Select appropriate cleaning supplies for plastic surfaces
Your plastic drawer makeover success starts with proper cleaning supplies that cut through years of grime and sticky residue. Grab degreasing dish soap, rubbing alcohol, and microfiber cloths to remove every trace of dirt that could prevent paint adhesion. Don’t skip the TSP substitute cleaner for stubborn buildup – it’s your secret weapon for creating the perfect surface for your DIY plastic storage transformation.
Choose the right primer for plastic adhesion
Plastic primer is non-negotiable for your cheap storage solutions makeover. You need a specialized plastic-bonding primer like Bullseye 1-2-3 or Kilz Adhesion Primer that chemically bonds to smooth surfaces. Skip regular wall primer – it’ll peel off your drawers within weeks. Look for primers labeled specifically for plastic, vinyl, or glossy surfaces to ensure your paint plastic drawers project delivers professional results that last.
Pick durable paints and finishes for long-lasting results
Your paint choice makes or break this plastic furniture makeover. Acrylic latex paint with built-in primer works beautifully over proper primer, while spray paint plastic storage options like Krylon Fusion or Rust-Oleum Universal deliver smooth, professional finishes. Choose semi-gloss or satin sheens for easy cleaning and durability. Stock up on foam brushes, high-quality synthetic brushes, and drop cloths to protect your workspace during this budget home decor transformation.
Collect decorative elements and hardware upgrades
Transform ordinary drawers into designer pieces with strategic hardware upgrades and decorative touches. Hunt for stylish knobs and pulls at discount stores, thrift shops, or online retailers – even basic options look expensive with the right finish. Consider contact paper for drawer interiors, decorative stencils for patterns, or metallic leaf for luxury touches. Your upgrade plastic drawers project becomes truly spectacular when you add these finishing elements that cost just dollars but deliver magazine-worthy results.
Prepare Plastic Surfaces for Professional-Quality Results
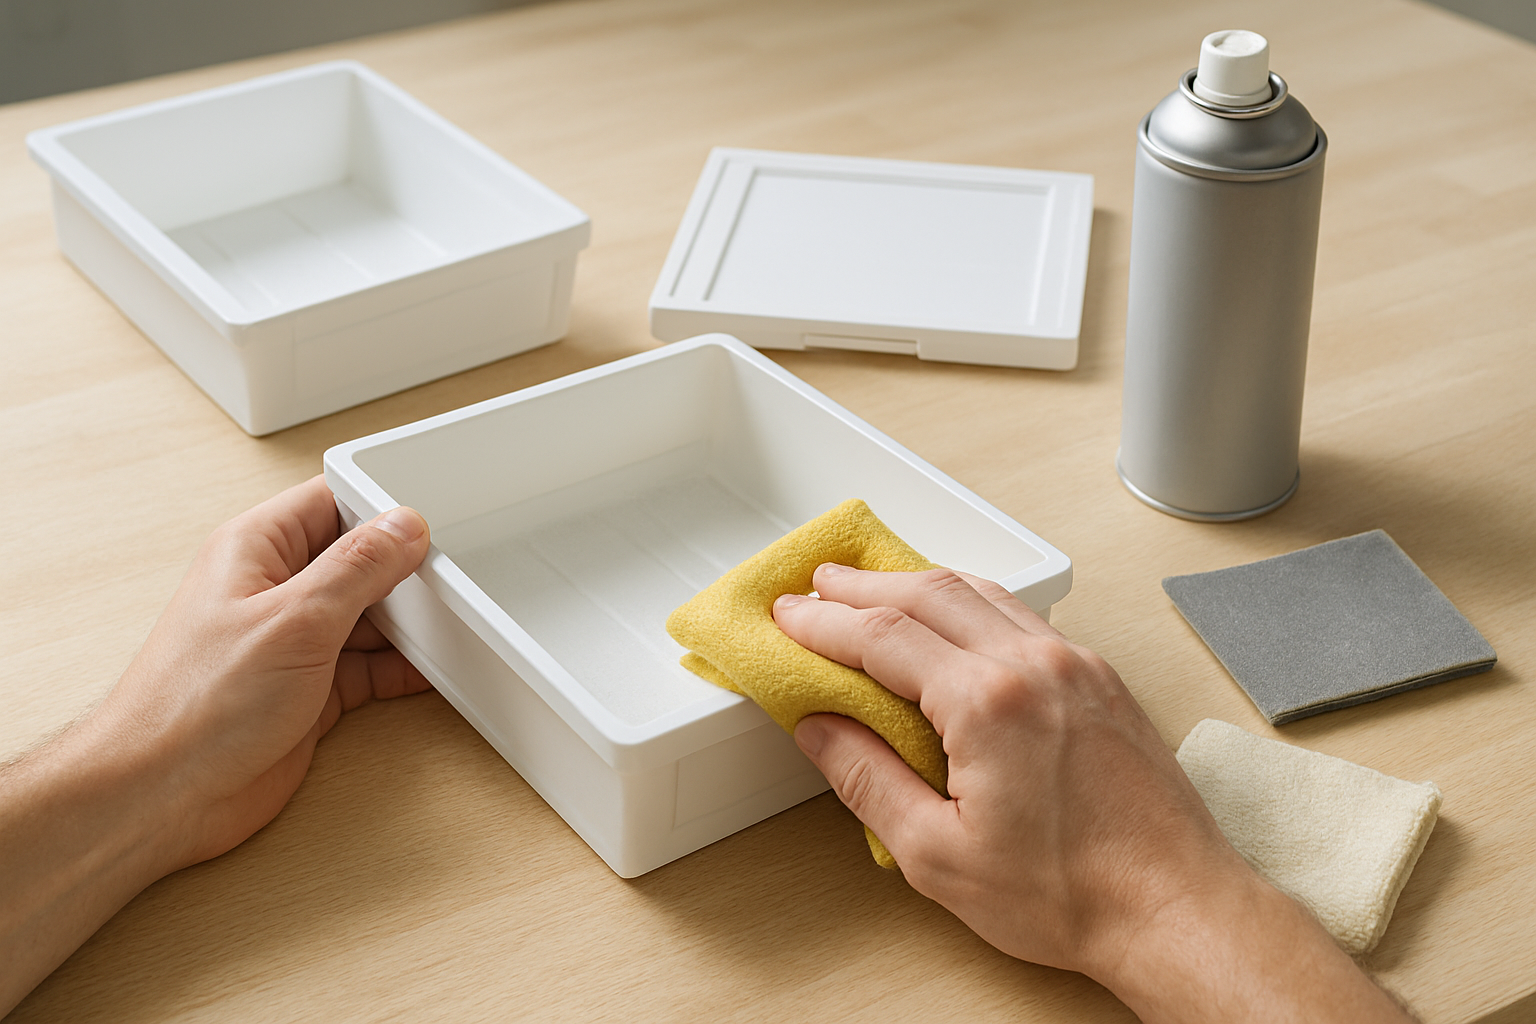
Deep clean to remove grease and residue buildup
Start your plastic drawer makeover by thoroughly cleaning every surface with degreasing dish soap and warm water. Scrub away years of accumulated grime, fingerprints, and sticky residue that prevent paint from bonding properly. Pay special attention to handles and corners where buildup typically hides.
Sand lightly to create paint-friendly texture
Once completely dry, lightly sand all surfaces with 220-grit sandpaper to create microscopic grooves that help paint grip the smooth plastic. You don’t need to sand aggressively—just scuff the surface enough to remove the glossy finish. Wipe away dust with a tack cloth before moving forward.
Apply specialized plastic primer for superior adhesion
Your plastic drawer transformation depends entirely on using plastic-specific primer designed to bond with non-porous surfaces. Apply thin, even coats following manufacturer instructions, allowing complete drying time between applications. This crucial step ensures your paint job won’t chip, peel, or scratch off during daily use.
Transform with Paint Techniques That Actually Work on Plastic
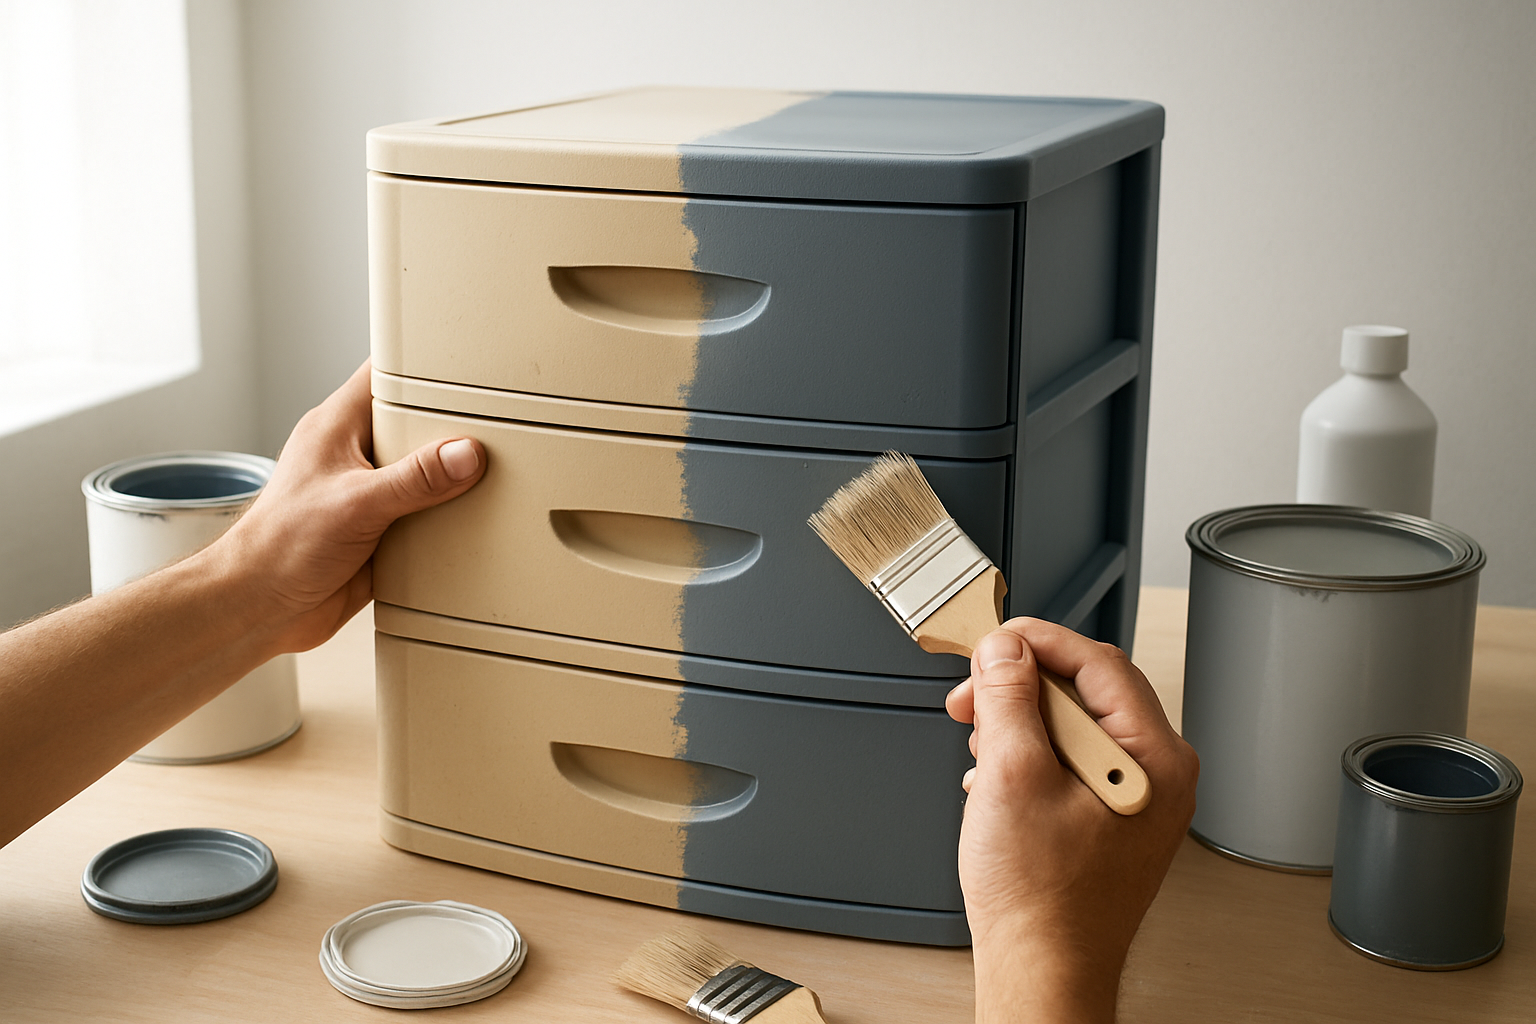
Apply Base Coat Using Proper Brush and Roller Methods
Start your plastic drawer makeover by applying a high-quality primer designed specifically for plastic surfaces. Use a foam roller for smooth, even coverage on flat areas, then switch to a synthetic bristle brush for detailed edges and corners. Work in thin, consistent layers to avoid drips and ensure proper adhesion. Allow each coat to dry completely before proceeding to decorative techniques.
Add Decorative Painting Techniques for Visual Interest
Transform your plain plastic drawers into eye-catching storage pieces with simple decorative techniques. Try color blocking with painter’s tape for clean geometric patterns, or use a sea sponge to create subtle texture. Stenciling adds professional-looking designs without requiring artistic skills. You can also experiment with ombré effects by blending two complementary colors while the paint is still wet for a modern gradient look.
Create Faux Finishes for Expensive-Looking Results
Achieve high-end appearances with budget-friendly faux finishing techniques. Create a marble effect using feathering brushes and multiple paint colors, or try a wood grain look with combing tools dragged through wet paint. Metallic finishes using bronze or copper spray paint give your plastic storage an upscale industrial vibe. These DIY plastic storage transformation techniques make cheap drawers look like designer pieces.
Seal With Protective Topcoat for Durability
Protect your paint plastic drawers investment with a quality protective topcoat. Choose a polyurethane or acrylic sealer that’s compatible with your base paint. Apply two thin coats using long, smooth strokes, allowing proper drying time between applications. This final step ensures your plastic drawer before and after transformation stays beautiful for years, even with daily use and handling.
Upgrade Hardware and Add Stylish Finishing Touches
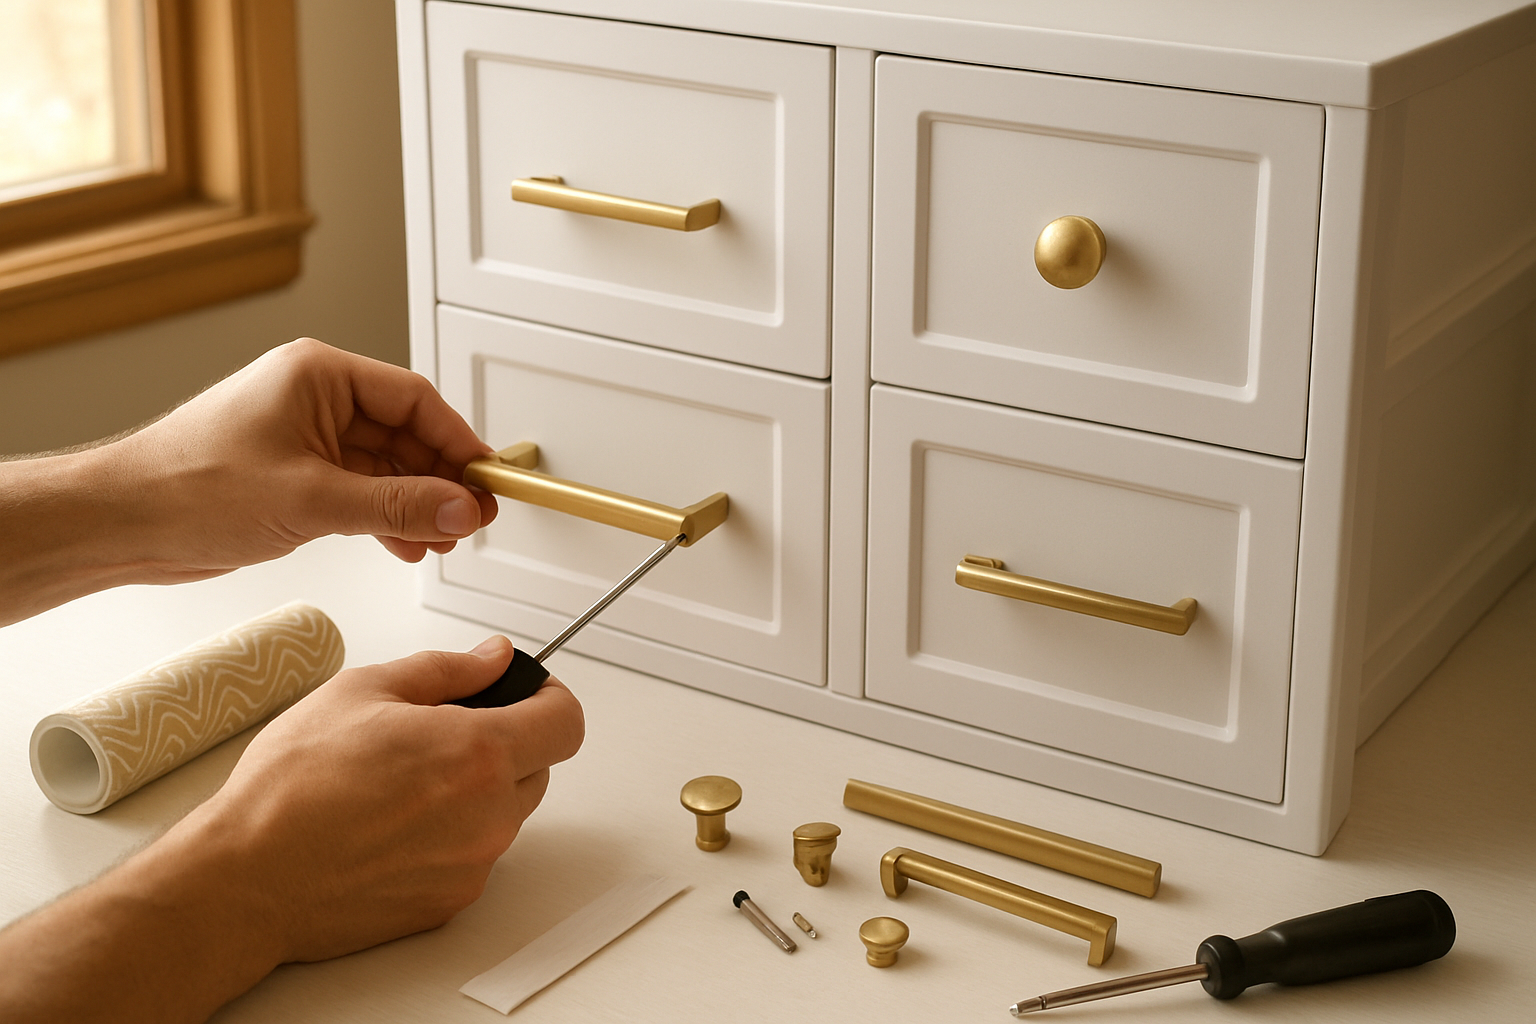
Replace Cheap Handles with Designer-Look Alternatives
Start your plastic drawer makeover by swapping out those flimsy factory handles for stylish alternatives that instantly elevate the entire piece. Hunt for brushed gold, matte black, or sleek chrome options at hardware stores – you’ll find quality handles starting at just $2 each. Measure your existing holes carefully and choose handles with matching spacing to avoid extra drilling. Pro tip: leather pulls or rope handles add unexpected texture that makes your budget storage look custom-built.
Add Decorative Trim or Molding for Custom Appearance
Transform basic drawer fronts into sophisticated pieces by adding architectural details that mimic high-end furniture. Apply thin wood strips or adhesive molding around drawer edges to create raised panel effects that fool everyone into thinking you spent hundreds. Picture frame molding works perfectly for this DIY plastic storage transformation – just cut pieces to fit, sand lightly, and attach with construction adhesive. Paint everything together for a seamless, built-in look.
Install Drawer Liners for Professional Interior Finish
Don’t let anyone peek inside and discover your budget secret. Quality drawer liners complete your plastic furniture makeover by hiding scratches and creating smooth, finished surfaces. Choose from adhesive vinyl in wood grain, marble patterns, or solid colors that complement your new exterior. Cut liners slightly larger than drawer bottoms, then trim excess with a craft knife for perfect edges. This simple step makes your cheap storage solutions feel expensive every time you open them.
Apply Protective Corner Guards and Bumpers
Protect your hard work and reduce noise by adding soft-close bumpers and corner protectors that prevent damage during daily use. Stick small foam pads inside drawer corners and along runners to eliminate that cheap plastic rattling sound. Clear corner guards on drawer exteriors prevent chips and dings while maintaining your fresh paint job. These finishing touches might seem minor, but they’re what separate amateur DIY jobs from professional-looking transformations that last for years.
Your plastic drawers don’t have to stay stuck in their boring, utilitarian look forever. With just a $5 investment and the right preparation techniques, you can turn those eyesore storage units into designer-worthy pieces that actually complement your home’s style. The secret lies in proper surface prep, choosing the right paint for plastic surfaces, and adding those final hardware upgrades that make all the difference.
Ready to shock your friends and family with your transformation skills? Grab your sandpaper, primer, and paint brush this weekend and give your drawers the makeover they deserve. You’ll be amazed at how this simple project can completely change the look and feel of your space without breaking the bank.


