Vapor Barrier Crawl Space: DIY Moisture Protection Made Easy

Dealing with a damp, musty crawl space? You’re not alone. Installing a vapor barrier crawl space system is one of the smartest DIY projects you can tackle to protect your home from moisture damage, mold growth, and high energy bills.
This guide is perfect for homeowners ready to roll up their sleeves and take control of their crawl space moisture problems. You don’t need professional contractor experience – just the right knowledge and tools to get the job done right.
You’ll learn how moisture wreaks havoc in your crawl space and why a vapor barrier stops the problem at its source.
We’ll walk you through the complete step-by-step installation process, from gathering your materials to sealing every seam. Plus, you’ll get insider tips that professionals use to make sure your vapor barrier lasts for years to come.


Understanding Crawl Space Moisture Problems
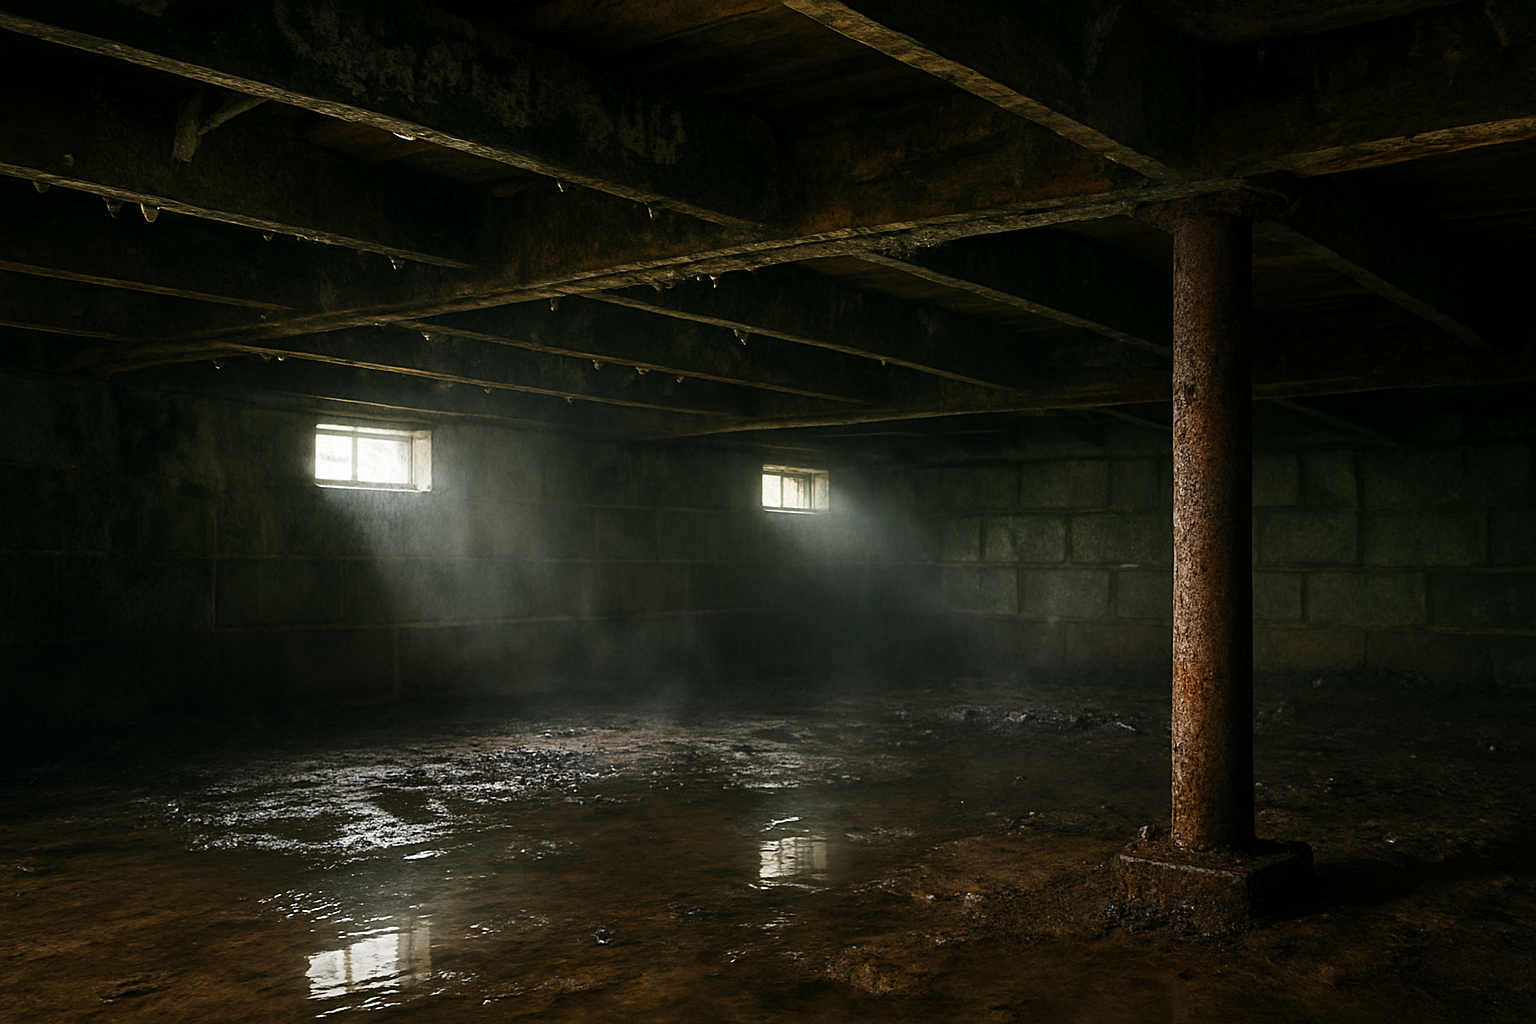
Signs of Excess Moisture and Water Damage
Your crawl space reveals moisture problems through several telltale signs. You’ll notice musty odors, standing water puddles, or wet soil surfaces. Check for water stains on foundation walls, rust on metal components, and condensation droplets on pipes or ductwork. White, chalky deposits called efflorescence appear when water evaporates from concrete surfaces. Your wooden floor joists may show dark staining or feel soft to the touch.
Health Risks from Mold and Mildew Growth
Excessive moisture creates perfect breeding grounds for mold and mildew in your crawl space. You and your family face respiratory issues, allergic reactions, and asthma complications when spores circulate through your home’s air system. Children and elderly family members are particularly vulnerable to these health threats. The musty smell you detect often indicates active mold growth that requires immediate attention to protect your household’s wellbeing.
Structural Damage to Floor Joists and Subflooring
Your home’s structural integrity suffers when moisture penetrates wooden components. Floor joists begin rotting from prolonged exposure to dampness, weakening your floors above. You’ll notice sagging, bouncing, or squeaking floors as the support system deteriorates. Subflooring delaminates and warps, creating uneven surfaces throughout your home. Metal fasteners rust and lose their holding power, compromising the entire floor system’s stability and requiring expensive repairs.
Energy Efficiency Impacts on Your Home
Moisture in your crawl space forces your HVAC system to work harder, increasing your monthly energy bills significantly. Humid air is more difficult to heat and cool than dry air, reducing your system’s efficiency. You’ll experience uneven temperatures throughout your home as moisture affects insulation performance. Your heating and cooling equipment may cycle more frequently, leading to premature wear and costly replacements while failing to maintain comfortable indoor conditions.
Benefits of Installing a Vapor Barrier System

Prevents Ground Moisture from Entering Living Spaces
Your crawl space acts like a gateway for moisture to travel into your home. Without a vapor barrier, ground moisture seeps through concrete and dirt floors, creating a humid environment that rises into your living areas. This moisture carries musty odors, allergens, and can trigger respiratory issues for your family. Installing a vapor barrier creates an effective shield that blocks this unwanted moisture at its source, keeping your indoor air fresh and healthy.
Reduces Humidity Levels and Improves Air Quality
High humidity in your crawl space doesn’t stay contained—it affects your entire home’s air quality. When you install a vapor barrier, you’ll notice immediate improvements in indoor humidity levels, typically reducing them by 10-20%. This reduction means fewer allergens, less mold growth, and cleaner air for your family to breathe. Your HVAC system won’t have to work overtime removing excess moisture, and you’ll enjoy more comfortable living conditions year-round.
Protects Insulation and Structural Components
Moisture is your home’s worst enemy when it comes to structural integrity. Your floor joists, subflooring, and insulation materials deteriorate rapidly when exposed to constant dampness. A vapor barrier protects these expensive components by preventing moisture damage that leads to wood rot, insulation degradation, and costly repairs. You’ll extend the lifespan of your home’s foundation and structural elements significantly, saving thousands in potential replacement costs.
Lowers Heating and Cooling Costs
Your energy bills take a hit when moisture makes your HVAC system work harder. Damp air requires more energy to heat and cool, while wet insulation loses its effectiveness completely. With a vapor barrier in place, you’ll see noticeable reductions in your monthly utility bills—often 15-20% savings on heating and cooling costs. Your HVAC system operates more efficiently in controlled humidity conditions, and your insulation performs at its intended R-value.
Increases Home Value and Marketability
Smart homebuyers recognize the value of proper moisture control, and a professionally installed vapor barrier system adds real value to your property. You’ll have documentation of moisture prevention measures that appeal to potential buyers and home inspectors. This improvement demonstrates proactive home maintenance and can differentiate your property in competitive markets. Real estate agents often highlight moisture control features as selling points, especially in humid climates where crawl space issues are common concerns.
Essential Tools and Materials for DIY Installation

Choosing the right vapor barrier material thickness
Your vapor barrier’s thickness determines its durability and moisture-blocking effectiveness. You’ll find options ranging from 6-mil to 20-mil plastic sheeting, with 6-mil being the minimum recommended thickness for crawl spaces. Choose 10-mil or thicker polyethylene for high-traffic areas or rough subfloor conditions. Class I vapor retarders with permeance ratings below 0.1 perms work best for complete moisture control.
Required cutting and measuring tools
You need a sharp utility knife with replacement blades for clean cuts through plastic sheeting. Pack a 25-foot measuring tape, chalk line for marking straight cuts, and a T-square for precise corners. Include scissors for detailed trimming around obstacles like pipes and posts. A straightedge ruler helps maintain accuracy when cutting around foundation vents and mechanical penetrations.
Fastening supplies and sealing materials
Stock up on construction-grade duct tape or specialized vapor barrier tape for seaming joints together. You’ll need concrete nails or masonry screws with washers to secure edges to foundation walls. Grab tube caulk or polyurethane sealant for gaps around pipes and irregular surfaces. Include plastic cap nails or furring strip boards for attaching barriers to wooden surfaces without tearing the material.
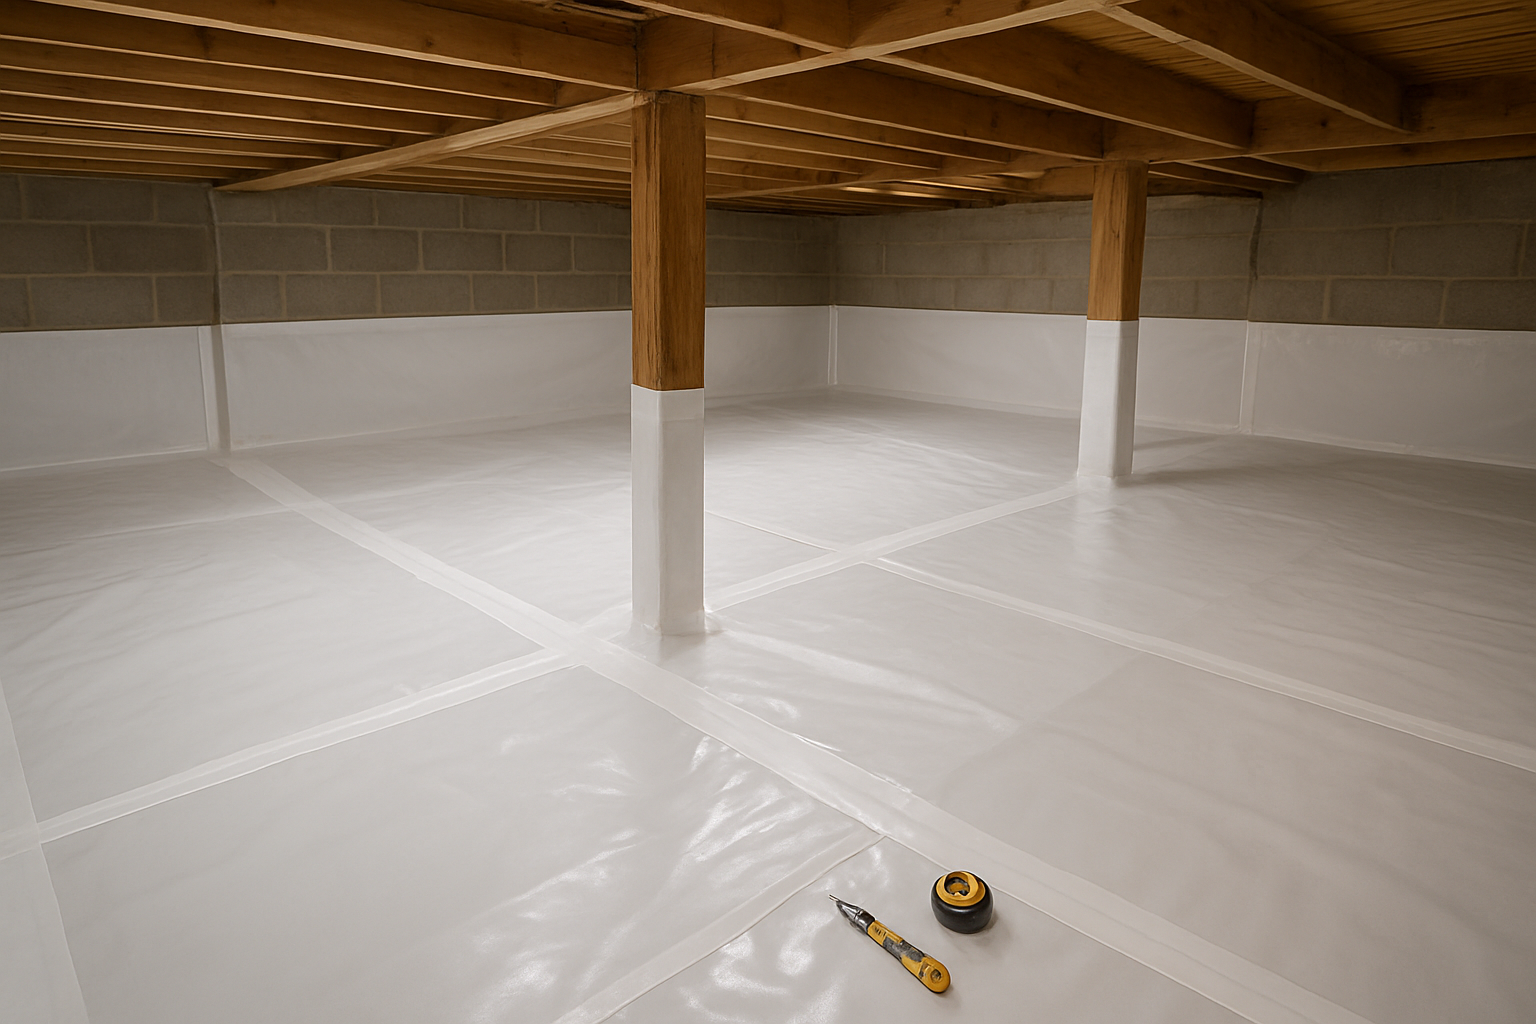
Step-by-Step Vapor Barrier Installation Process

Preparing the crawl space surface and clearing debris
Start by removing all debris, rocks, and organic matter from your crawl space floor. You’ll need to level any uneven areas and fill low spots with sand or gravel. Check for standing water and address drainage issues before proceeding. Remove any sharp objects that could puncture your vapor barrier material.
Measuring and cutting barrier material to fit
Measure each section of your crawl space carefully, adding 6-8 inches extra on all sides for proper overlap onto foundation walls. Mark your measurements on the plastic sheeting using a permanent marker. Cut the material with a sharp utility knife, making clean straight cuts. Plan your layout to minimize seams and waste while ensuring complete coverage.
Securing the barrier to foundation walls
Attach the vapor barrier to your foundation walls using mechanical fasteners like concrete screws or masonry nails every 12-16 inches. Position the barrier 6 inches up the wall minimum, creating a continuous seal. Use a hammer drill for concrete walls or a regular drill for block walls. Apply construction adhesive behind the barrier for extra holding power.
Sealing seams and penetrations properly
Overlap all seams by at least 6 inches and seal them with high-quality vapor barrier tape or polyurethane sealant. Cut small slits around pipes, posts, and other penetrations, then wrap the material tightly around each obstruction. Seal these areas with butyl tape or compatible caulk. Double-check every connection point to prevent moisture infiltration through gaps.
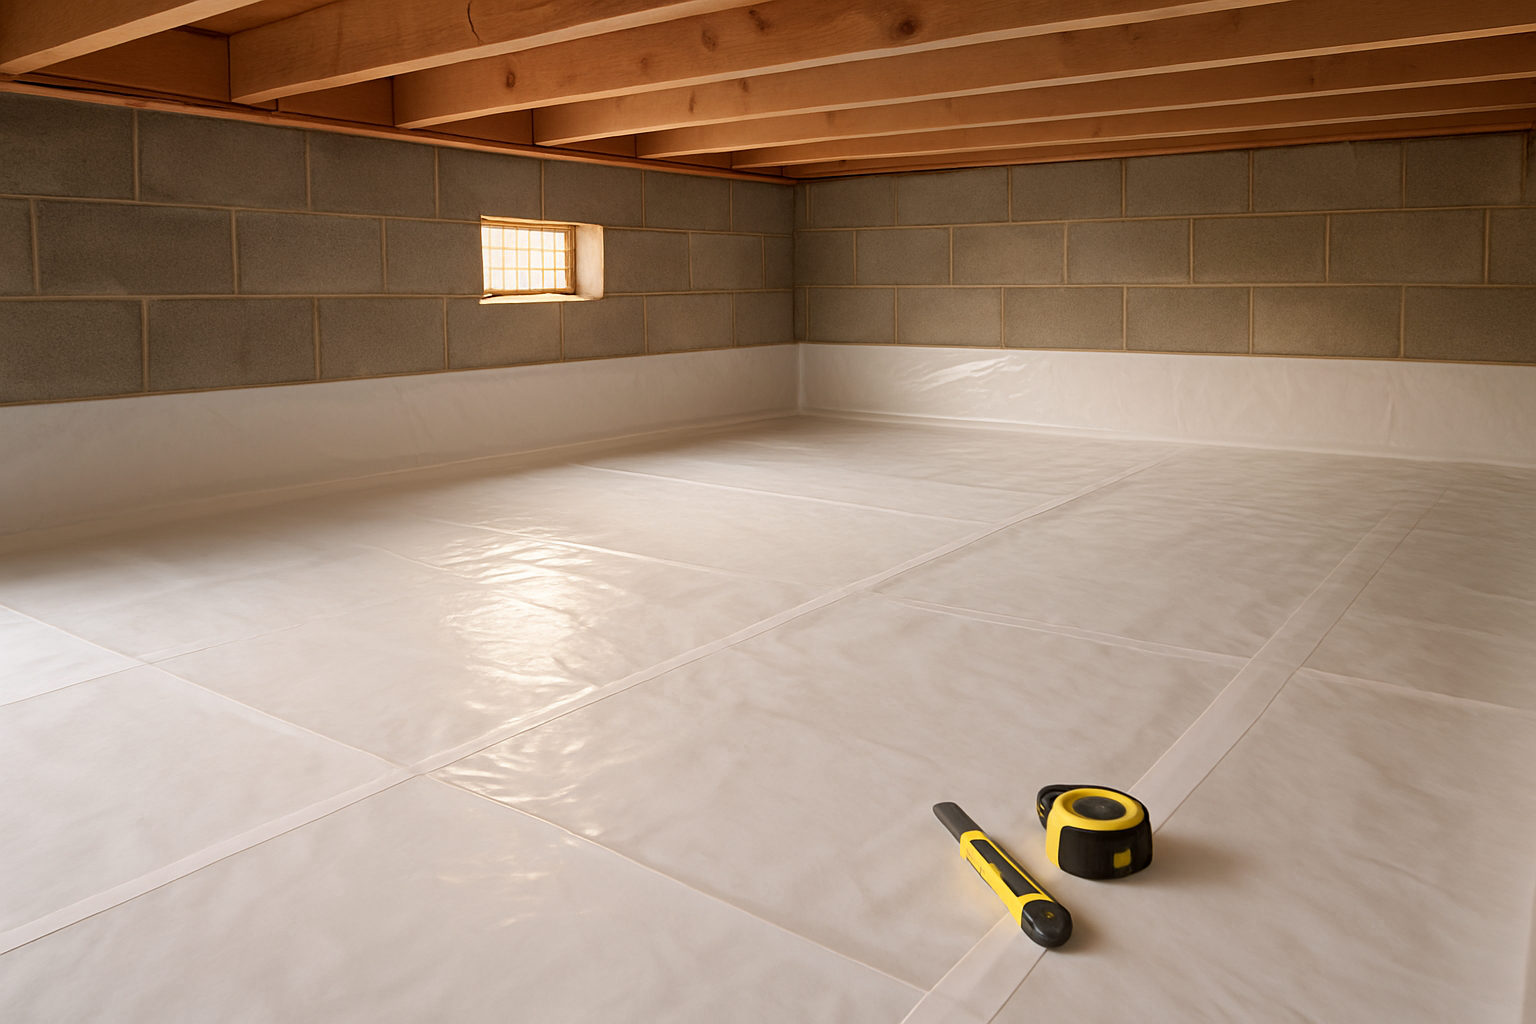
Professional Tips for Long-Lasting Results
Avoiding Common Installation Mistakes
You’ll want to overlap your vapor barrier seams by at least 6 inches and seal them completely with vapor barrier tape, not duct tape. Don’t stretch the material too tight during installation, as ground settling can cause tears. Always extend the barrier up foundation walls at least 6 inches and secure it properly to prevent moisture from creeping underneath.
Ensuring Proper Ventilation Considerations
Your crawl space needs balanced ventilation even with a vapor barrier installed. Install foundation vents at opposite ends to create cross-flow, positioning them high on walls to prevent moisture accumulation. In colder climates, consider closing vents during winter months to prevent freezing pipes, but maintain some air circulation through mechanical ventilation if needed.
Maintenance Schedule for Optimal Performance
Check your vapor barrier every six months for tears, gaps, or areas where tape has loosened. Replace any damaged sections immediately to maintain protection. Inspect the crawl space for standing water or unusual odors during seasonal changes. Clean debris from vents quarterly and verify that your drainage systems remain clear to prevent water buildup that could compromise your barrier’s effectiveness.
You’ve learned that moisture in your crawl space isn’t just a minor annoyance—it’s a serious threat to your home’s foundation, air quality, and your family’s health. Installing a vapor barrier gives you powerful protection against humidity, mold growth, and structural damage while potentially lowering your energy bills. With the right materials like 6-mil plastic sheeting, seam tape, and basic tools, you can tackle this project yourself and save hundreds of dollars in contractor fees.
The installation process might seem overwhelming at first, but breaking it down into manageable steps makes it totally doable for most homeowners. Remember to clean your crawl space thoroughly, seal all seams properly, and secure the barrier to walls and piers for maximum effectiveness. Take your time with the details—properly overlapping seams and creating airtight connections will determine how well your vapor barrier performs over the years. Your crawl space will stay dry, your home will be healthier, and you’ll have the satisfaction of protecting your biggest investment with your own hands.


