How to Build a Shiplap Siding Door in 5 Easy Steps

I priced custom barn doors at three local shops. The quotes ranged from $650 to $890 for a basic 36-inch door, not including hardware or installation. That’s insane for what’s essentially boards attached to a frame.
I built my own shiplap door last fall for $87 in materials from Home Depot. Took me one Saturday afternoon with basic tools I already owned. The door looks identical to the $650 version I almost bought, and three people have asked where I got it since I installed it.
My biggest mistake was not building the frame square the first time. The door wouldn’t hang right and I had to rebuild the frame. Once I understood the frame had to be perfectly square before adding boards, the second attempt went smoothly. That lesson cost me 2 hours and some frustration but saved hundreds.
Here’s exactly how to build a shiplap door that doesn’t look homemade. You’ll learn the frame technique that keeps doors straight, the board spacing that looks professional instead of amateur, staining tricks that highlight the wood grain, and the one measurement error that makes DIY doors obviously DIY. Whether you’re replacing a bedroom door or creating a sliding barn door, this process works with beginner woodworking skills.


Gather Essential Materials and Tools for Your Shiplap Door Project
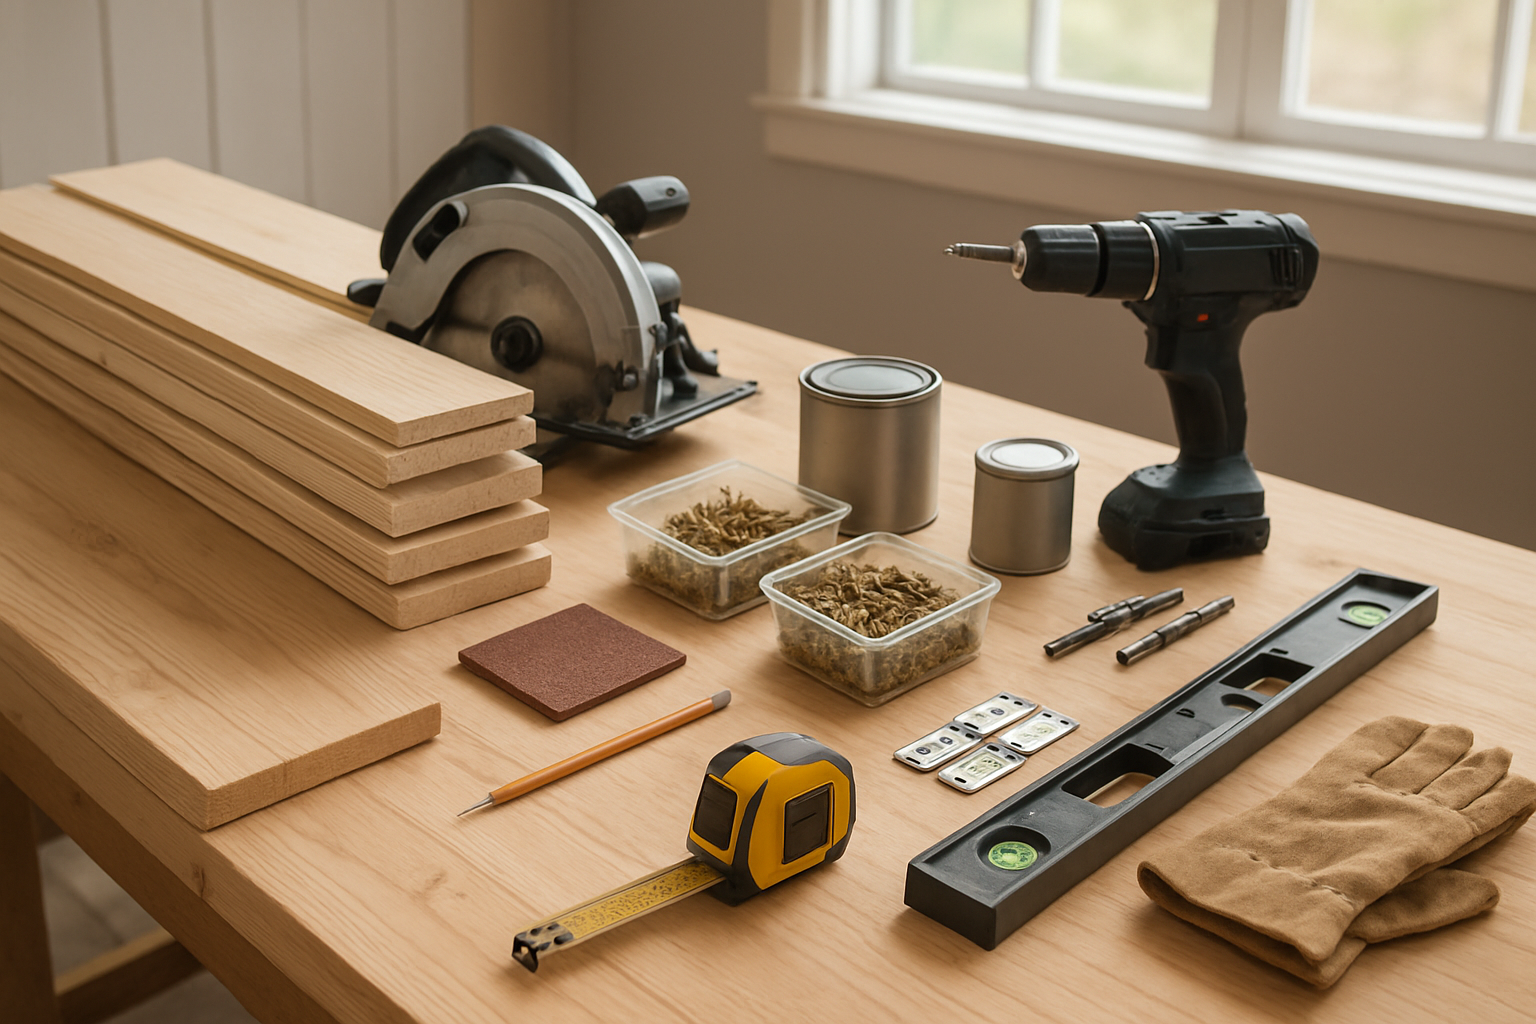
Select high-quality wood boards for durability and appearance
For your DIY shiplap door project, you’ll need sturdy 1×6 or 1×8 pine boards that are straight and free from warping. Choose kiln-dried lumber to prevent shrinkage and cracking over time. Cedar offers natural weather resistance for exterior doors, while pine works perfectly for indoor applications and takes stain beautifully.
Choose the right hardware including hinges and door handle
Your shiplap door construction requires heavy-duty hinges rated for the door’s weight – typically 3.5-inch butt hinges work best. Pick a door handle that complements your home’s style, whether rustic barn door hardware or traditional lever handles. Don’t forget the latch mechanism and strike plate for proper door closure.
Acquire necessary cutting and measuring tools
You’ll need a circular saw or miter saw for precise cuts, a measuring tape, carpenter’s square, and level for accurate alignment. A drill with various bits handles hardware installation, while sandpaper smooths rough edges. Clamps help hold boards steady during assembly of your homemade shiplap door.
Prepare wood stain or paint for finishing
Select a high-quality wood stain that enhances the natural grain or choose exterior paint for weather protection. Prime bare wood first for better adhesion and color consistency. Semi-transparent stains showcase the wood’s character while solid stains provide more uniform coverage for your shiplap siding door tutorial project.
Measure and Cut Your Shiplap Boards to Perfect Dimensions
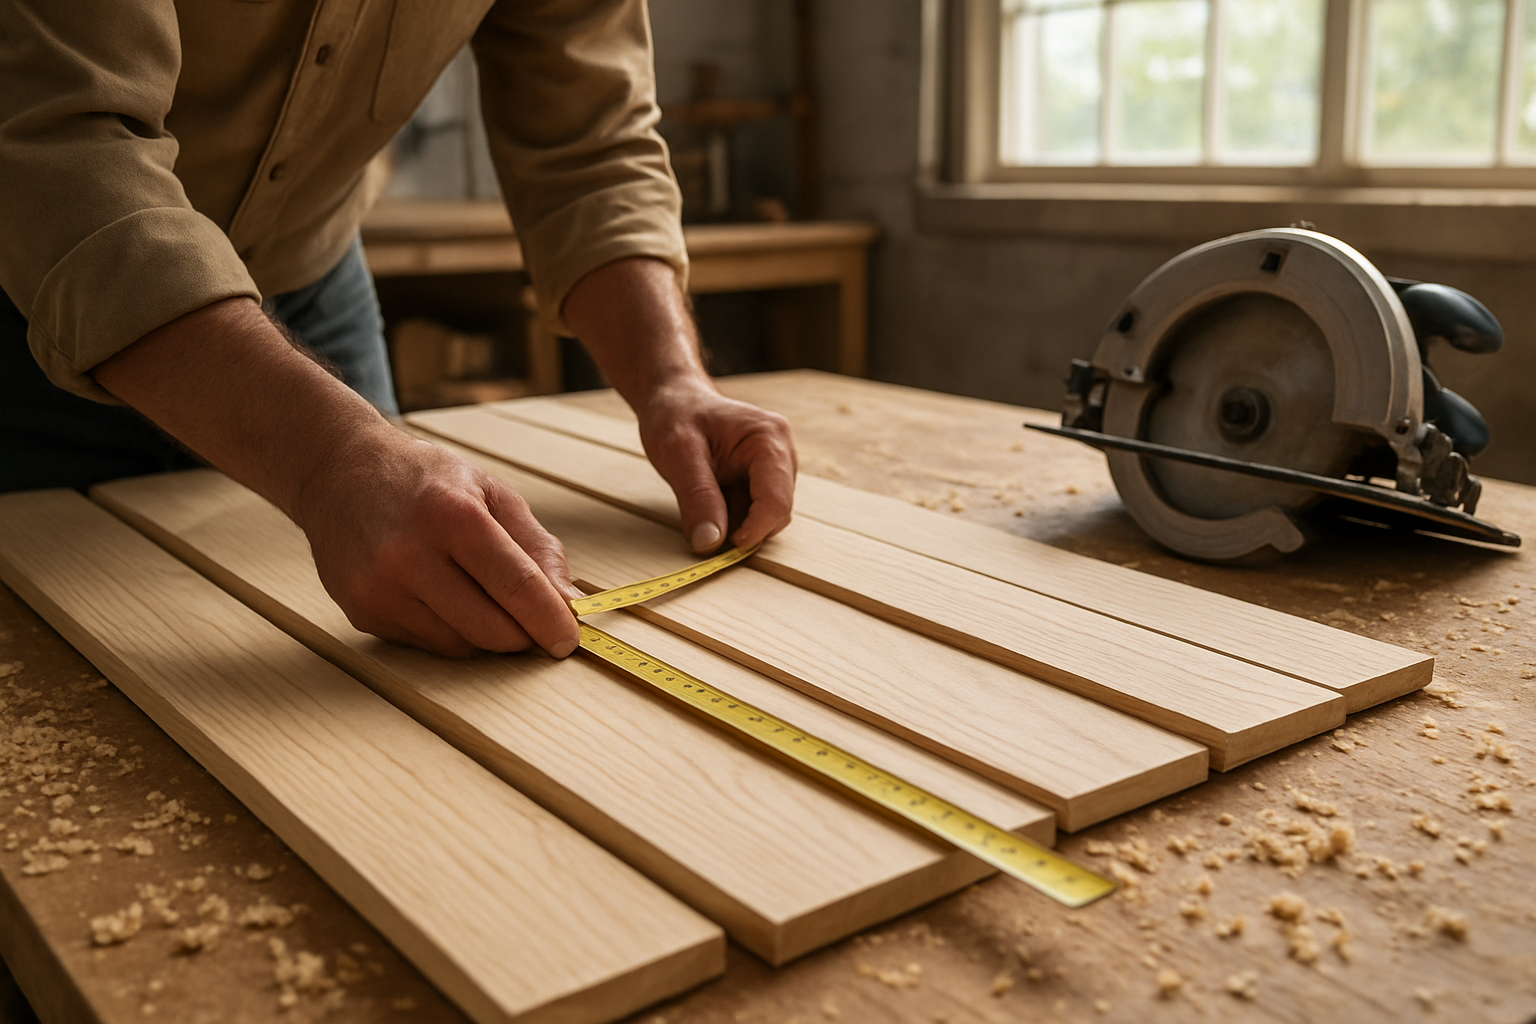
Calculate exact door measurements for your frame opening
Start by measuring your door frame’s width and height three times at different points to account for any irregularities. Your shiplap door should be 1/8 inch smaller than the frame opening on all sides to allow proper clearance for smooth operation.
Mark cutting lines on each board for precision
Use a sharp pencil and speed square to mark your cutting lines clearly on each shiplap board. Double-check your measurements against your door dimensions before marking, and always measure twice to avoid costly mistakes in your DIY shiplap door project.
Use proper cutting techniques to avoid splintering
Score the cut line lightly with a utility knife before using your circular saw or miter saw. This prevents the wood fibers from tearing during the cut. Support both sides of the board while cutting and use a fine-tooth blade designed for finished lumber.
Sand cut edges smooth for professional appearance
After cutting, sand all edges with 120-grit sandpaper followed by 220-grit for a smooth finish. Pay special attention to the cut ends where the wood grain is exposed, as these areas will be most visible on your completed shiplap door construction.
Test fit boards before proceeding to assembly
Lay out your cut shiplap boards on a flat surface in the exact pattern you’ll use for assembly. Check that the tongue-and-groove joints fit snugly together and that your overall dimensions match your door frame measurements before moving to the next step.
Create the Strong Door Frame Foundation
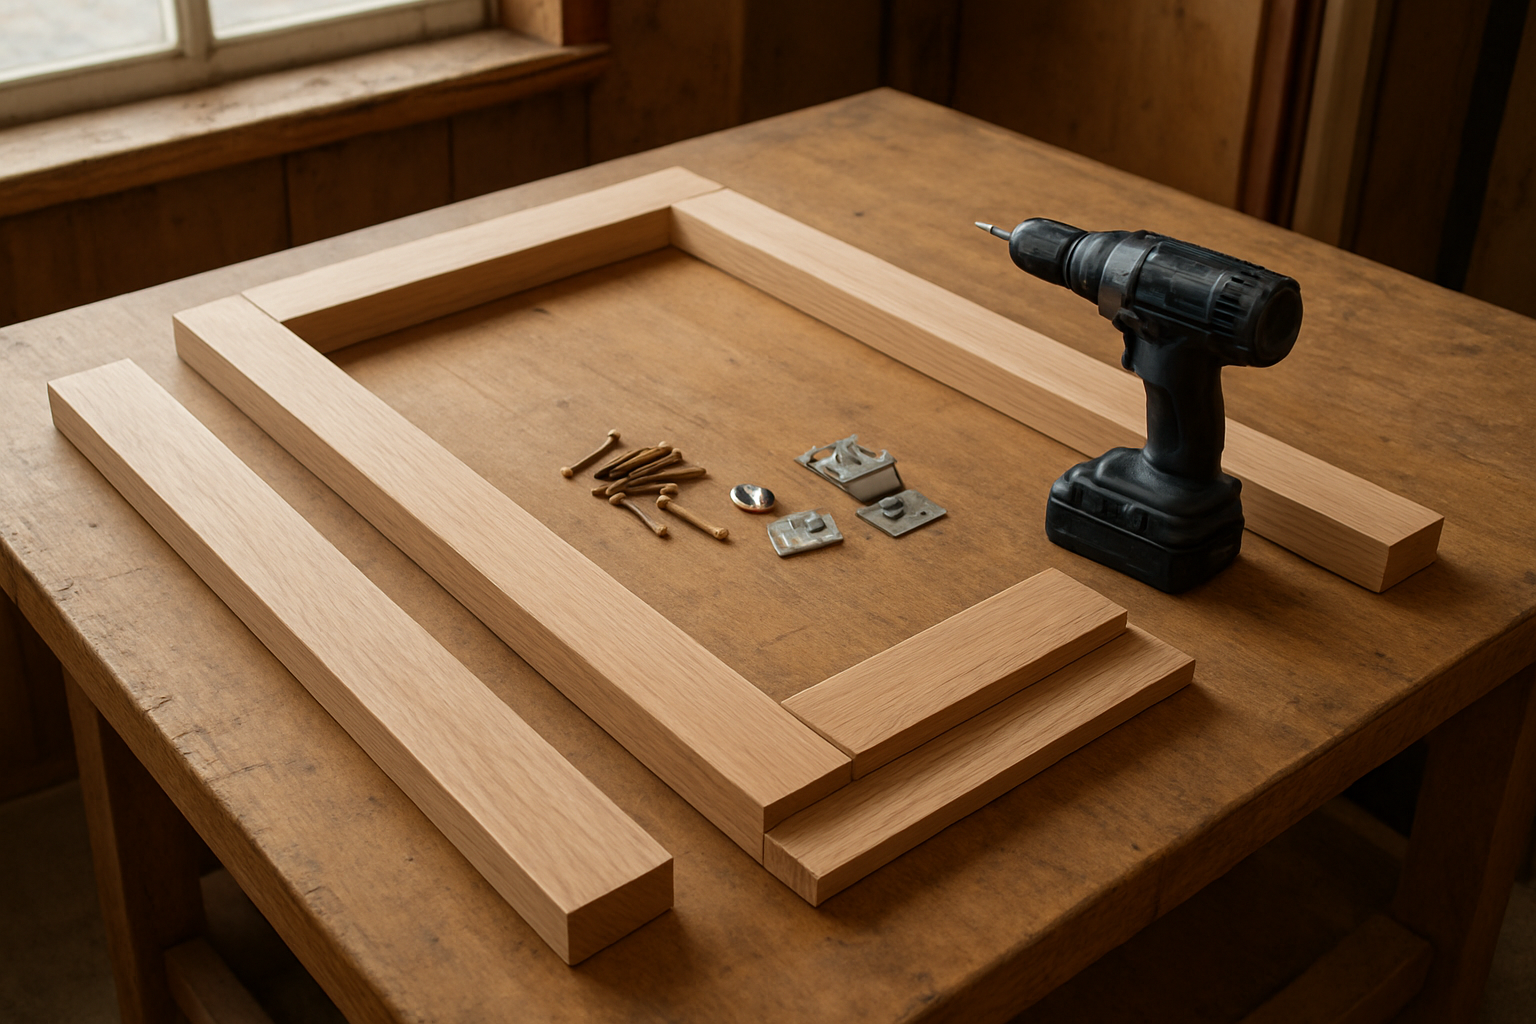
Cut frame pieces to match your door dimensions
Your shiplap door construction starts with precise frame pieces that determine your door’s final size and strength. Measure twice and cut your 2×4 lumber into two vertical stiles and two horizontal rails, adding an extra 1/8 inch to account for sanding and final adjustments.
Join frame corners using wood glue and screws
Apply wood glue generously to each joint before securing with 2.5-inch wood screws driven from the outside edges. Pre-drill pilot holes to prevent splitting, especially near board ends. This combination of glue and mechanical fasteners creates a rock-solid foundation that’ll support your shiplap siding door for years of heavy use.
Check frame for square alignment using measuring tools
Grab your measuring tape and check both diagonal measurements across your assembled frame – they should match exactly if your frame is perfectly square. A carpenter’s square helps verify each corner sits at exactly 90 degrees. Any deviation now will create gaps and alignment issues when you attach your shiplap boards, so take time to adjust before the glue sets completely.
Attach Shiplap Boards to Form the Door Panel
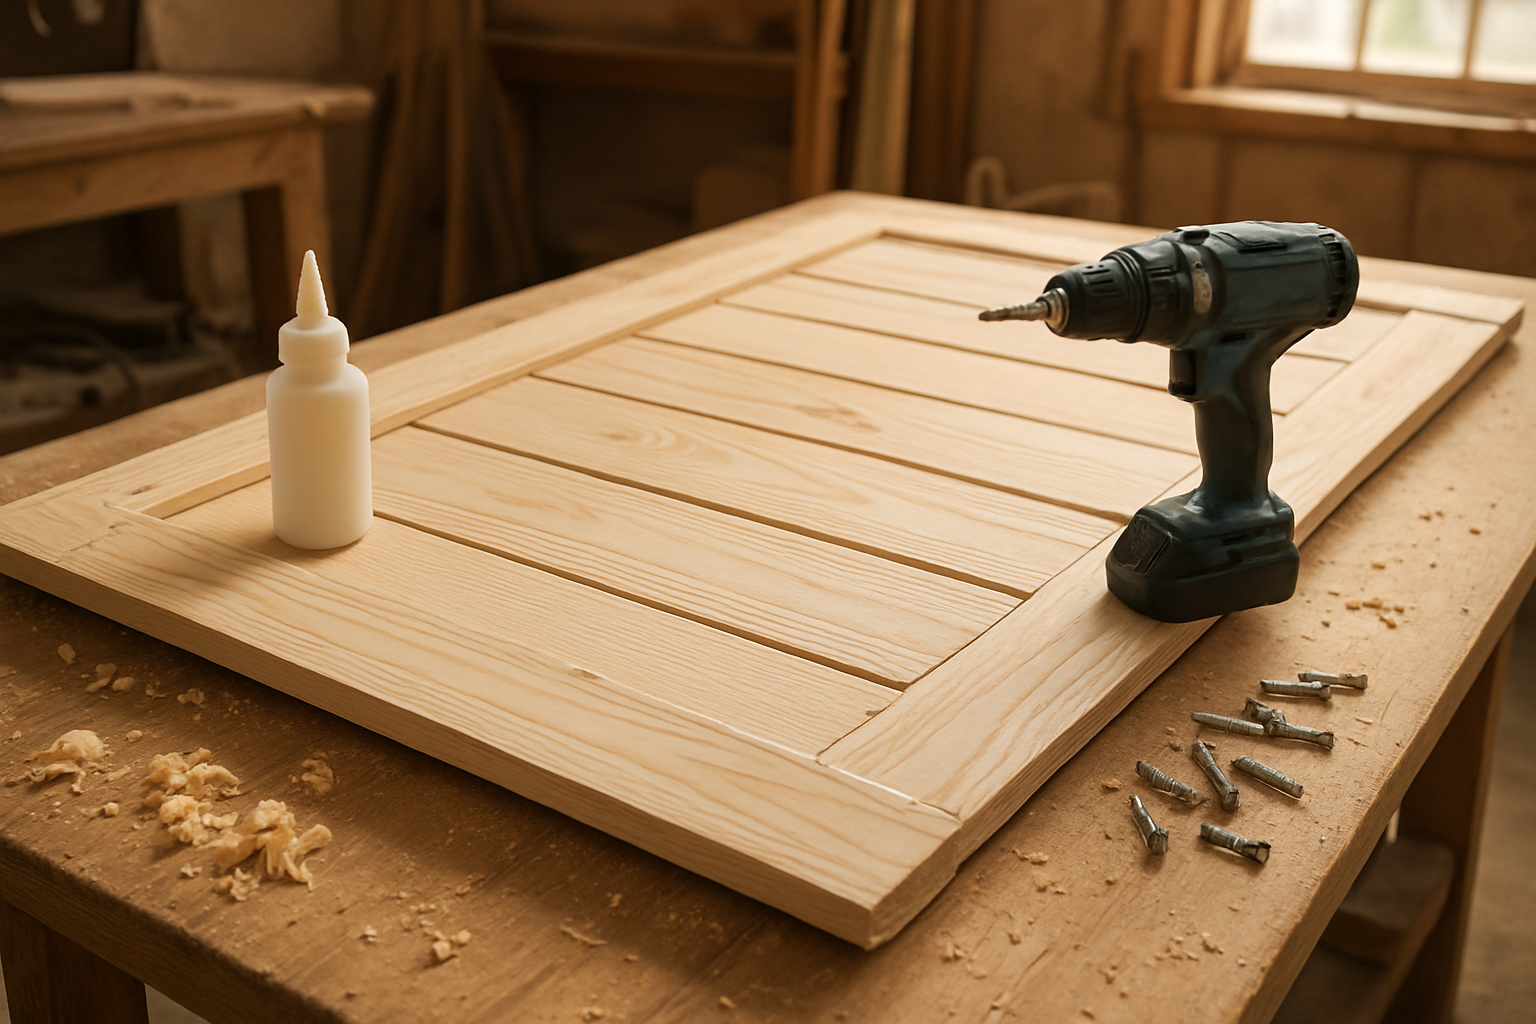
Position first board flush with frame edge
Start your DIY shiplap door construction by placing the first shiplap board perfectly aligned with the bottom edge of your door frame. This initial placement sets the foundation for your entire shiplap door project and ensures a professional-looking finish.
Apply wood glue between overlapping board edges
Before securing each board, spread a thin layer of wood glue along the rabbet edge where boards will overlap. This creates a stronger bond between your shiplap boards and helps prevent gaps from forming over time in your homemade shiplap door.
Secure each board with appropriate fasteners
Use 1¼-inch brad nails or screws to attach each shiplap board to your door frame. Drive fasteners through the tongue of each board at a slight angle to hide them within the overlap. Space fasteners every 8-10 inches along each board for optimal holding power in your shiplap door construction.
Maintain consistent spacing throughout installation
Check your spacing between each board using a small wooden spacer or coin to ensure uniform gaps throughout your DIY barn door shiplap project. Work your way up from the bottom board, double-checking alignment with a level after every few boards to keep your wooden shiplap door perfectly straight and professional-looking.
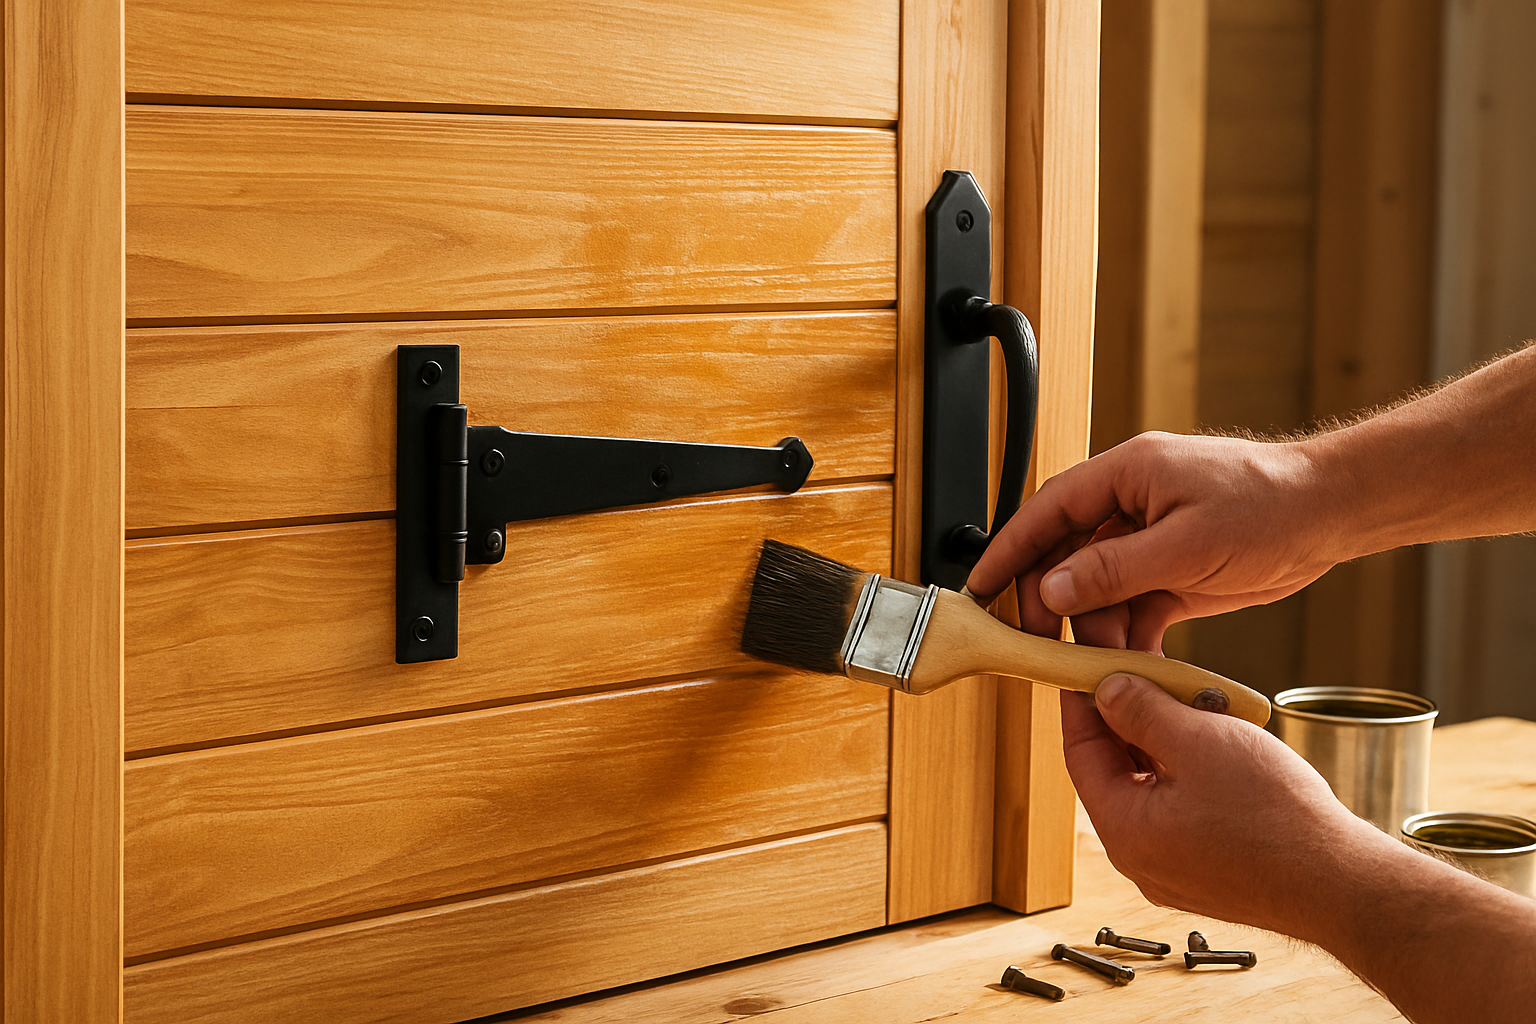
Install Hardware and Apply Final Protective Finish
Mark and drill precise holes for hinges and handle
Position your hinges 6-7 inches from the top and bottom of your shiplap door frame. Use a pencil to mark screw hole locations, then create pilot holes with a drill bit slightly smaller than your screws. For the handle, measure 36 inches from the bottom and mark your drilling point on the opposite side from the hinges.
Mount all hardware components securely
Attach hinges to your DIY shiplap door first, ensuring they’re flush with the frame edge. Tighten screws gradually to prevent wood splitting. Install your chosen handle or knob next, checking that it operates smoothly. Add a latch or lock mechanism if desired, making sure all components align properly for seamless operation.
Apply wood stain or paint for weather protection
Clean your shiplap door construction thoroughly before applying any finish. Choose exterior-grade stain or paint designed for outdoor wood projects. Apply thin, even coats using a brush or roller, working with the wood grain. Pay special attention to end cuts and joints where moisture typically penetrates, as proper sealing extends your homemade shiplap door’s lifespan significantly.
Allow proper drying time before hanging door
Give your finish 24-48 hours to cure completely in well-ventilated conditions. Avoid hanging your shiplap door project during humid weather, as this can compromise the protective coating. Test that hardware moves freely and the finish feels completely dry before installation. Proper curing prevents sticky surfaces and ensures your DIY barn door shiplap finish remains durable for years.


