How to Build a Smokeless Fire Pit for Under $50?

Building a DIY smokeless fire pit under $50 is totally doable with the right materials and a simple design plan. If you’re a weekend warrior, budget-conscious homeowner, or camping enthusiast who wants clean-burning fires without breaking the bank, this guide is for you.
You’ll discover the essential materials and tools needed to get started, plus learn the key design principles that make smokeless fire pits work so effectively. We’ll walk you through the complete step-by-step construction process and share proven cost-saving tips that keep your project well under budget.
Ready to create your own affordable backyard fire pit that produces minimal smoke and maximum enjoyment? Let’s dive into this budget-friendly build that transforms your outdoor space without emptying your wallet.
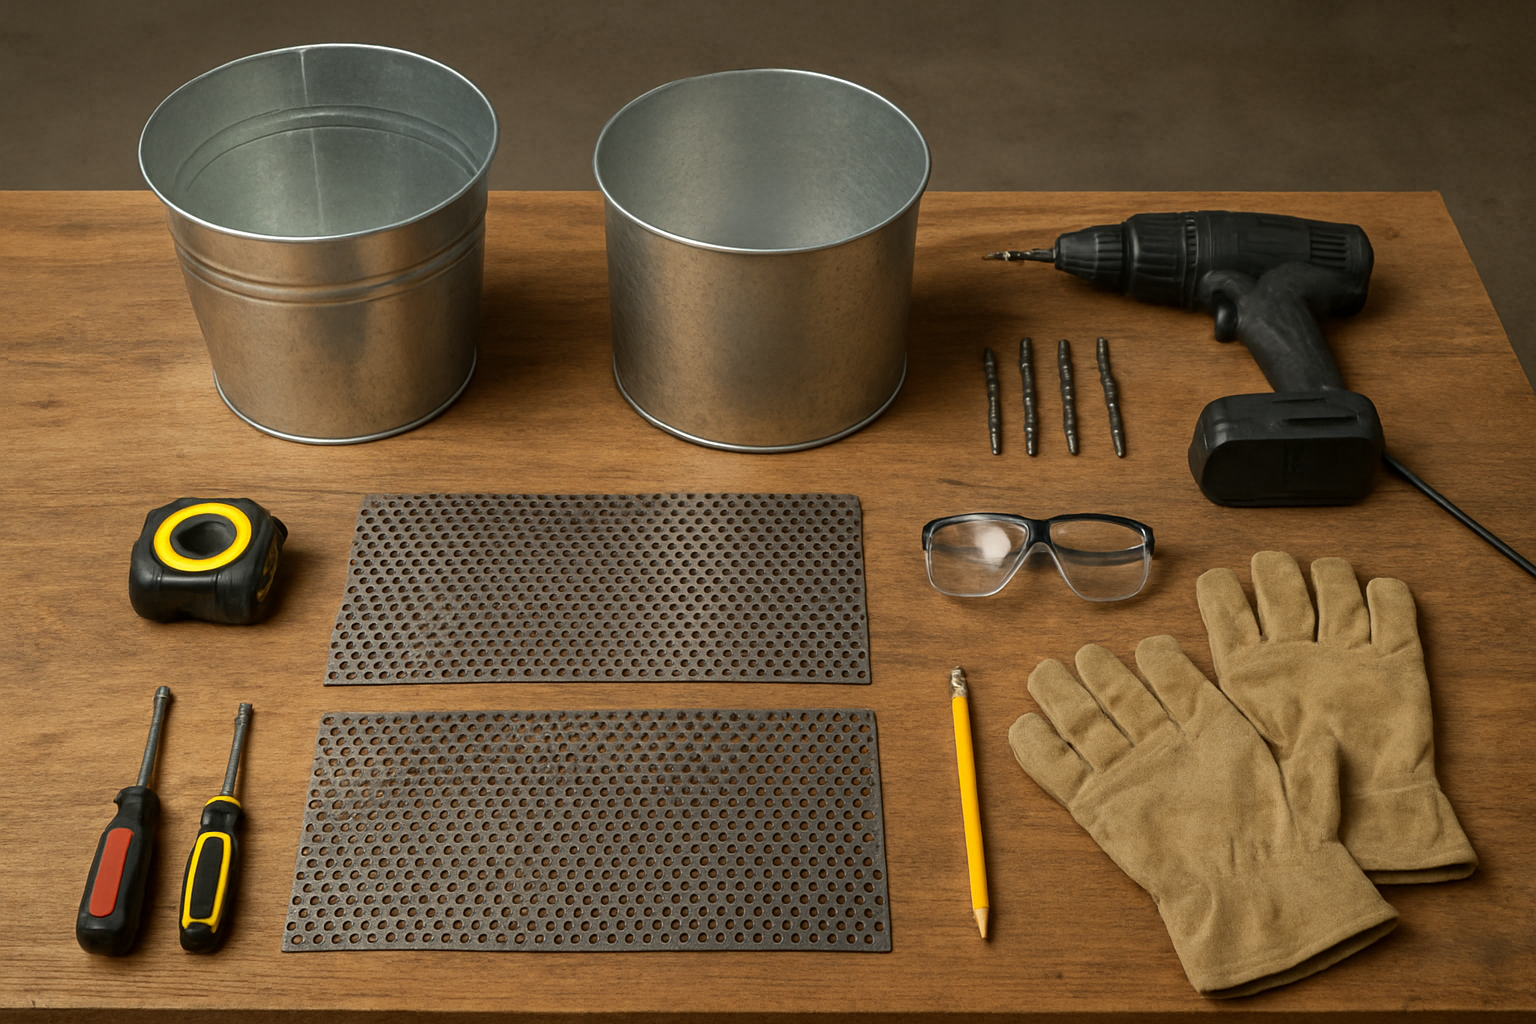
Essential Materials and Tools You Need
You Might Also Love These Ideas


Budget-friendly steel drum or large metal container options
You’ll need a steel drum or large metal container as your primary fire pit base. Look for 55-gallon steel drums at industrial supply stores, scrap yards, or online marketplaces for $15-25. Clean, food-grade drums work best and cost slightly more, but any steel drum without toxic residue will suffice. Large metal planters, galvanized wash tubs, or even old washing machine drums make excellent alternatives if you can’t find a steel drum.
Basic tools required for cutting and assembly
Your tool list includes an angle grinder with cutting discs ($20-30 if you don’t own one), a drill with metal bits, and basic measuring tools like a tape measure and marker. You’ll also need safety glasses, work gloves, and a metal file for smoothing rough edges. Most DIY smokeless fire pit projects require minimal specialized equipment – these common workshop tools handle the cutting and assembly work perfectly.
Hardware supplies under $10
Grab these inexpensive hardware items: metal screws or bolts ($3-4), a small tube of high-heat silicone sealant ($2-3), and sandpaper or steel wool for surface prep ($2). You might also want spray paint designed for high temperatures ($3-5) if you plan to finish your fire pit. These supplies complete your build without breaking your $50 budget for this affordable backyard fire pit project.
Safety Equipment
Safety gear protects you during construction and fire pit use. Invest in quality safety glasses ($5-8), heavy-duty work gloves ($8-12), and a dust mask for grinding operations ($3-5). Keep a fire extinguisher or garden hose nearby during your first test burns. This safety equipment pays for itself by preventing injuries and ensuring your homemade fire pit ideas become reality safely.
Understanding Smokeless Fire Pit Design Principles
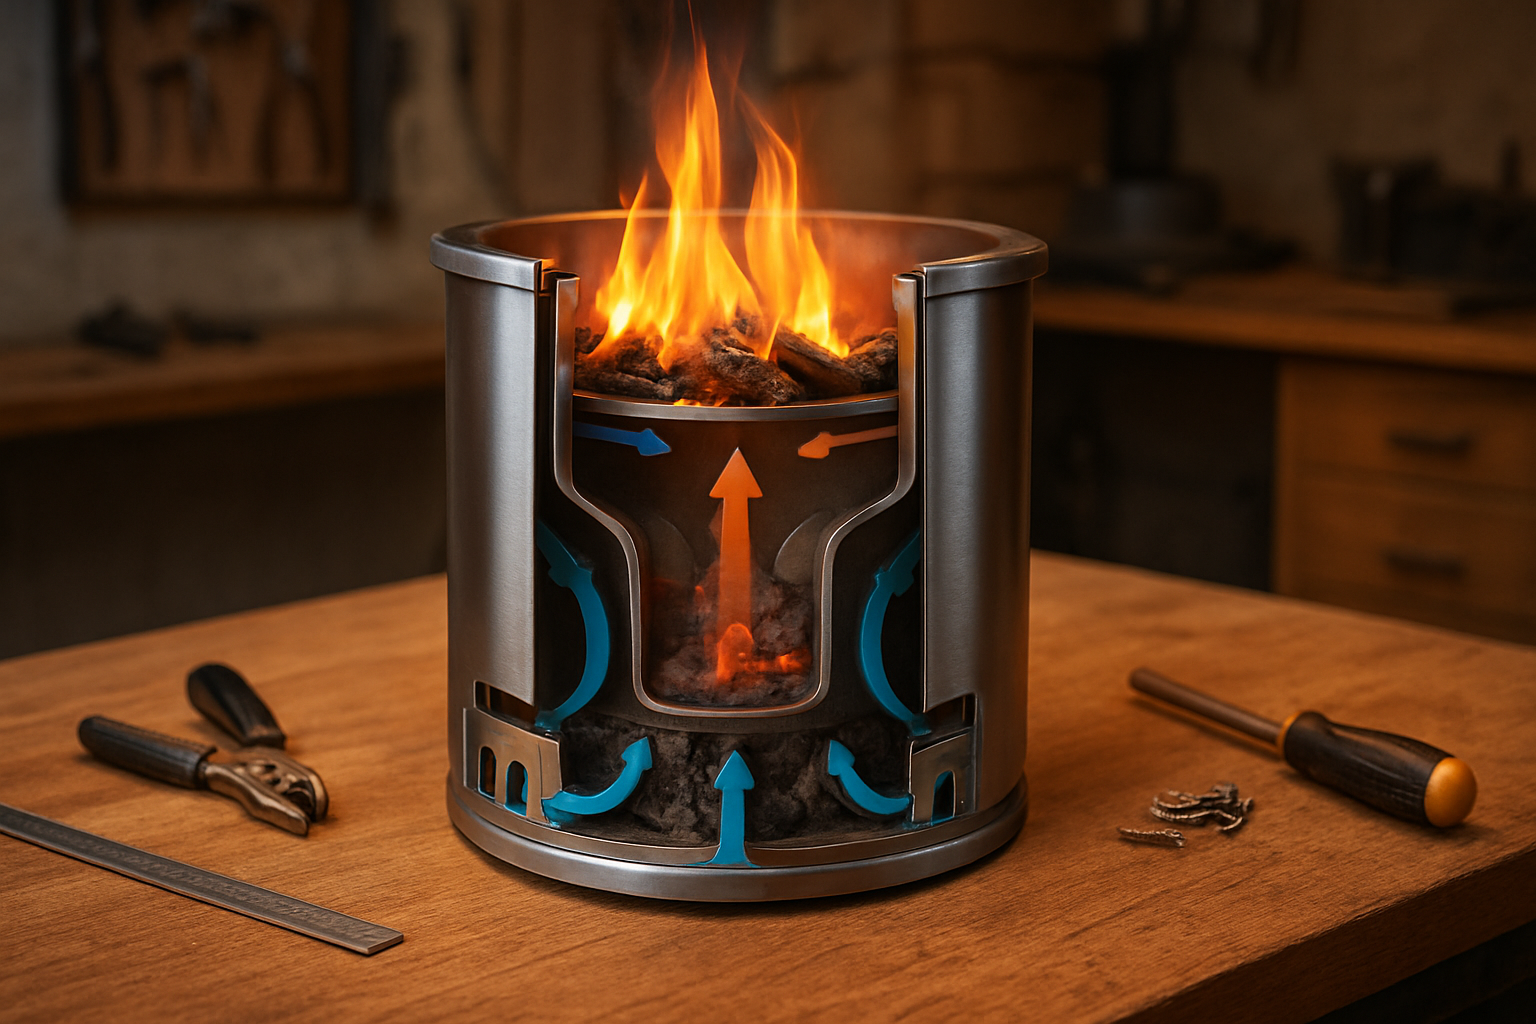
How double-wall combustion creates cleaner burns
Your DIY smokeless fire pit design works by creating a double-wall system that burns wood twice. The inner wall contains your primary fire, while the outer wall creates a secondary combustion chamber. Hot air rises between these walls, getting superheated before entering the fire zone through strategically placed holes at the top.
Air circulation patterns that eliminate smoke
This clever airflow pattern forces unburned particles and gases back into the flames for complete combustion. You’ll position air intake holes at the bottom of the outer wall and exhaust holes near the top, creating a natural draft that pulls fresh oxygen up through the walls and into the fire, eliminating the smoke that typically escapes from traditional fire pits.
Step-by-Step Construction Process
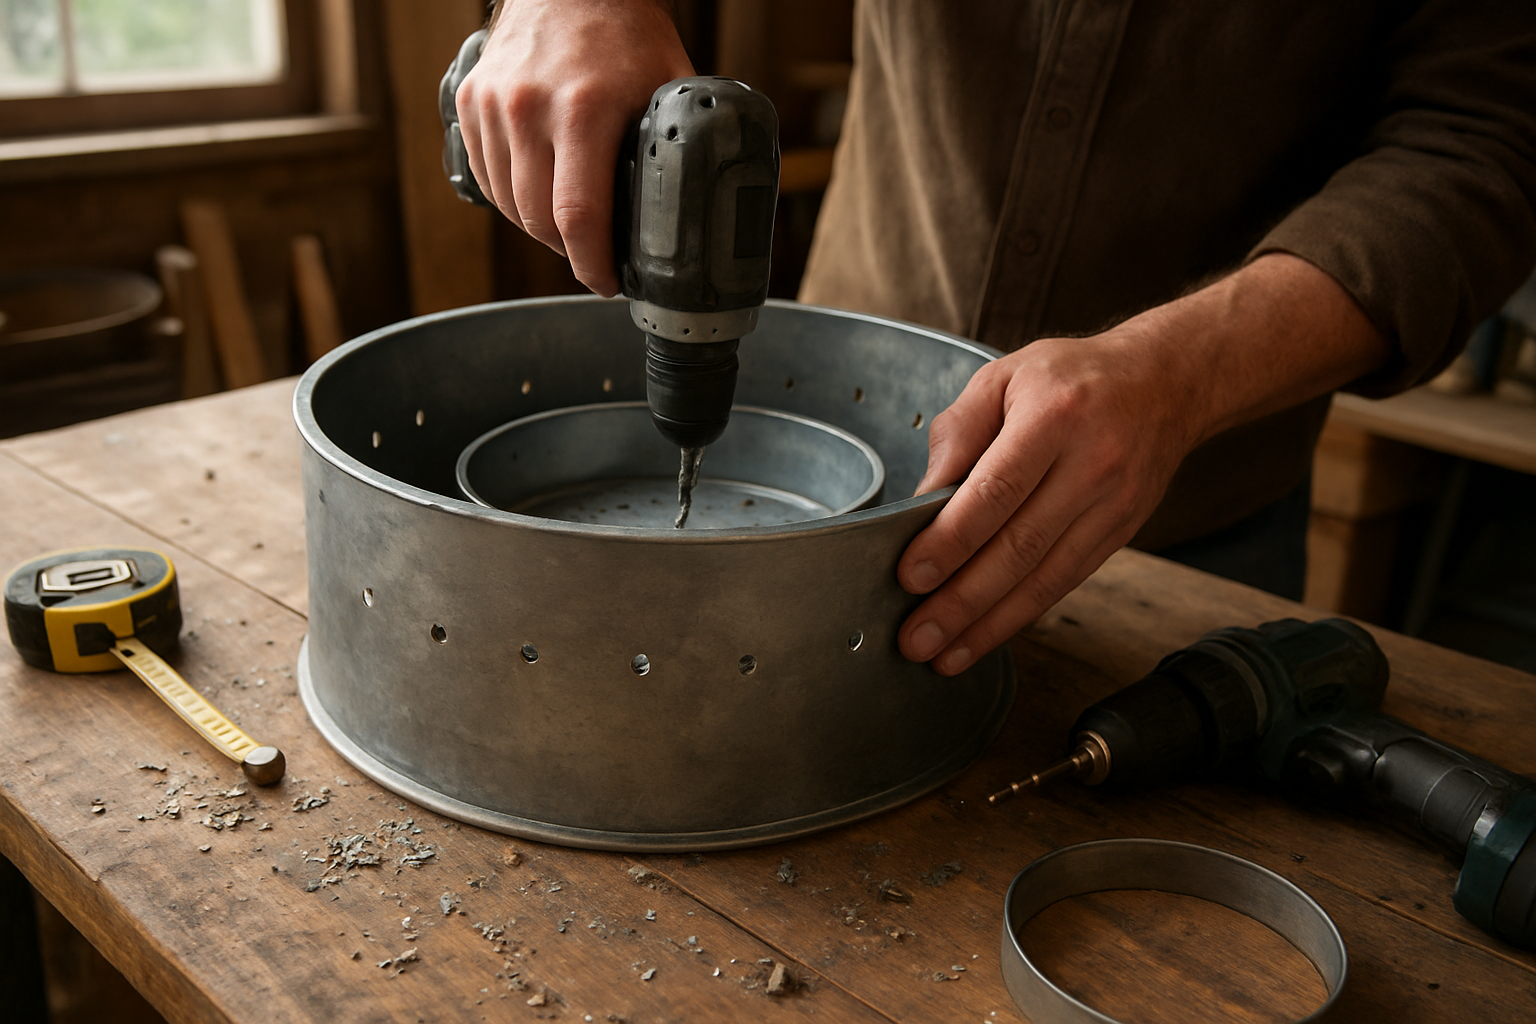
Preparing and cutting your main fire chamber
Start by marking your main chamber dimensions on the large metal container – you’ll want to cut ventilation holes around the bottom perimeter, spacing them 2-3 inches apart. Use your angle grinder or drill to create these primary air intake holes, keeping them about 1 inch in diameter for optimal airflow in your DIY smokeless fire pit construction.
Creating the secondary combustion air holes
Drill a second ring of holes approximately 4-5 inches from the top of your container, making these slightly smaller than your bottom holes. These secondary air holes are crucial for the smokeless fire pit design to work properly, as they allow preheated air to mix with smoke particles and burn them off completely.
Installing the raised fire grate system
Position your steel grate or expanded metal mesh 3-4 inches above the container bottom using metal brackets or rebar supports. This raised system creates the air gap necessary for proper combustion while keeping your fuel elevated. Secure the grate firmly to prevent shifting during use in your budget fire pit build.
Adding the outer wall for airflow
If using a double-wall design, place your smaller inner container inside the larger outer one, maintaining a 2-3 inch gap between walls. This air space acts as an insulation layer and helps preheat incoming air. For single-wall builds, you can skip this step while still achieving good results with your homemade fire pit.
Finishing touches for durability
Sand any rough edges smooth and apply high-temperature paint if desired, though raw steel develops an attractive patina over time. Check all connections and holes for proper sizing, then test your affordable backyard fire pit with a small fire to ensure proper airflow before full use.
Cost-Saving Tips and Money-Saving Alternatives

Finding Free or Discounted Metal Containers
Check local appliance stores, scrapyards, and online marketplaces for discounted metal drums or washing machine tubs. Many businesses throw away perfectly good containers that work great for your DIY smokeless fire pit project. Facebook Marketplace and Craigslist often have deals on used metal containers for under $20.
Repurposing Household Items for Components
Your garage likely contains everything you need for this budget fire pit build. Old metal buckets, large flower pots, or even repurposed dryer drums make excellent outer shells. Look for wire cooling racks from your kitchen to create air gaps, and use spare bolts or screws from your toolbox instead of buying new hardware for your homemade fire pit ideas.
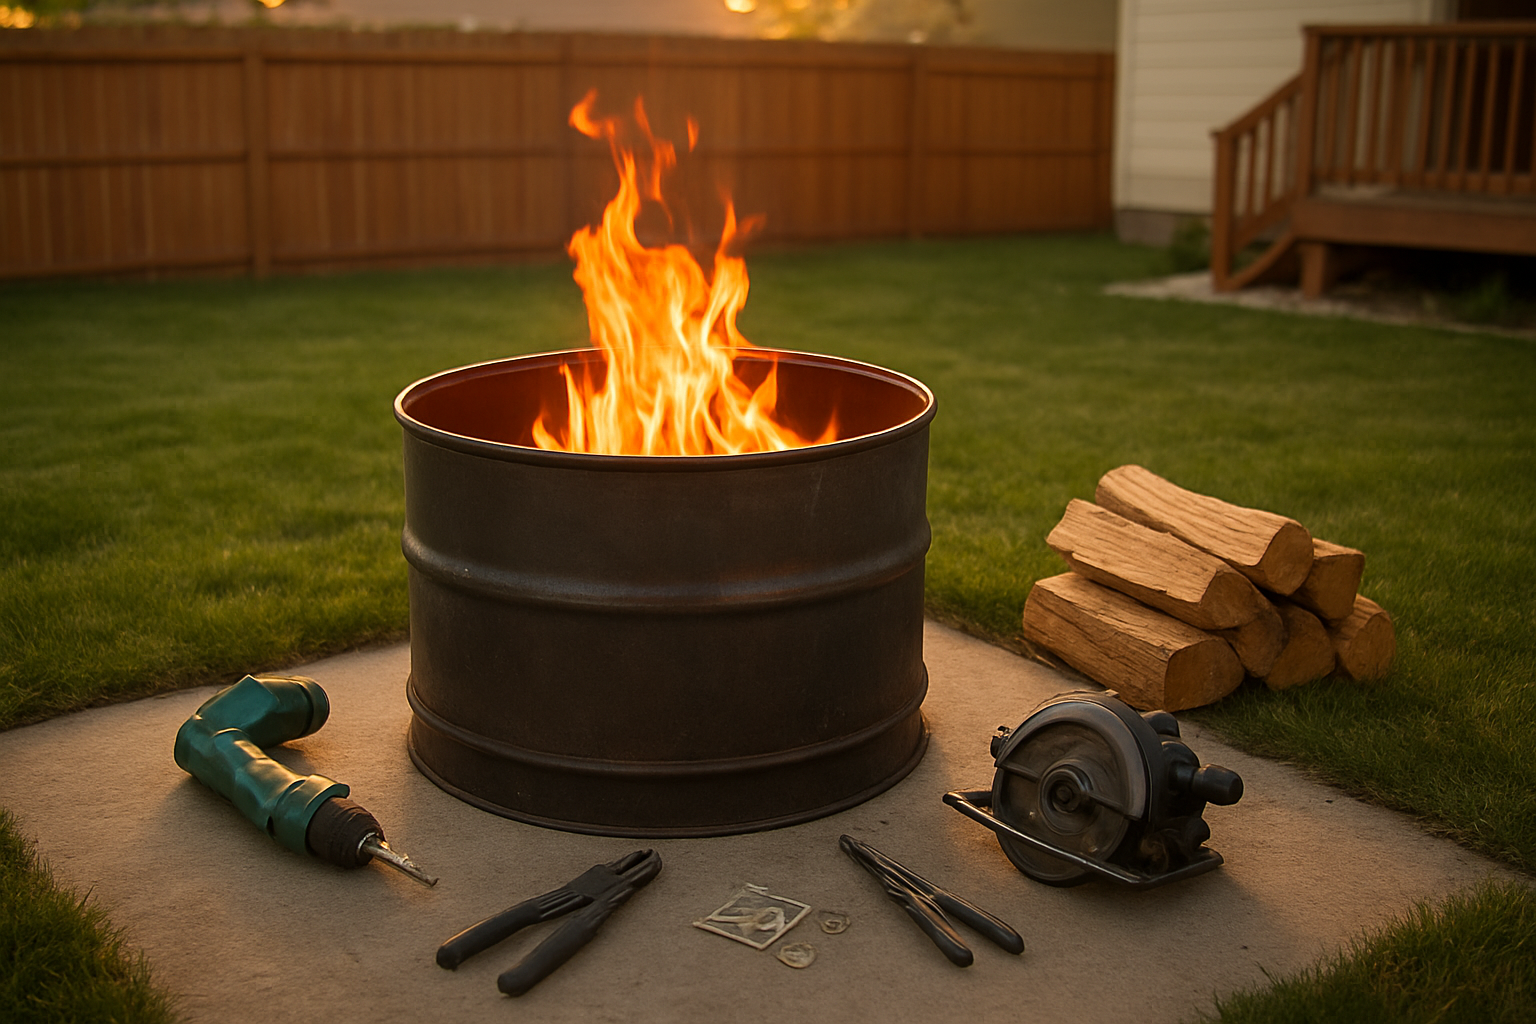
Building your own smokeless fire pit doesn’t have to break the bank or require advanced construction skills. You can create an efficient, clean-burning fire pit using basic materials like steel rings, hardware cloth, and some simple tools – all while staying well under your $50 budget. The key lies in understanding how proper airflow design creates that magical smokeless effect, allowing you to enjoy cozy fires without constantly dodging smoke clouds.
Your DIY smokeless fire pit will give you the same satisfaction as expensive store-bought versions at a fraction of the cost. Start gathering your materials this weekend and follow the straightforward construction steps we’ve outlined. You’ll have a functional fire pit ready for your next backyard gathering, and your wallet will thank you for choosing the smart, budget-friendly route.


