Build Your Dream Pizza Oven: Complete DIY Guide for Beginners

Building your own DIY pizza oven transforms your backyard into the ultimate entertainment space. You’ll create authentic wood-fired pizzas with that perfect crispy crust and smoky flavor that commercial ovens simply can’t match.
This complete guide walks you through every step of outdoor pizza oven construction, from initial planning to your first pizza party. You don’t need professional masonry experience – just enthusiasm and attention to detail.
Who This Guide Is For:
- First-time builders ready to tackle their dream backyard pizza oven project
- Homeowners wanting to add value and functionality to their outdoor space
- DIY enthusiasts looking for a rewarding weekend project that keeps giving back
What You’ll Learn:
We’ll start by helping you choose the right pizza oven plans for your space and budget. You’ll discover the essential tools and materials needed, then dive into creating a solid pizza oven foundation that will last decades. Finally, you’ll master pizza oven dome construction techniques and learn proper chimney installation to ensure perfect airflow every time.


Your homemade pizza oven will become the centerpiece of countless gatherings, delivering restaurant-quality results right in your backyard.
Choose the Perfect Pizza Oven Design for Your Space

Compare wood-fired vs gas-powered oven benefits
Wood-fired pizza ovens deliver authentic smoky flavors and reach higher temperatures, creating that perfect crispy crust with leopard spotting. You’ll love the traditional cooking experience, but expect longer heat-up times and more maintenance. Gas-powered ovens offer convenience with quick startup and precise temperature control, making them perfect for busy families. While they won’t match the smoky taste of wood, they’re cleaner and easier to operate.
Determine ideal size based on family needs
Your family size directly impacts your DIY pizza oven dimensions. A 32-inch diameter oven comfortably serves 4-6 people, cooking 2-3 pizzas simultaneously. Larger families need 36-42 inch ovens for bigger gatherings. Consider your entertaining style too – weekend pizza parties require more cooking space than weeknight dinners. Remember, bigger ovens use more fuel and take longer to heat up.
Evaluate portable vs permanent installation options
Portable pizza ovens give you flexibility to move your outdoor pizza oven around your yard or take it camping. They’re lighter on your budget and don’t require permits or extensive foundation work. Permanent installations become beautiful backyard centerpieces that increase property value. You’ll need proper pizza oven foundation work, but they retain heat longer and handle weather better. Choose portable if you’re renting or want versatility.
Select materials that fit your budget and climate
Fire bricks form your oven’s cooking surface and dome – they’re essential for heat retention and durability. Refractory concrete works for budget builds but won’t last as long. In cold climates, choose materials that handle freeze-thaw cycles well. Clay and sand mixtures cost less but require more maintenance. Stainless steel components resist rust in humid areas. Your material choices affect both upfront costs and long-term pizza oven construction success.
Essential Tools and Materials for Your Build
Gather Basic Construction Tools and Safety Equipment
You’ll need a solid collection of construction tools for your DIY pizza oven project. Start with basic masonry tools: a trowel, spirit level, rubber mallet, and measuring tape. Don’t forget safety gear including work gloves, safety glasses, and a dust mask. A wheelbarrow will save your back when moving heavy materials, while a mixing paddle attachment for your drill makes mortar preparation much easier.
Source High-Quality Refractory Bricks and Insulation
Your pizza oven’s performance depends heavily on using proper refractory bricks that can handle extreme temperatures. Look for fire bricks rated to at least 2000°F – these withstand the intense heat of wood fired pizza oven construction. You’ll also need insulation materials like ceramic fiber blanket or perlite concrete. Avoid regular construction bricks as they’ll crack under high heat, ruining your outdoor pizza oven dreams.
Choose the Right Mortar and Cement Types
Selecting appropriate mortar is critical for your build pizza oven success. Use refractory mortar for joints between fire bricks – regular mortar will fail under high temperatures. For the foundation, standard concrete works fine, but consider adding fiber mesh for extra strength. Fire cement works well for sealing gaps around your chimney installation. Never use regular construction adhesives as they’ll break down when you fire up your homemade pizza oven.
Calculate Exact Quantities to Avoid Costly Mistakes
Proper material calculation prevents expensive trips back to the supplier mid-project. For a standard 36-inch dome, you’ll need approximately 150-200 fire bricks, 5-6 bags of refractory mortar, and 2-3 cubic yards of concrete for the foundation. Create a detailed materials list based on your specific pizza oven plans, then add 10% extra for cuts and mistakes. Measure twice, order once – this approach keeps your backyard pizza oven project on budget and on schedule.
Prepare Your Foundation and Base Structure

Build a sturdy concrete foundation that lasts decades
Your pizza oven foundation needs proper concrete footings at least 4 inches thick, extending 6 inches beyond your planned oven dimensions. Mix concrete with a 3:2:1 ratio of gravel, sand, and Portland cement for maximum strength. Level the surface perfectly using a screed board, then allow 48 hours minimum curing time before starting your base construction. This solid foundation prevents cracking and settling that could damage your entire DIY pizza oven project.
Construct an insulated base for optimal heat retention
Build your insulated base using fire bricks laid flat over a 4-inch layer of vermiculite concrete insulation. Create this insulation mix by combining 6 parts vermiculite, 1 part Portland cement, and water until you achieve a consistency similar to oatmeal. The vermiculite concrete acts as a thermal barrier, keeping heat inside your wood fired pizza oven while protecting your foundation from extreme temperatures. Space fire bricks with minimal gaps using refractory mortar for the cooking surface that will support your oven dome construction.
Master the Art of Dome Construction

Create a Sand Form for Perfect Dome Shape
Building your pizza oven dome starts with creating a precise sand form that acts as your template. Mix damp sand with a small amount of clay to create a firm, moldable base that holds its shape. Start by marking the center point of your foundation and use a string compass to draw a perfect circle matching your desired interior diameter. Build your sand dome by gradually packing the mixture, checking the height regularly with a straightedge to maintain the ideal dome proportions – typically, your dome height should equal half the interior diameter for optimal heat circulation.
Lay Firebricks with Precision for Even Heating
Your firebrick placement determines how evenly your pizza oven dome construction will distribute heat throughout the cooking chamber. Start laying firebricks from the bottom center, working outward in concentric rings around your sand form. Cut bricks as needed using a masonry saw, ensuring tight joints between each piece. Use refractory mortar sparingly between joints – too much mortar creates weak points that crack under high temperatures. Keep checking that each brick follows the dome curve smoothly, as any flat spots or irregularities will create hot or cold zones in your finished oven.
Build the Entrance Arch for Proper Airflow
Creating the perfect entrance arch requires careful attention to both structural integrity and airflow dynamics in your DIY pizza oven. The arch opening should measure approximately 60-65% of your dome’s interior height to maintain proper draw and heat retention. Build a wooden form to support your arch bricks during construction, then carefully lay each brick with refractory mortar. The keystone brick at the top locks everything in place, so take your time positioning it perfectly. Once your arch cures, this entrance will create the ideal draft that pulls fresh air in and pushes exhaust gases up through your chimney system.
Apply Insulation Layers for Maximum Efficiency
Proper insulation transforms your backyard pizza oven from a basic cooking chamber into an efficient heat-retention system. Start with a layer of ceramic fiber blanket directly over your firebrick dome, covering every surface completely. Next, apply a thick layer of insulating vermiculite concrete – mix six parts vermiculite to one part Portland cement with just enough water to bind. This combination creates an insulation barrier that keeps heat inside your cooking chamber while protecting the outer structure. Finish with a weather-resistant outer layer of standard concrete or stucco to protect your insulation from moisture and temperature changes.
Install Chimney and Ventilation Systems

Position chimney for optimal smoke evacuation
You’ll want to place your pizza oven chimney at the front of the dome opening, roughly 63% back from the entrance. This sweet spot creates the perfect draw that pulls smoke away from your cooking area while maintaining proper airflow. Mount your chimney vertically and ensure it extends at least 3 feet above the highest point of your dome to prevent downdrafts that could send smoke back into your cooking space.
Build flue system for consistent temperature control
Your flue system acts as the lungs of your wood fired pizza oven DIY project. Start by constructing a smoke chamber above the dome entrance using firebricks, then connect this to your chimney stack. The flue opening should measure about 60% of your door height – this ratio ensures proper draft without losing too much heat. Install your flue liner with high-temperature mortar, making sure all joints are sealed tight to prevent heat loss and maintain consistent cooking temperatures.
Add dampers for better heat management
Installing a damper gives you complete control over your pizza oven’s airflow and heat retention. Position a sliding plate damper inside your chimney, about 18 inches above the flue entrance. This allows you to restrict airflow when you want to hold heat for baking bread or slow-cooking dishes. You can also add a butterfly damper at the base of your chimney for fine-tuning. These dampers transform your backyard pizza oven from a simple fire box into a precision cooking instrument that maintains steady temperatures for hours.
Finish and Cure Your Pizza Oven Properly

Apply Weather-Resistant Exterior Finishes
Protect your DIY pizza oven investment with quality exterior finishes that withstand the elements. Start by applying a base coat of heat-resistant render, followed by your chosen finish like stucco, ceramic tiles, or natural stone. These materials not only shield your oven from rain and temperature fluctuations but also enhance its visual appeal in your backyard setting.
Follow Proper Curing Process to Prevent Cracking
Your homemade pizza oven needs gradual heat conditioning to prevent structural damage. Begin with small, low-temperature fires (200-250°F) for 2-3 hours daily over the first week. Gradually increase temperatures by 50°F increments each day until you reach 700°F. This methodical curing process allows moisture to escape slowly and prevents thermal shock that causes cracks in your dome construction.
Test Temperature Zones for Perfect Pizza Cooking
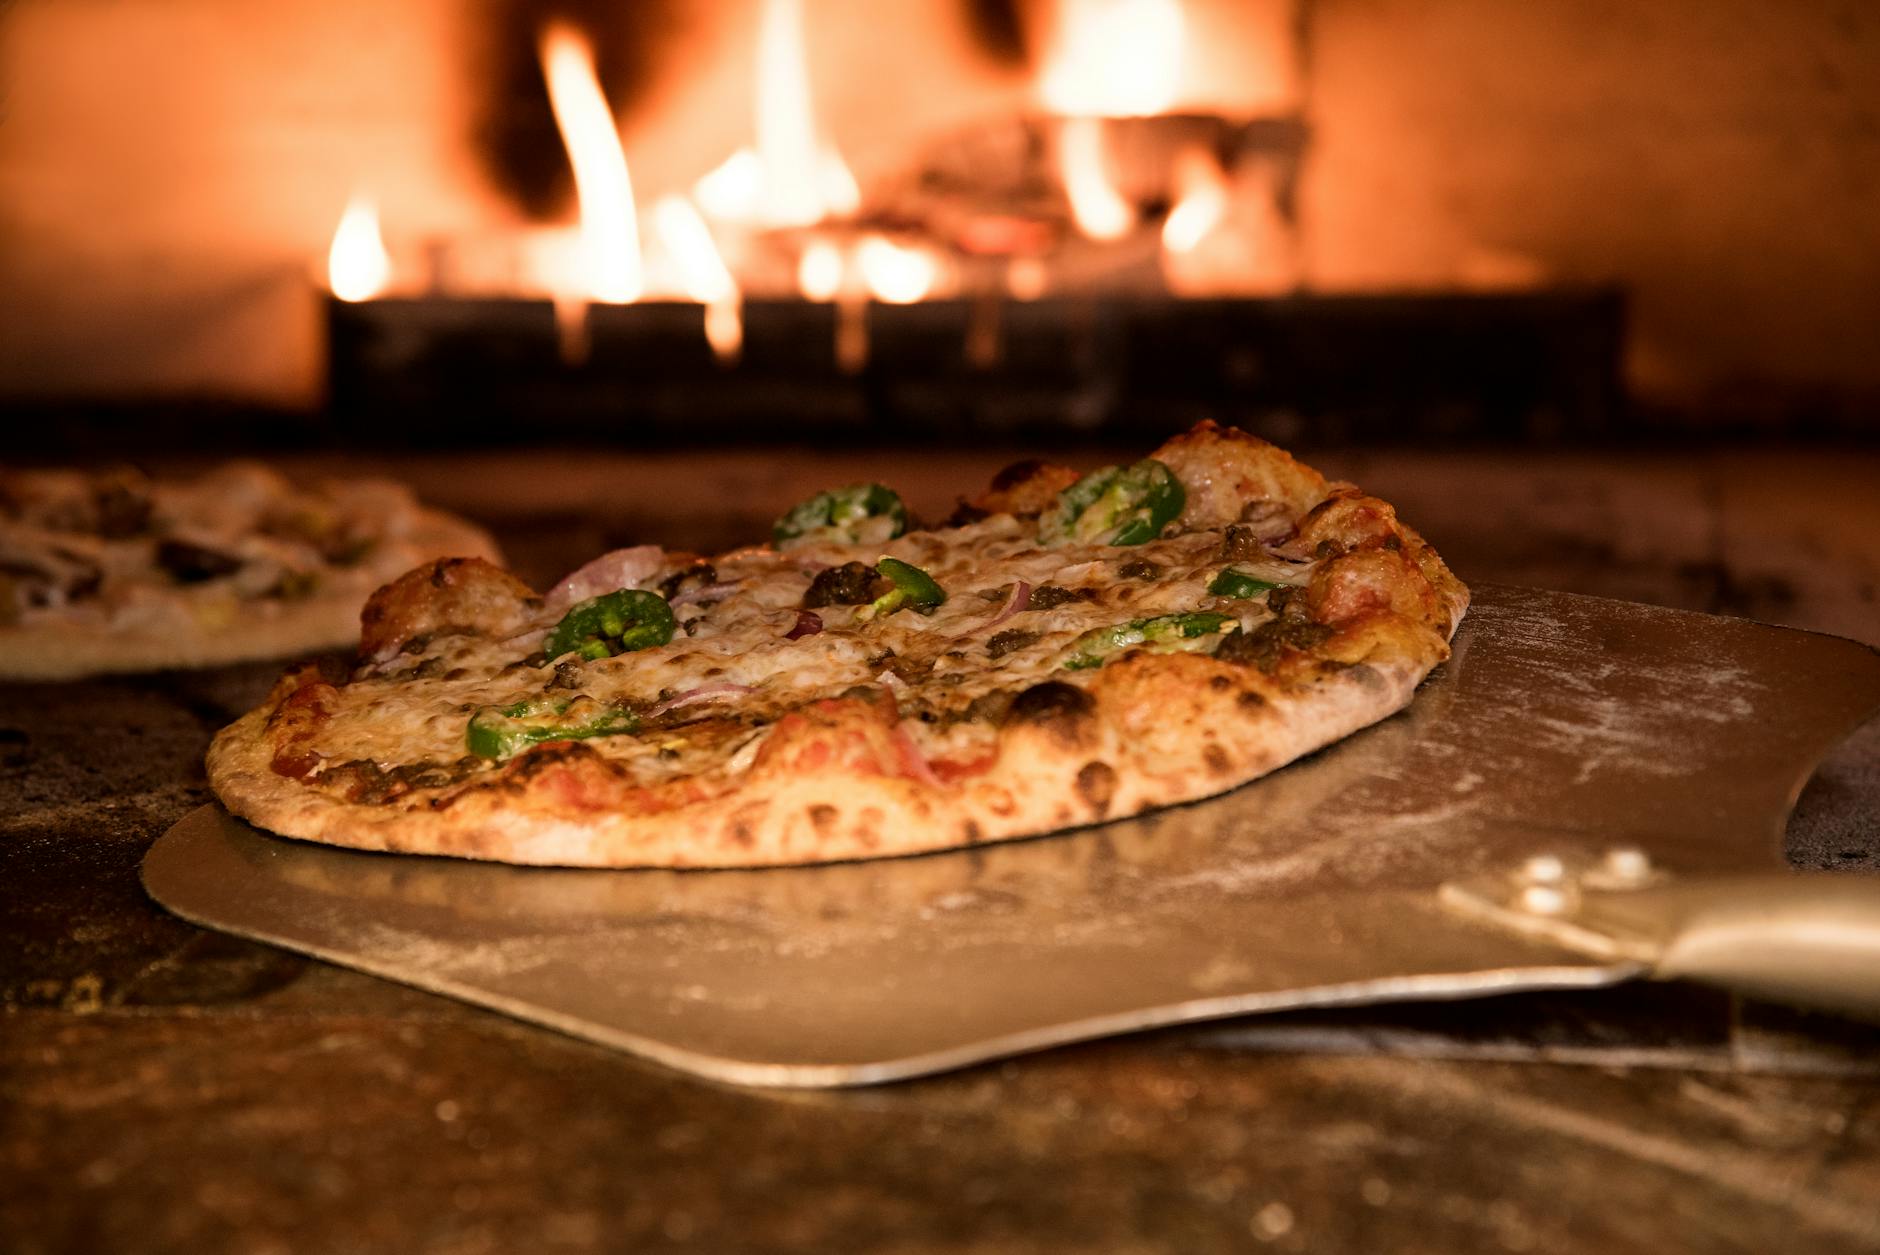
Understanding your wood fired pizza oven’s heat distribution is crucial for consistent results. Use an infrared thermometer to map different temperature zones across the cooking floor. The hottest area near the fire should reach 900°F for Neapolitan-style pizzas, while the cooler zones work perfectly for bread, roasts, and slower-cooking dishes. Document these zones for future reference.
Add Final Touches and Decorative Elements
Transform your outdoor pizza oven construction into a stunning centerpiece with thoughtful finishing touches. Install LED lighting around the base, add a wooden work surface for prep space, and consider building storage compartments for tools and wood. Decorative elements like mosaic tiles, custom nameplates, or surrounding landscaping will make your backyard pizza oven a true focal point for entertaining guests.
Your homemade pizza oven is now ready to transform your backyard into the neighborhood’s favorite gathering spot. You’ve learned how to select the right design for your space, gathered all the necessary tools and materials, and mastered everything from laying a solid foundation to constructing that perfect dome shape. The chimney and ventilation work you’ve completed will ensure proper airflow, while following the curing process guarantees your oven will last for years to come.
Fire up your new creation and start experimenting with different pizza recipes, bread baking, and even roasted vegetables. The investment of time and effort you’ve put into this project will pay off with countless memorable meals and proud moments showing off your handiwork. Your DIY pizza oven isn’t just a cooking appliance – it’s the centerpiece of future family gatherings and weekend celebrations that will create lasting memories for years ahead.


