Small Budget, Big Impact: 10 Grassless Dog Yard Ideas!

I gave up on grass after three years of fighting a losing battle against my two German Shepherds. Yellow dead spots, muddy paw prints tracked through my house after every rain, and constant reseeding that never took. My backyard looked like a dirt lot with patches of sad grass clinging to life.
I ripped out the grass last summer and converted my 800 square foot yard to a mix of gravel, mulch, and pavers for $520 total. No more mud, no more dead spots, and my dogs actually prefer the new surface. My cleaning time dropped from 30 minutes daily to maybe 5 minutes, and I haven’t watered, fertilized, or mowed in eight months.
The transformation shocked my neighbors who asked how much I spent on professional landscaping. They assumed it cost thousands and required contractors. I did everything myself over two weekends using materials from Home Depot and basic tools I already owned.
Here are 10 grassless yard ideas that work for dog owners on actual budgets. You’ll get drainage solutions that prevent puddles and mud, and maintenance reality for each option. Whether you have one small dog or multiple large breeds destroying your lawn, one of these setups will save your sanity and your yard.


Gravel and Stone Options for Durability
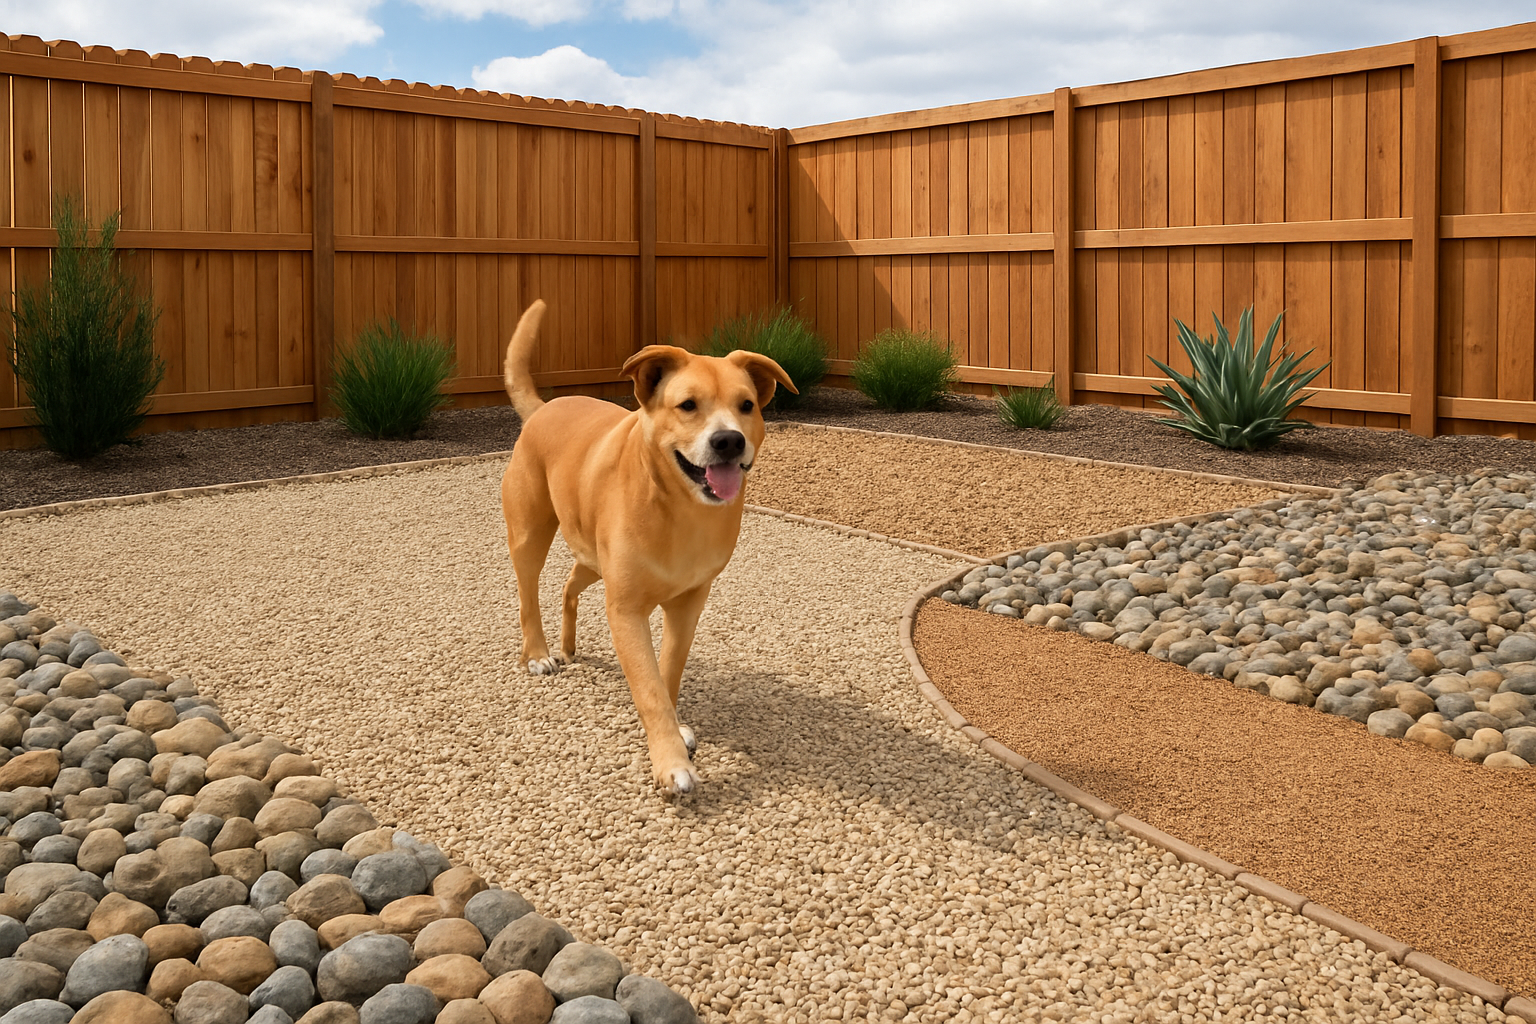
Choosing the Right Stone Size
Your choice of gravel size makes all the difference in creating a functional dog yard. Pea gravel (3/8-inch) works best for most dogs since it’s gentle on paws while providing excellent drainage. Avoid crushed rock or jagged stones that can hurt your pet’s feet during play.
Installation Tips for Long-lasting Results
You’ll want to excavate 2-3 inches deep and lay landscape fabric before adding your gravel. This prevents weeds from sprouting through while maintaining proper drainage. Compact the stones lightly with a rake, then add a thin layer of sand between larger stones to create a stable, comfortable surface your dog will love walking on.
Sand and Decomposed Granite Solutions

Benefits of Sand as Ground Cover
Sand creates an excellent dog-friendly surface that drains well and stays cool under your pup’s paws. You can install it quickly by leveling the ground, adding landscape fabric, and spreading a 2-3 inch layer of coarse sand. Your dogs will love the soft texture, and you’ll appreciate how easy it is to rake smooth after playtime.
Decomposed Granite for Long-Term Durability
Decomposed granite offers superior durability compared to regular sand while maintaining natural drainage properties. You’ll want to compact it properly after installation to prevent shifting, creating a stable surface that handles heavy dog traffic. This budget-friendly option requires minimal maintenance and naturally suppresses weeds, making your yard management effortless year-round.
Mulch and Wood Chips for Natural Appeal
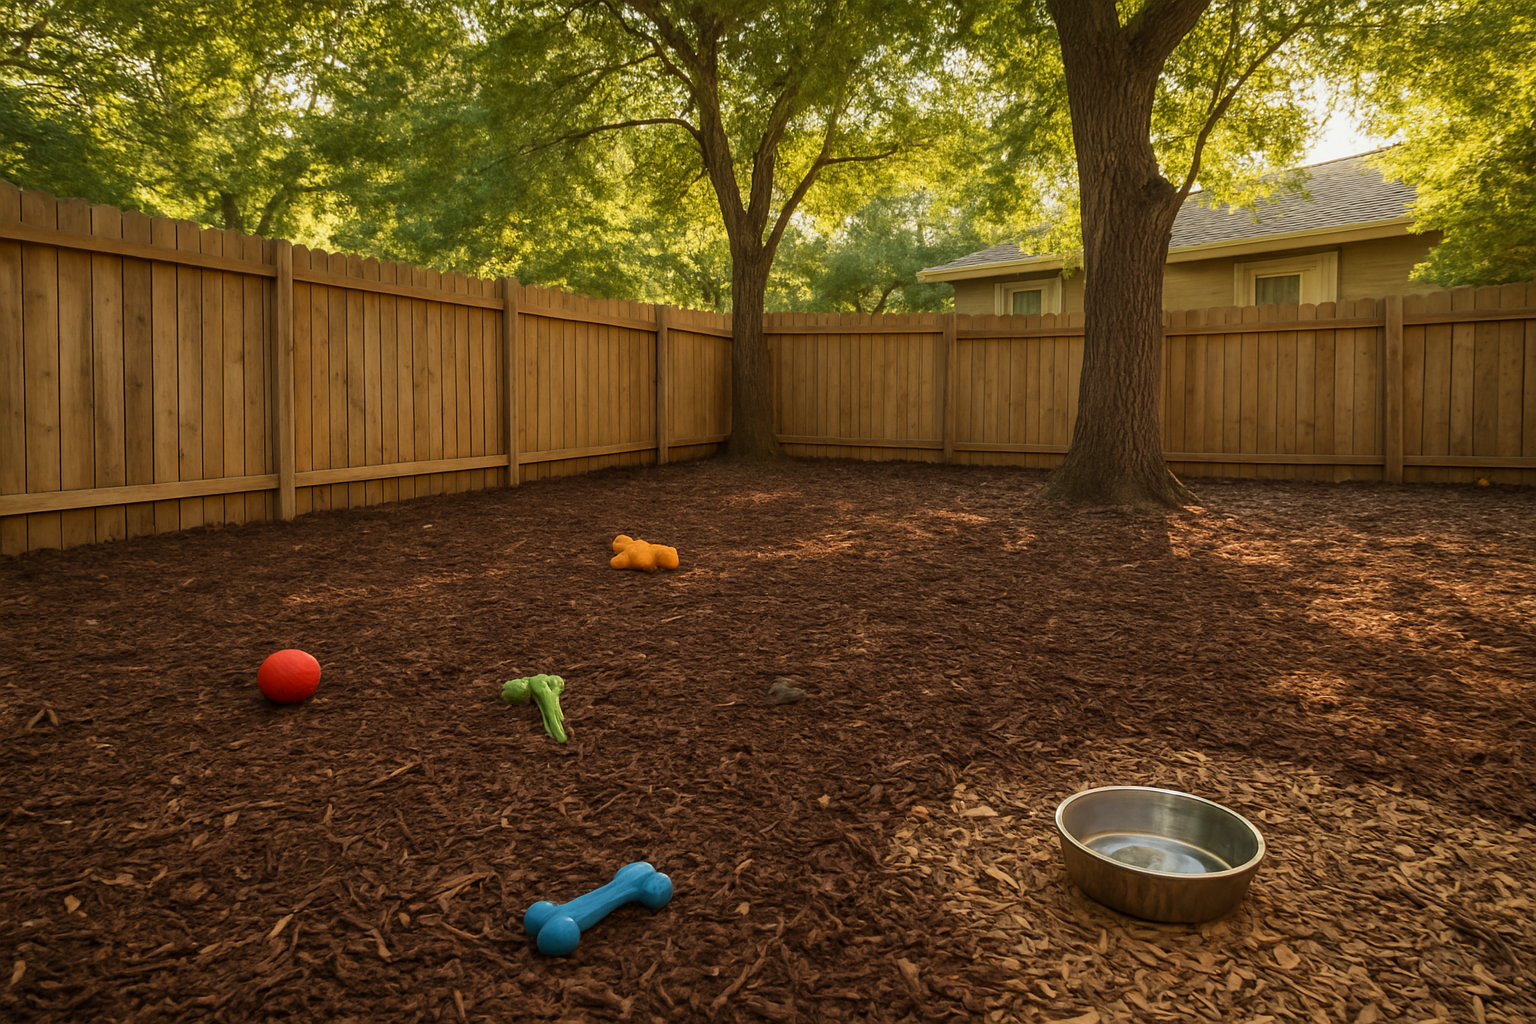
Choosing the Right Type of Mulch
Wood chips and mulch create a soft, natural surface that’s easy on your dog’s paws while adding visual warmth to your yard. You’ll want to select cedar or pine chips since they naturally repel insects and resist decay better than other wood types.
Installation and Maintenance Tips
Spread a 2-3 inch layer over landscape fabric to prevent weeds and ensure proper drainage. You’ll need to refresh the mulch annually as it decomposes, but this actually benefits your soil by adding organic matter over time.
Paver Patios Using Affordable Materials
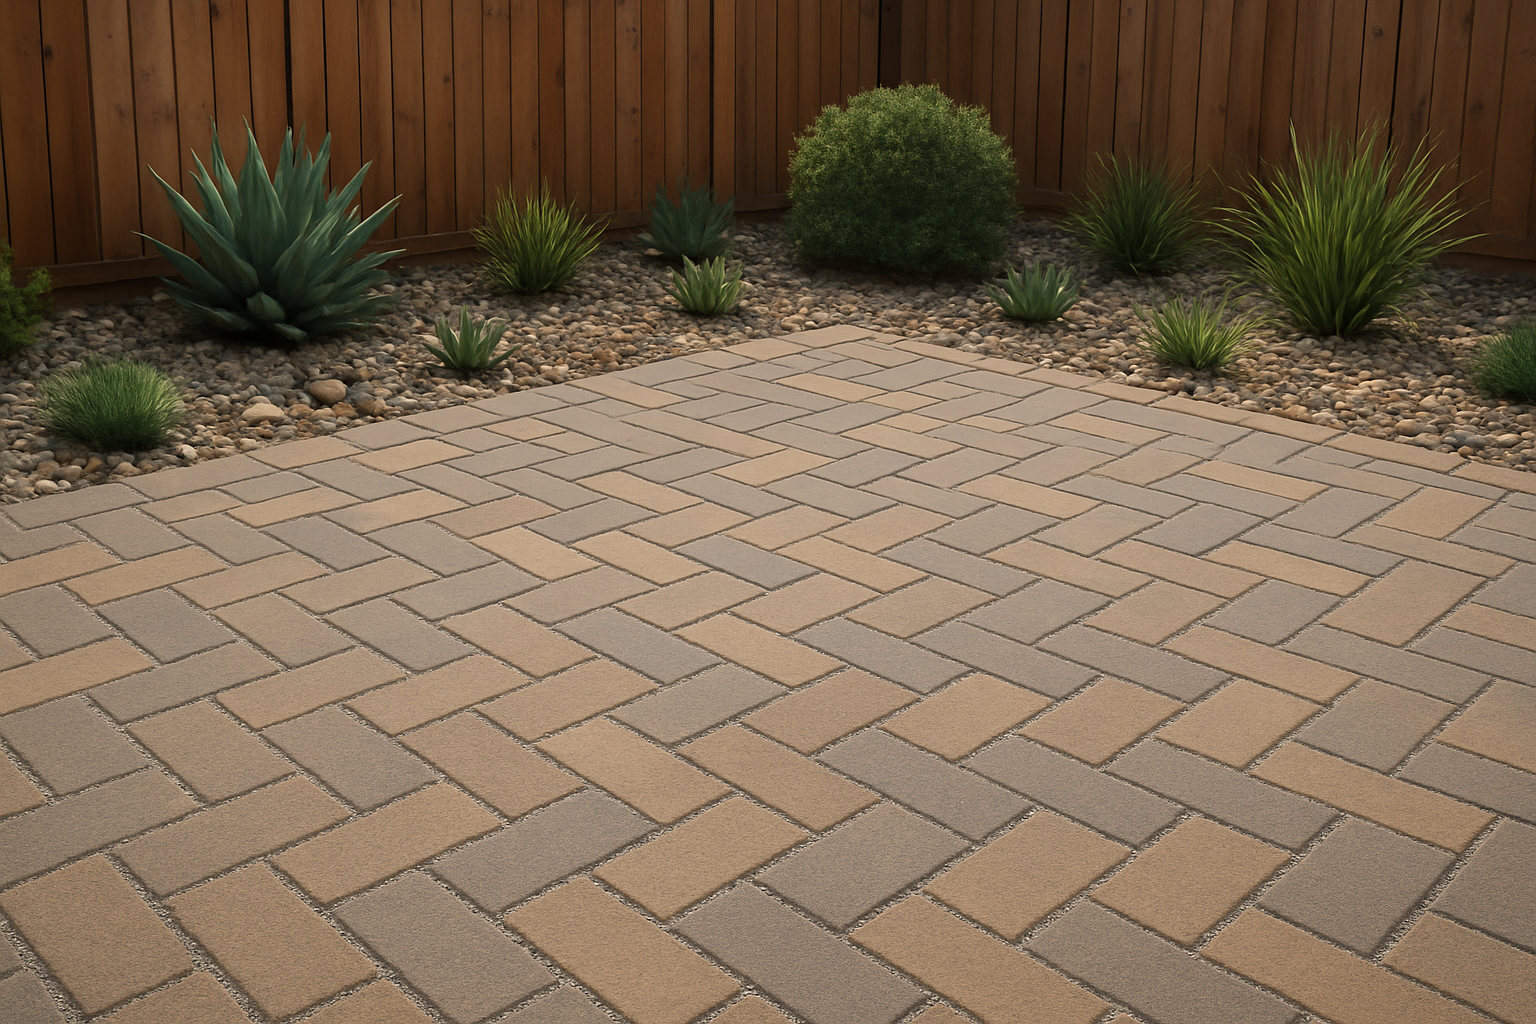
Now that we’ve covered natural ground cover options, concrete pavers present an excellent solution for creating durable dog pathways in your yard. You’ll find that concrete pavers can handle lots of use from your pets while maintaining their structural integrity over time. Their simple cleaning process makes maintenance effortless, and they won’t hold onto unpleasant smells that can accumulate in other materials.
With this in mind, you can customize your pet’s play area using the variety of shapes and colors available in concrete pavers. This versatility allows you to design pathways that complement your existing landscape while providing a functional surface that withstands heavy foot traffic from your dogs.
Concrete Pad Installation Made Simple
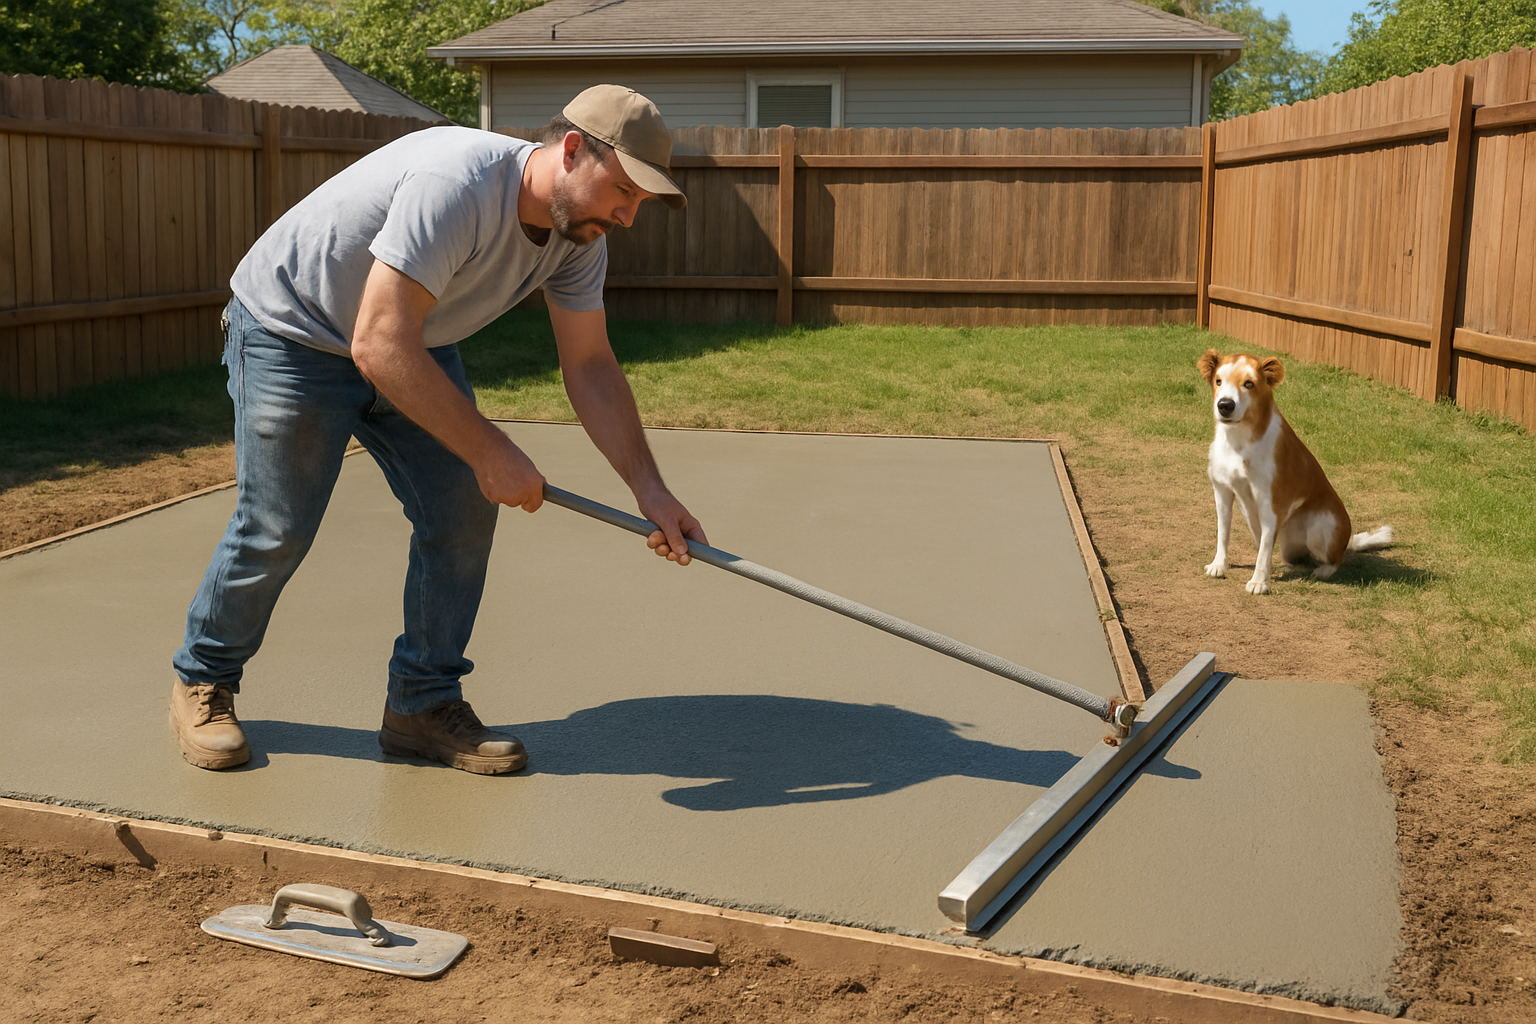
Budget-Friendly Concrete Pour Options
You can create a durable concrete pad for your dog yard without breaking the bank by using bagged concrete mix instead of hiring a professional crew. Start by marking your desired area, excavating 4-6 inches deep, and laying a gravel base for proper drainage. Mix the concrete according to package directions and pour in sections for easier management.
Essential Tools and Preparation Steps
Your basic toolkit needs include a shovel, rake, level, wheelbarrow, and float for smoothing. Before pouring, compact your gravel base thoroughly and dampen it slightly to prevent moisture absorption from the fresh concrete. Work in temperatures between 50-80°F for optimal curing, and keep the surface moist for several days after installation to achieve maximum strength and prevent cracking.
Stepping Stone Pathways for Easy Navigation
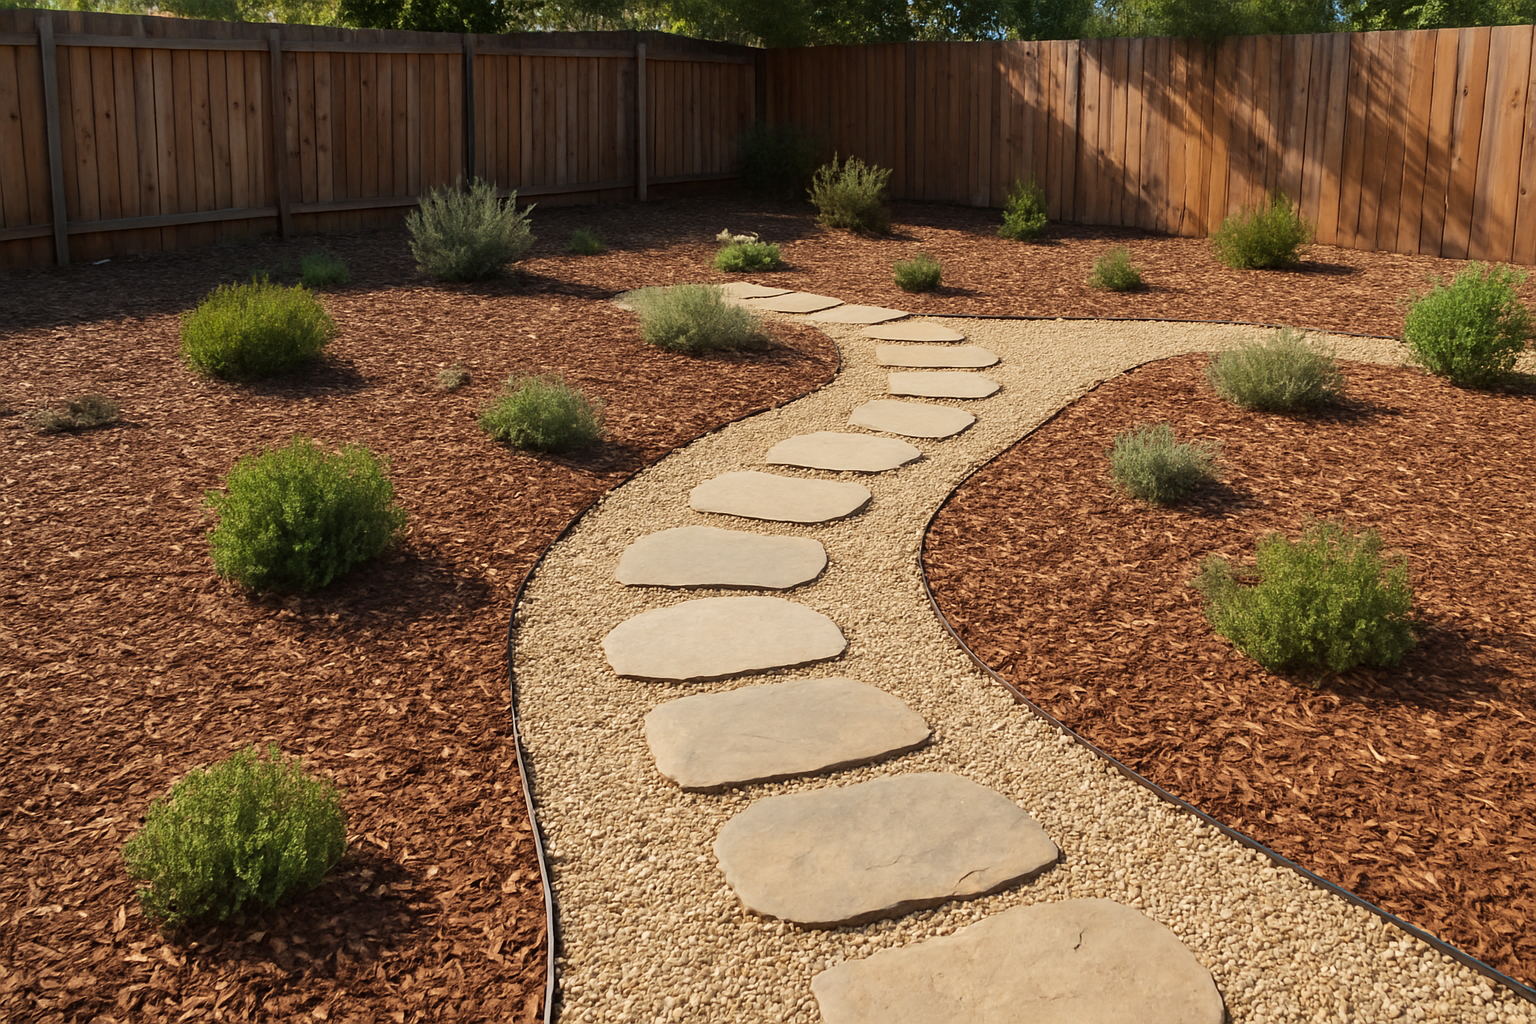
Affordable Stone Selection and Spacing
You can create beautiful pathways using budget-friendly flagstone, concrete pavers, or natural river rocks from your local home improvement store. Space your stepping stones 18-24 inches apart to match your natural stride, and dig each stone slightly into the ground for stability. This prevents wobbling and creates a professional look without expensive installation costs.
Installation Tips for Long-lasting Results
Place a thin layer of sand underneath each stone to prevent settling and improve drainage around your dog’s play areas. You’ll want to edge your pathway with small decorative rocks or mulch to define the space and prevent grass from creeping back in. This simple technique keeps maintenance low while directing foot traffic away from muddy spots.
Hardy Ground Cover Plants That Withstand Traffic
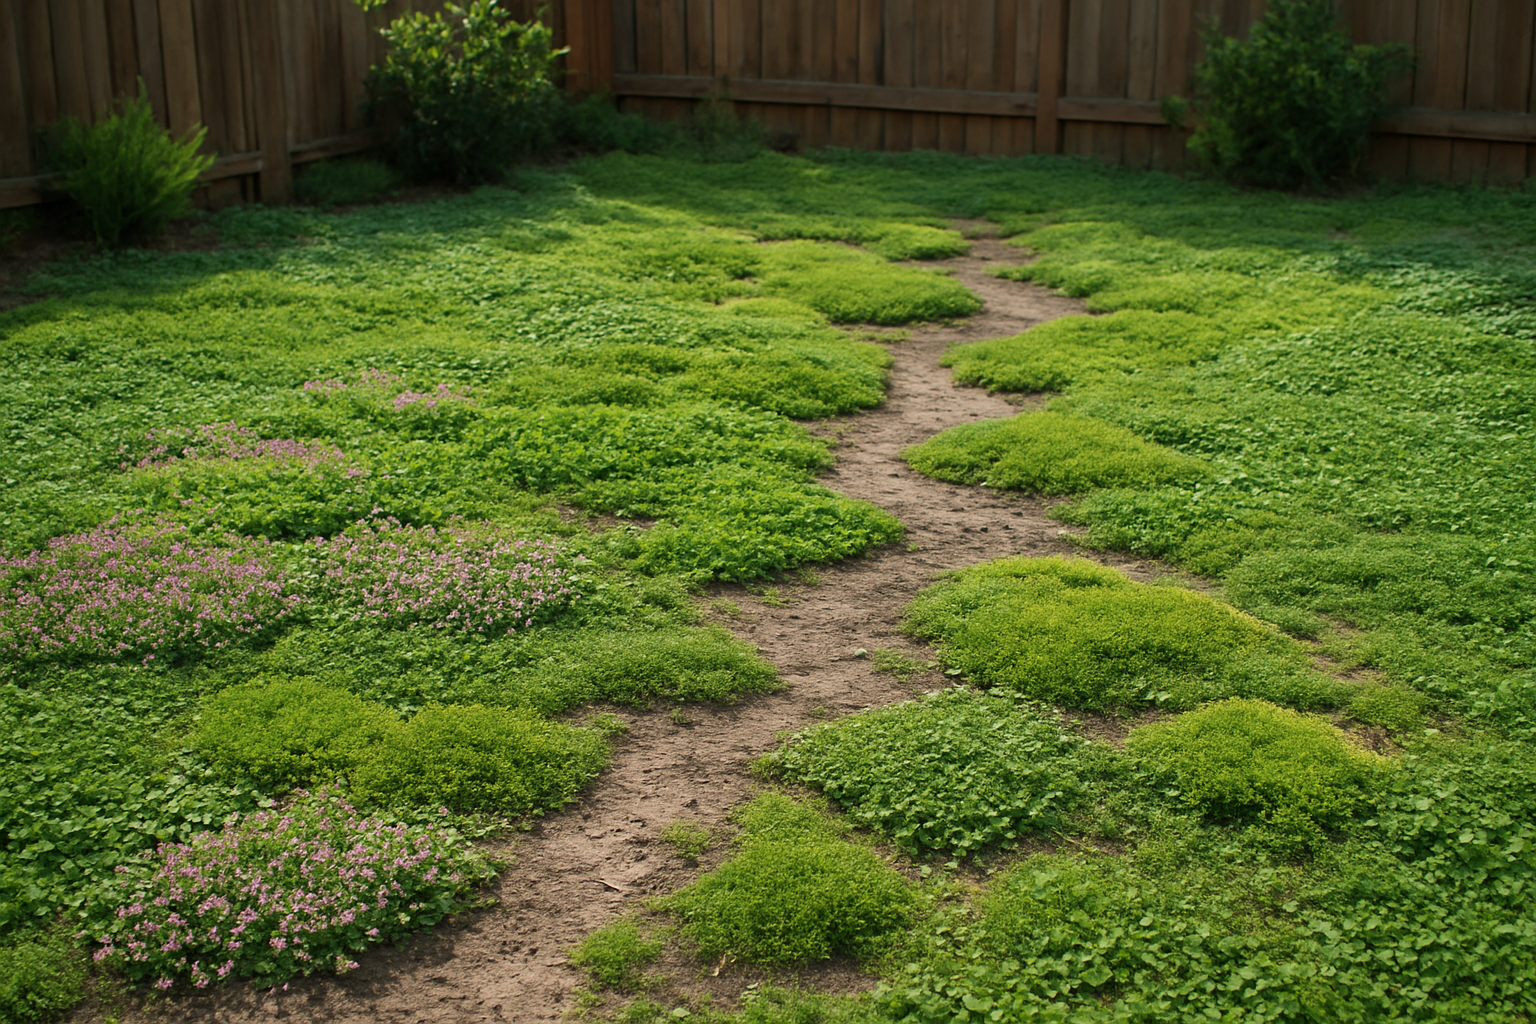
Best Plant Options for High-Traffic Areas
When choosing plants that can handle your dog’s daily activities, focus on tough, low-growing varieties that bounce back quickly from trampling. Creeping thyme, buffalo grass, and clover create dense carpets that withstand paws while staying green. These plants root deeply and spread naturally, filling in bare spots where your dog loves to run and play.
Your best results come from mixing several hardy species together rather than relying on just one type. Try combining moss, wild strawberry, and ajuga for a diverse ground cover that handles different soil conditions and traffic patterns. Plant these options in spring or fall when they’ll establish strong root systems before facing summer heat or winter cold.
Raised Garden Beds to Protect Landscaping
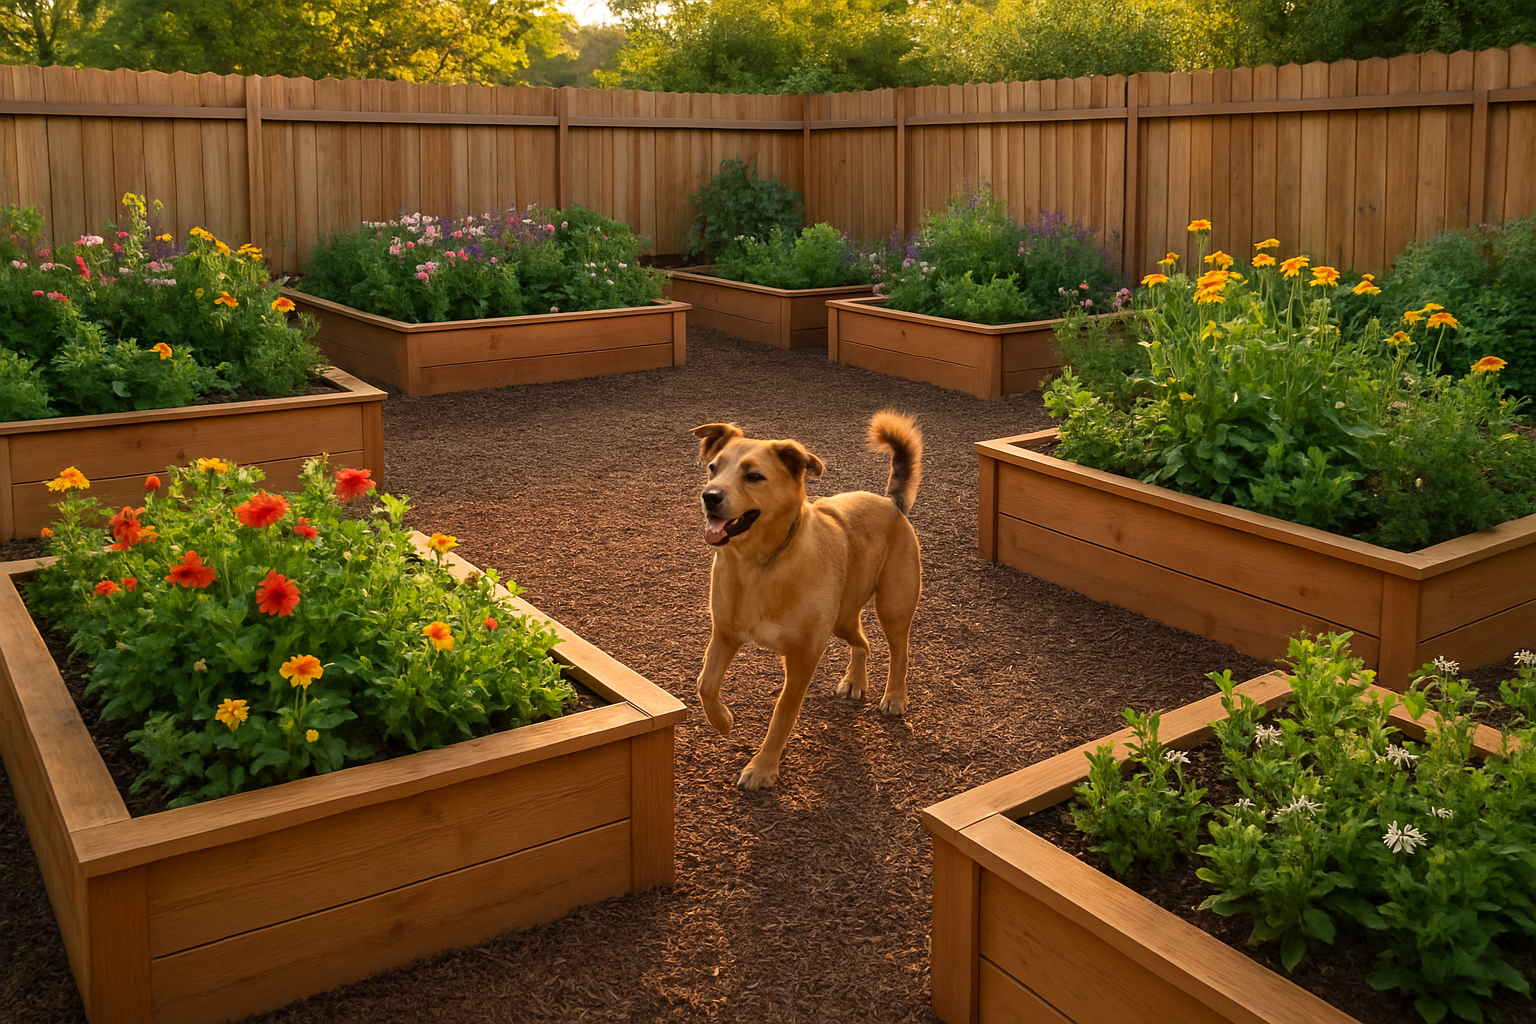
Creating Strategic Garden Boundaries
You can transform your dog yard while protecting your precious plants by installing raised garden beds along your property’s perimeter. These elevated planters create natural barriers that keep your furry friend away from delicate flowers and vegetables while adding visual interest to your landscape. Build them using affordable materials like reclaimed wood, concrete blocks, or even repurposed pallets.
Choosing Dog-Safe Plants and Materials
Your raised beds work best when you fill them with sturdy, non-toxic plants that can handle occasional canine curiosity. Consider hardy perennials like lavender, rosemary, or ornamental grasses that bounce back from minor damage. Make sure your bed height reaches at least 12-18 inches to discourage most dogs from jumping in, and choose materials that won’t splinter or harm paws during playful moments.
French Drain Solutions for Soggy Areas
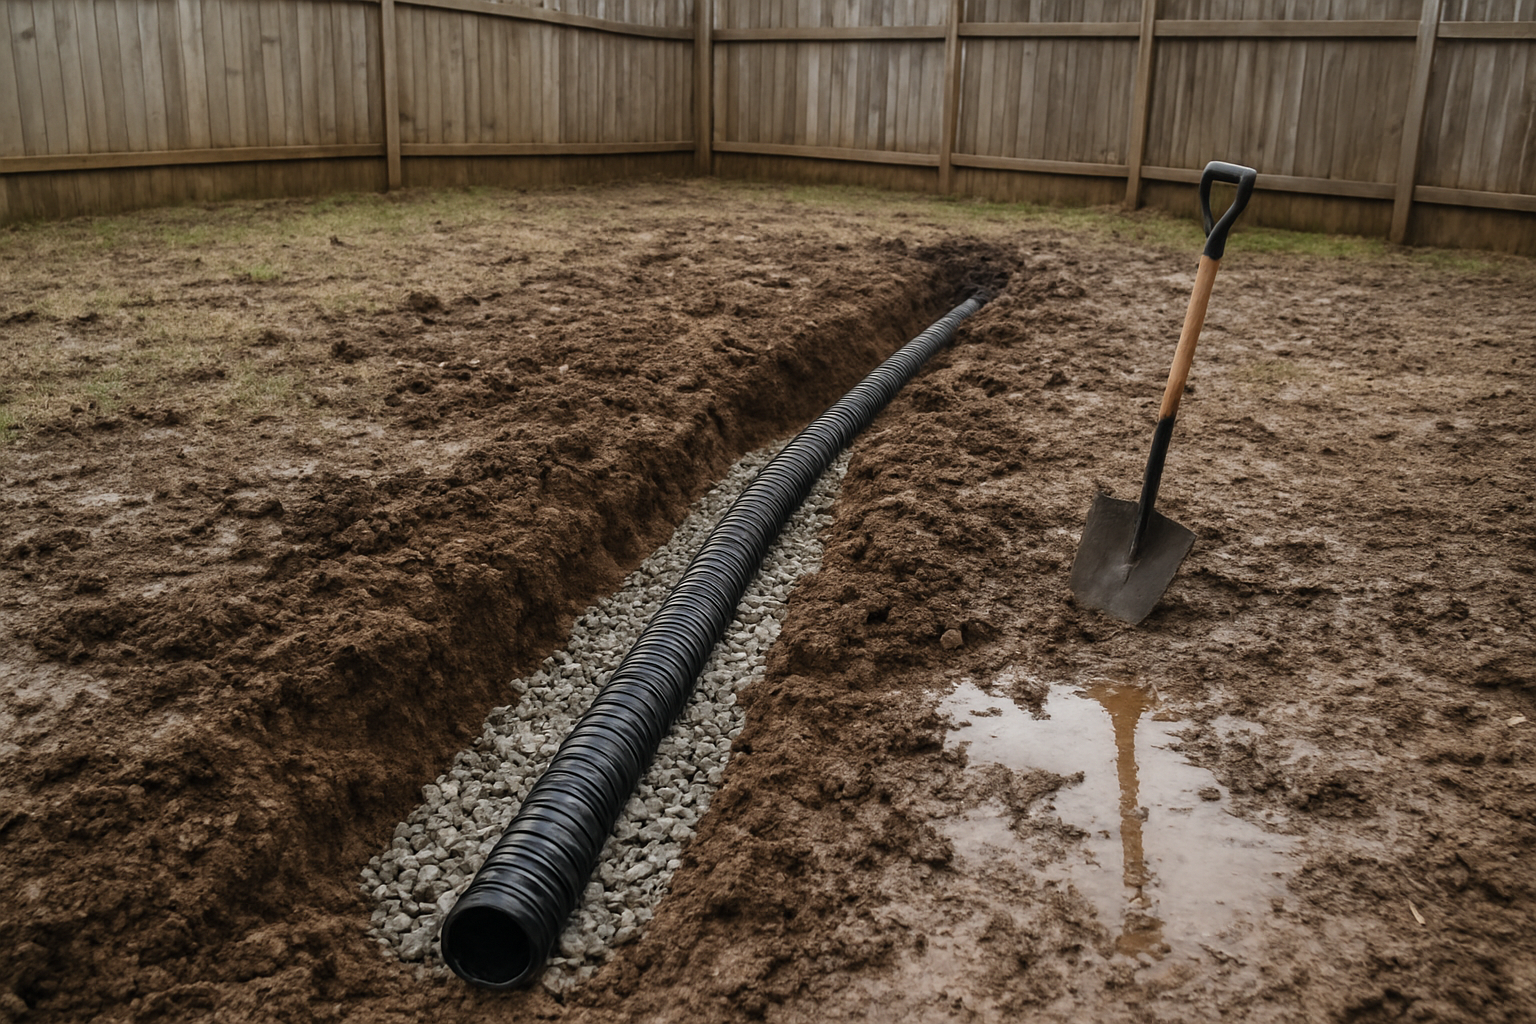
Installing a Basic French Drain System
You can tackle persistent water problems in your dog yard with a simple French drain installation. Start by digging a trench about 12 inches deep along the wet area, sloping it toward your desired drainage point. Fill the trench with graded gravel and wrap a perforated pipe in landscape fabric before placing it inside.
Maintenance and Cost Considerations
Your French drain will need occasional cleaning to remove debris that clogs the gravel. Budget around $3-5 per linear foot for materials, making this an affordable solution for most yards. Regular inspection after heavy rains helps you spot potential issues early and keeps your drainage system working effectively for years.
Rain Garden Design for Natural Water Control
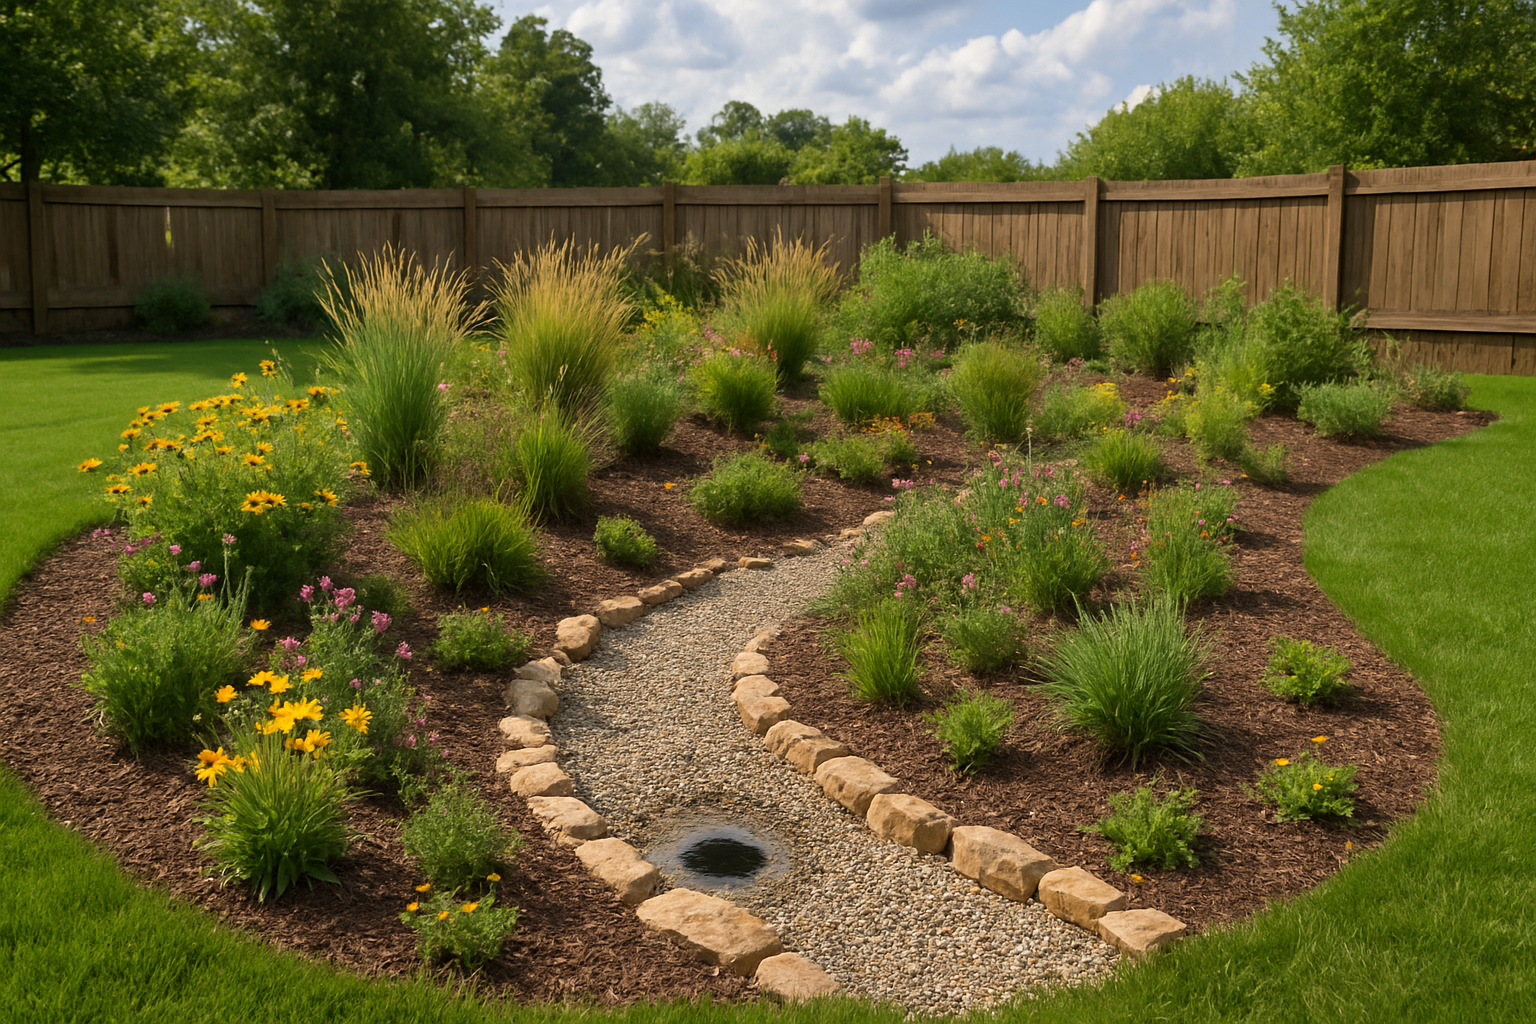
Creating Your Rain Garden Layout
You can transform your yard’s drainage problems into a beautiful feature by designing a rain garden that captures runoff from your roof and hardscaped areas. Position your rain garden in the lowest part of your yard or create a shallow depression where water naturally flows. Choose native plants like sedges, native irises, and swamp milkweed that thrive in wet conditions while filtering pollutants from stormwater.
Plant Selection and Maintenance
Your rain garden works best with a three-zone planting system: deep-rooted plants in the center where water pools, moisture-loving perennials in the middle zone, and drought-tolerant natives on the edges. This design handles both flooding and dry periods while providing year-round interest for your dog yard.


