Outdoor Rock Dog Potty Area (5×8 Layout With Underground Drain Guide)

Creating an outdoor rock dog potty area with underground drainage gives your furry friend a dedicated bathroom spot that’s clean, hygienic, and easy to manage. This guide is perfect for dog owners who want a permanent outdoor solution that eliminates muddy paws and soggy grass while keeping odors under control.
Your 5×8 rock dog potty area will transform a small section of your yard into a functional space that works year-round. We’ll walk you through planning your layout to maximize drainage and accessibility, then show you how to install the underground drainage system that makes this setup so effective. You’ll also learn the best techniques for surface preparation and rock installation, plus simple maintenance tips that will keep your dog’s outdoor bathroom fresh and functional for years to come.
Planning Your 5×8 Rock Dog Potty Area
Choosing the optimal location for drainage and accessibility
Pick a spot with natural slope to help water flow away from your house and foundation. You’ll want easy access for cleaning and maintenance, but far enough from entertaining areas to avoid odors. Avoid low-lying spots where water pools after rain. Check for underground utilities before digging by calling 811. Consider your dog’s bathroom habits – some prefer privacy while others like open spaces. Stay at least 10 feet from wells, septic systems, or property lines to prevent drainage issues with neighbors.
You Might Also Love These Ideas


Measuring and marking your 5×8 space accurately
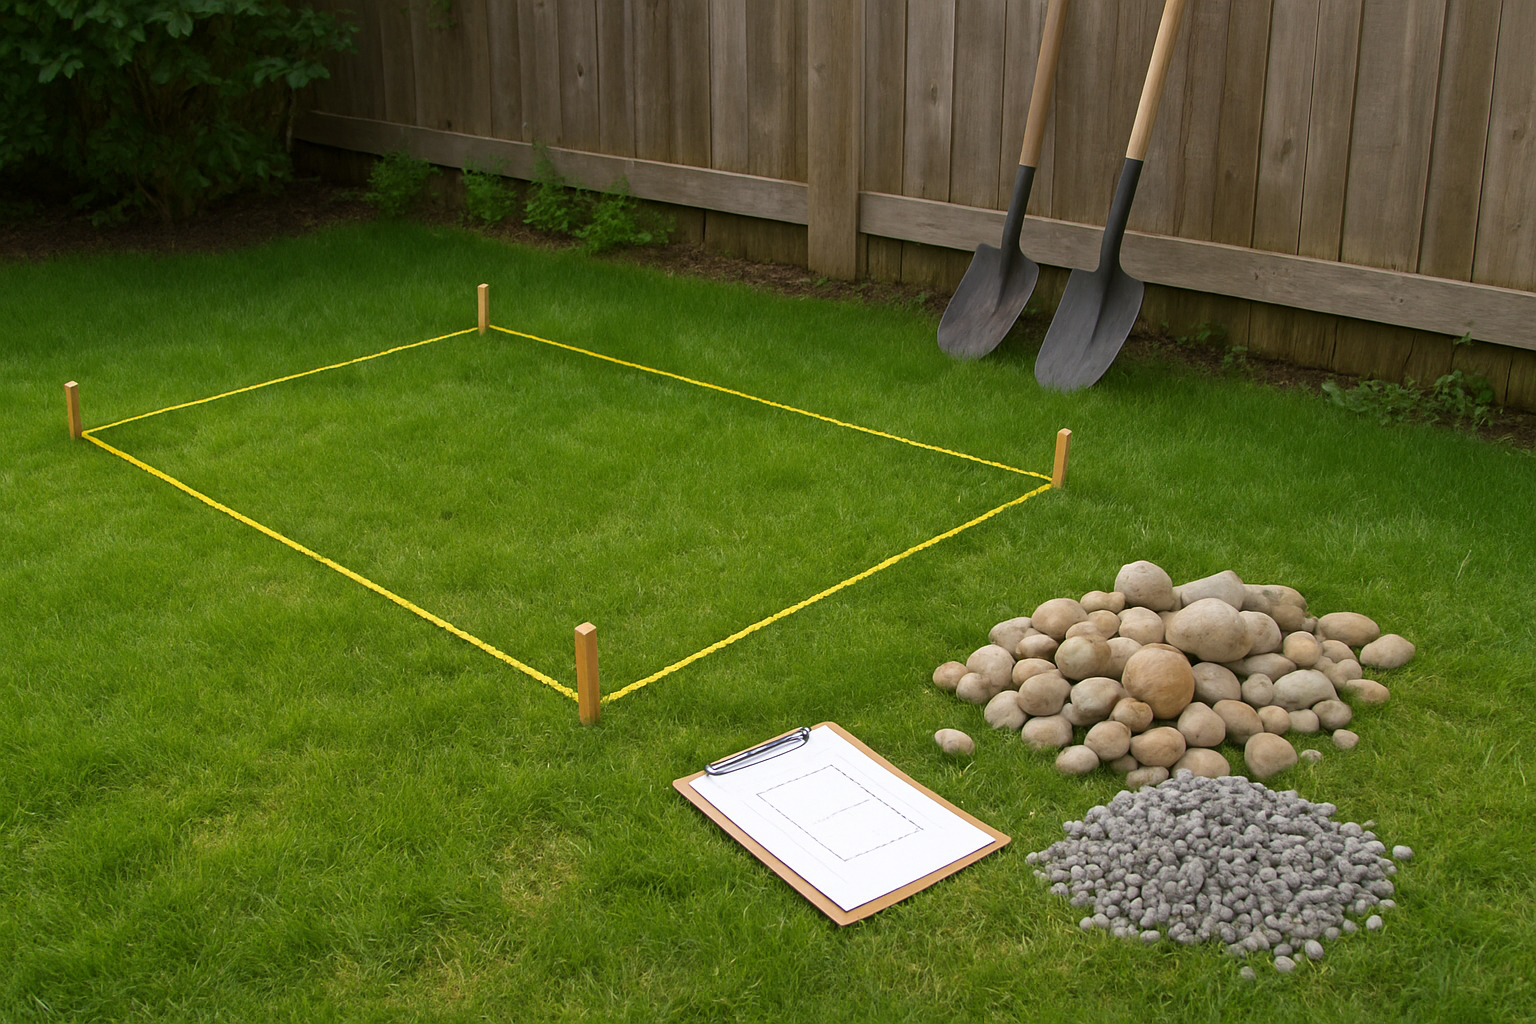
Use spray paint or stakes with string to mark your exact 5×8 rectangle. Double-check measurements with a tape measure – you want 40 square feet total. Mark the corners first, then connect with straight lines. Check that corners are square using the 3-4-5 triangle method: measure 3 feet along one side, 4 feet along the adjacent side, and the diagonal should be exactly 5 feet. Add an extra 6 inches on all sides for digging room and border materials.
Selecting the right rock materials for durability and drainage
Choose pea gravel or decomposed granite for the surface layer – they’re comfortable for dog paws and drain well. Avoid sharp rocks that could hurt your pet’s feet. For the base layer, use larger drainage rock like 3/4-inch crushed stone. Skip smooth river rocks since they don’t pack well and can shift around. Look for locally sourced materials to save on delivery costs. Angular rocks interlock better than round ones, creating a more stable surface that won’t scatter when your dog digs or plays.
Calculating material quantities and costs
You’ll need about 2 cubic yards of base rock and 1 cubic yard of surface material for proper depth. Base layer should be 4 inches deep, surface layer 2 inches. Add 10% extra for settling and future touch-ups. Budget $150-300 for materials depending on rock type and local prices. Include costs for landscape fabric, edging materials, and drainage pipe. Delivery fees can add $50-100 to your total. Get quotes from multiple suppliers since prices vary widely between garden centers, quarries, and home improvement stores.
Underground Drainage System Installation
Excavating the proper depth for effective water flow
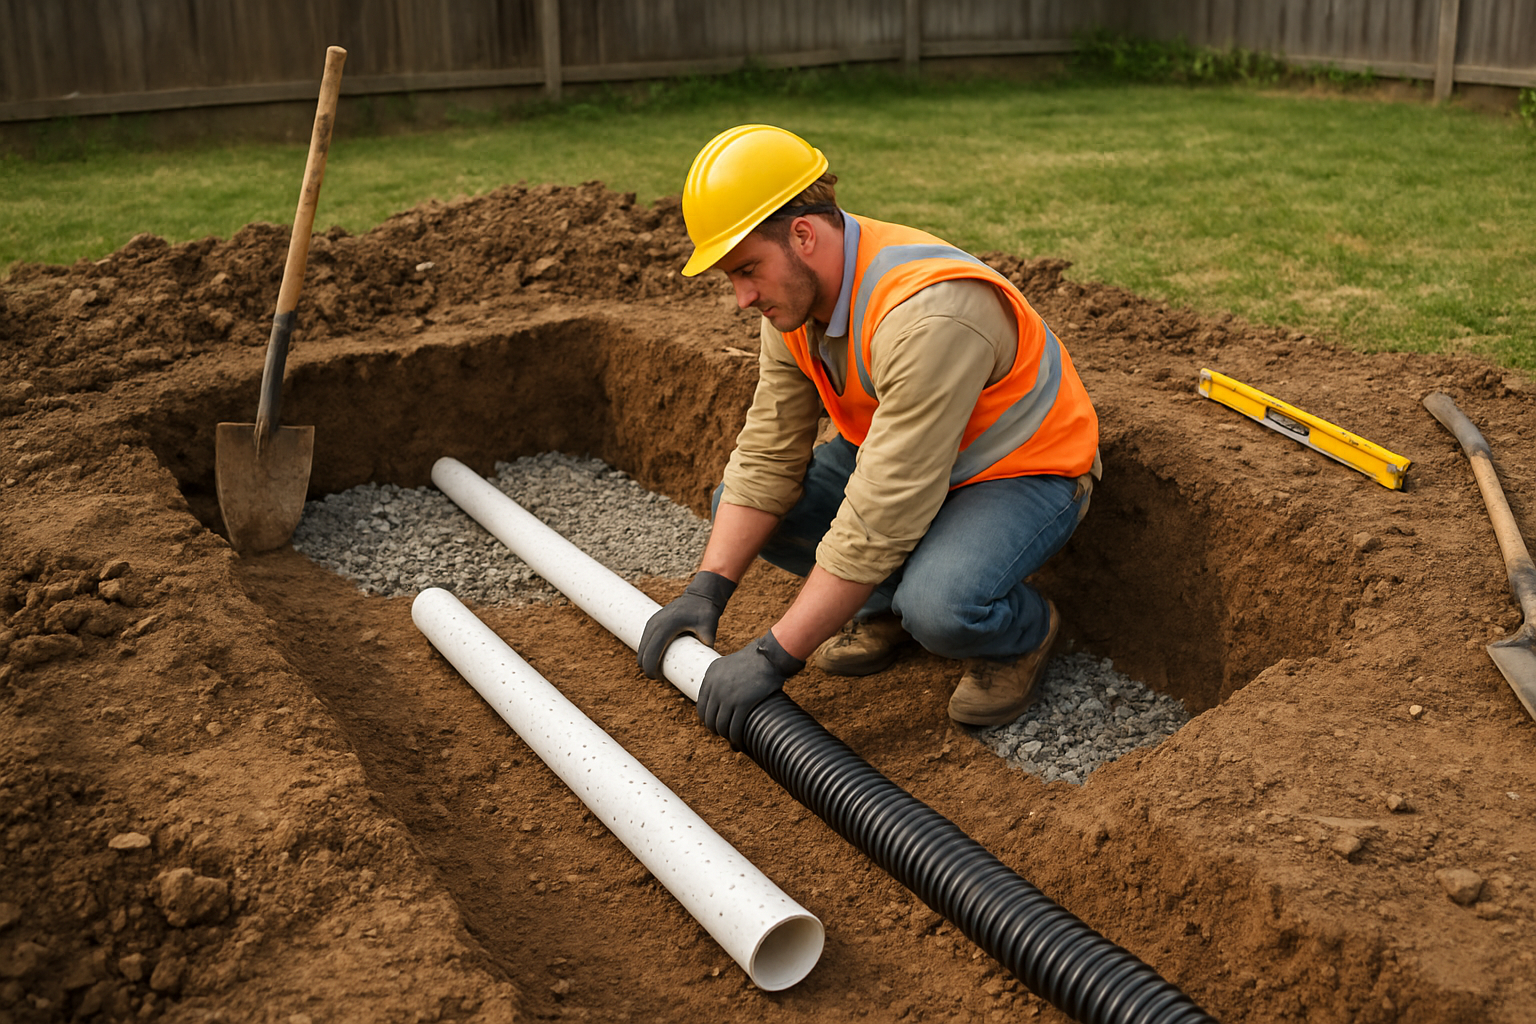
You’ll need to dig approximately 18-24 inches deep across your entire 5×8 area to create proper drainage foundation. Start by marking your boundaries with spray paint, then remove all existing grass and topsoil. Dig consistently to maintain even depth throughout, checking frequently with a level to avoid creating low spots where water could pool.
Installing perforated drain pipes and connections
Position your main 4-inch perforated drain pipe along the lowest edge of your excavated area, connecting it to your home’s existing drainage system or a dedicated dry well. Run secondary 3-inch pipes in a grid pattern every 3 feet, ensuring all connections are secure with proper fittings. Wrap pipes in landscape fabric to prevent debris clogging while maintaining water flow.
Creating the correct slope gradient for optimal drainage
Establish a minimum 1-2% slope away from any structures, which equals about 1-2 inches of drop per 8 feet of length. Use a transit level or smartphone app to verify your gradient, adjusting soil as needed. Your highest point should be where dogs typically enter the area, sloping toward your main drain outlet for maximum water evacuation efficiency.
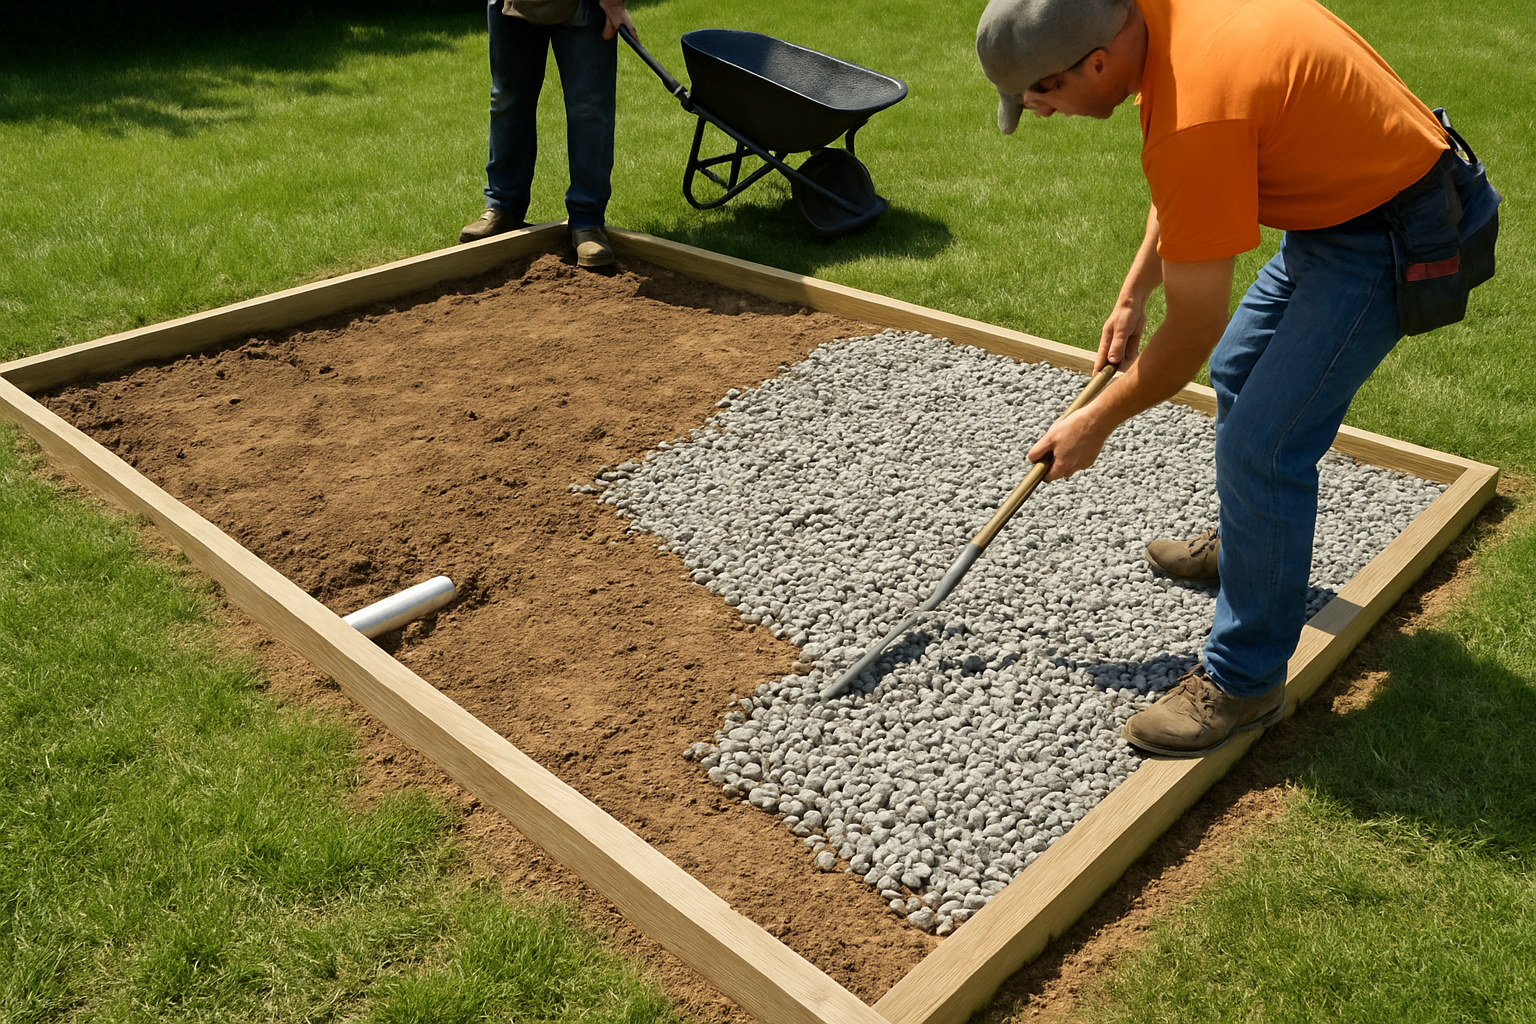
Adding gravel base layers for enhanced water filtration
Layer 6 inches of coarse gravel (3/4 to 1-inch stones) directly over your pipe system, followed by 4 inches of medium gravel (1/2-inch), and top with 2 inches of fine gravel or pea stone. Each layer acts as a filter, preventing fine particles from reaching your drainage pipes while allowing rapid water penetration through the rock surface above.
Surface Preparation and Rock Installation
Laying landscape fabric to prevent weed growth
Roll out high-quality landscape fabric across your prepared area, overlapping seams by 6 inches. Secure the fabric with landscape staples every 2-3 feet along the edges and seams. This barrier prevents weeds from growing through your rock surface while allowing proper drainage.
Installing edging materials to contain the rock area
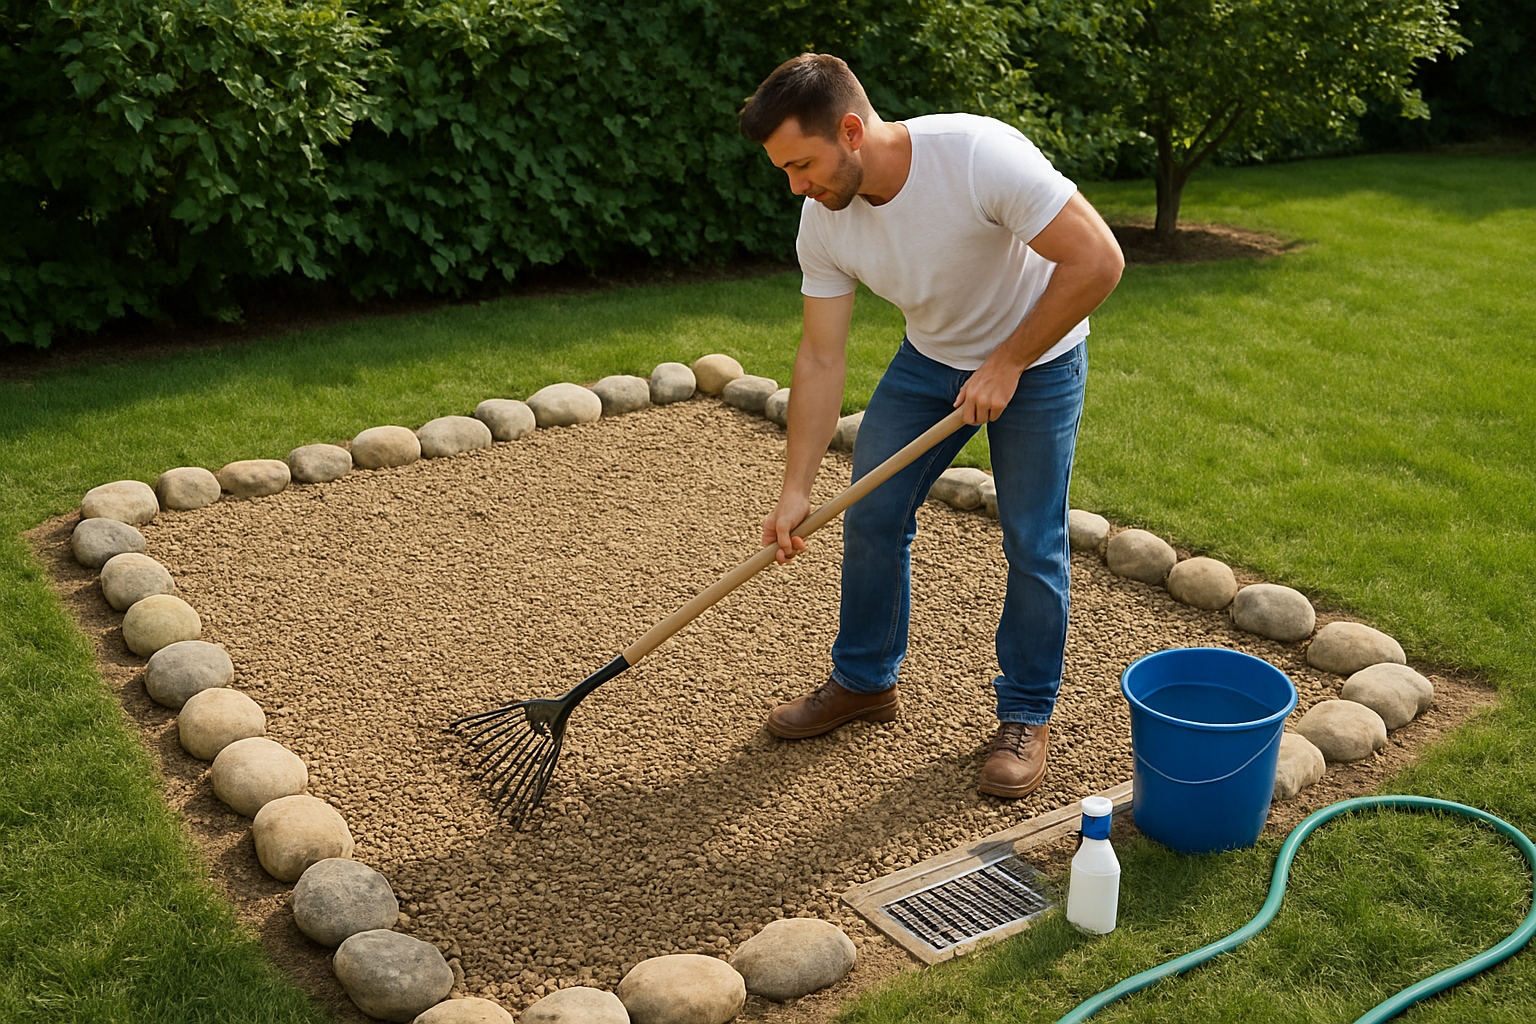
Install plastic, metal, or concrete edging around your 5×8 perimeter to keep rocks contained. Dig a shallow trench and set the edging so it sits 1-2 inches above ground level. This prevents rock migration into surrounding areas and maintains clean, defined borders for your dog’s potty zone.
Spreading and leveling your chosen rock materials
Start with larger base rocks, then add your chosen surface material like pea gravel or decomposed granite. Use a rake to spread rocks evenly, working from one end to the other. Check for level spots with a straight board and add or remove material as needed to maintain consistent coverage.
Ensuring proper depth and coverage for easy cleaning
Maintain a 2-3 inch depth of rock material for optimal drainage and easy waste removal. This depth prevents urine from pooling on top while allowing solid waste to sit on the surface for quick cleanup. Check depth regularly and add fresh material when levels drop below 2 inches.
Maintenance and Long-Term Care
Daily Waste Removal Techniques for Hygiene
Your rock potty area needs daily attention to stay clean and odor-free. Remove solid waste immediately using a scoop or tongs, then rinse the affected rocks with a hose. For liquid waste absorption, keep the drainage system clear by flushing it weekly with clean water.
Seasonal Deep Cleaning and Sanitization Methods
Deep clean your rock surface every three months by removing all waste, then spray the entire area with a pet-safe disinfectant solution. Allow the sanitizer to sit for 10 minutes before rinsing thoroughly. Check your underground drainage system for clogs and flush with enzyme cleaners to break down organic buildup that could cause blockages.
Managing Odor Control Naturally and Effectively
Sprinkle baking soda across the rocks weekly to neutralize odors naturally. Add beneficial bacteria products monthly to your drainage system to break down waste organically. Plant lavender or mint around the perimeter for natural deodorizing, and ensure proper ventilation by keeping the area free from surrounding obstacles that block airflow.
Setting up your 5×8 rock dog potty area with proper underground drainage takes some planning and effort upfront, but it’s one of the best investments you can make for your yard and your dog’s comfort. You’ve learned how to plan the space effectively, install a drainage system that actually works, prepare the surface correctly, and choose the right rocks for both function and appearance. When you follow these steps carefully, you’ll end up with a clean, odor-free solution that handles even heavy rain without turning into a muddy mess.
Remember to stay on top of the basic maintenance tasks like regular rinsing and occasional rock replacement. Your new potty area will serve your dog well for years to come, and you’ll appreciate having a designated space that keeps the rest of your yard looking great. Start with quality materials and take your time with the installation – your future self will thank you for doing it right the first time.


