How To Build A Backyard Dog Potty Area Step-By-Step (Drainage Done Right)

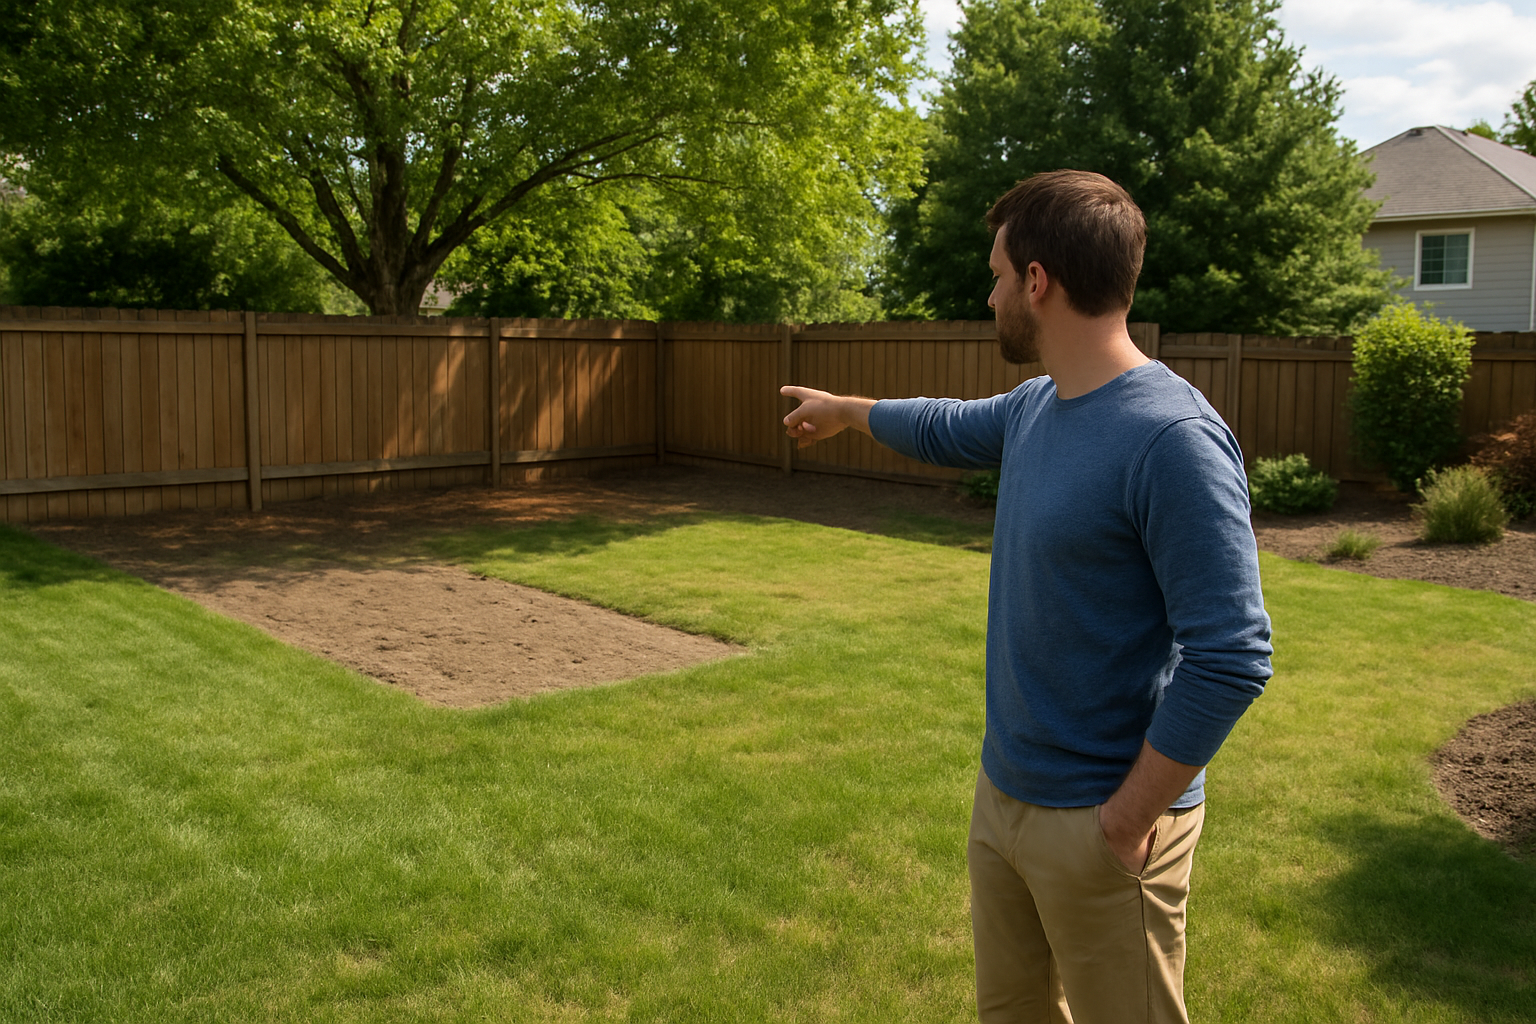
Tired of muddy paw prints, dead grass spots, and that lingering smell in your yard? You can solve these problems by building a dedicated backyard dog potty area with proper drainage. This guide is perfect for dog owners who want a clean, functional outdoor space that keeps their pets happy and their yards looking great.
Building a successful dog potty area isn’t just about picking a corner and hoping for the best. You need smart location planning, a drainage system that prevents soggy messes, and the right surface materials that your dog will actually want to use.
We’ll walk you through choosing the perfect spot in your yard, installing a drainage system that handles heavy rain without creating swampy conditions, and selecting surface materials that feel good under your dog’s paws while staying easy to clean. You’ll also learn simple training tricks to get your dog using the new area right away.
Choose the Perfect Location for Your Dog Potty Area
You Might Also Love These Ideas


Select a spot with natural drainage away from your house
Look for an area where water naturally flows away from your home’s foundation. Check how rainwater moves across your yard after a storm – you want a spot that doesn’t collect standing water. Avoid low-lying areas or spots where water pools, as these create muddy, smelly conditions that make cleanup difficult.
Consider your dog’s size and bathroom habits
Your dog’s breed and size directly impact the space you’ll need. Large dogs require more room to move around comfortably, while small breeds can work with compact areas. Watch where your dog naturally prefers to go – some dogs like privacy behind bushes, while others prefer open spaces. Match your location choice to these existing preferences.
Ensure easy access for daily cleaning and maintenance
Pick a spot you can reach easily with your garden hose and cleaning supplies. You’ll be scooping waste and hosing down the area regularly, so avoid placing it behind dense landscaping or in hard-to-reach corners. Make sure there’s enough space around the perimeter for you to walk and work comfortably during maintenance tasks.
Essential Tools and Materials for Professional Results
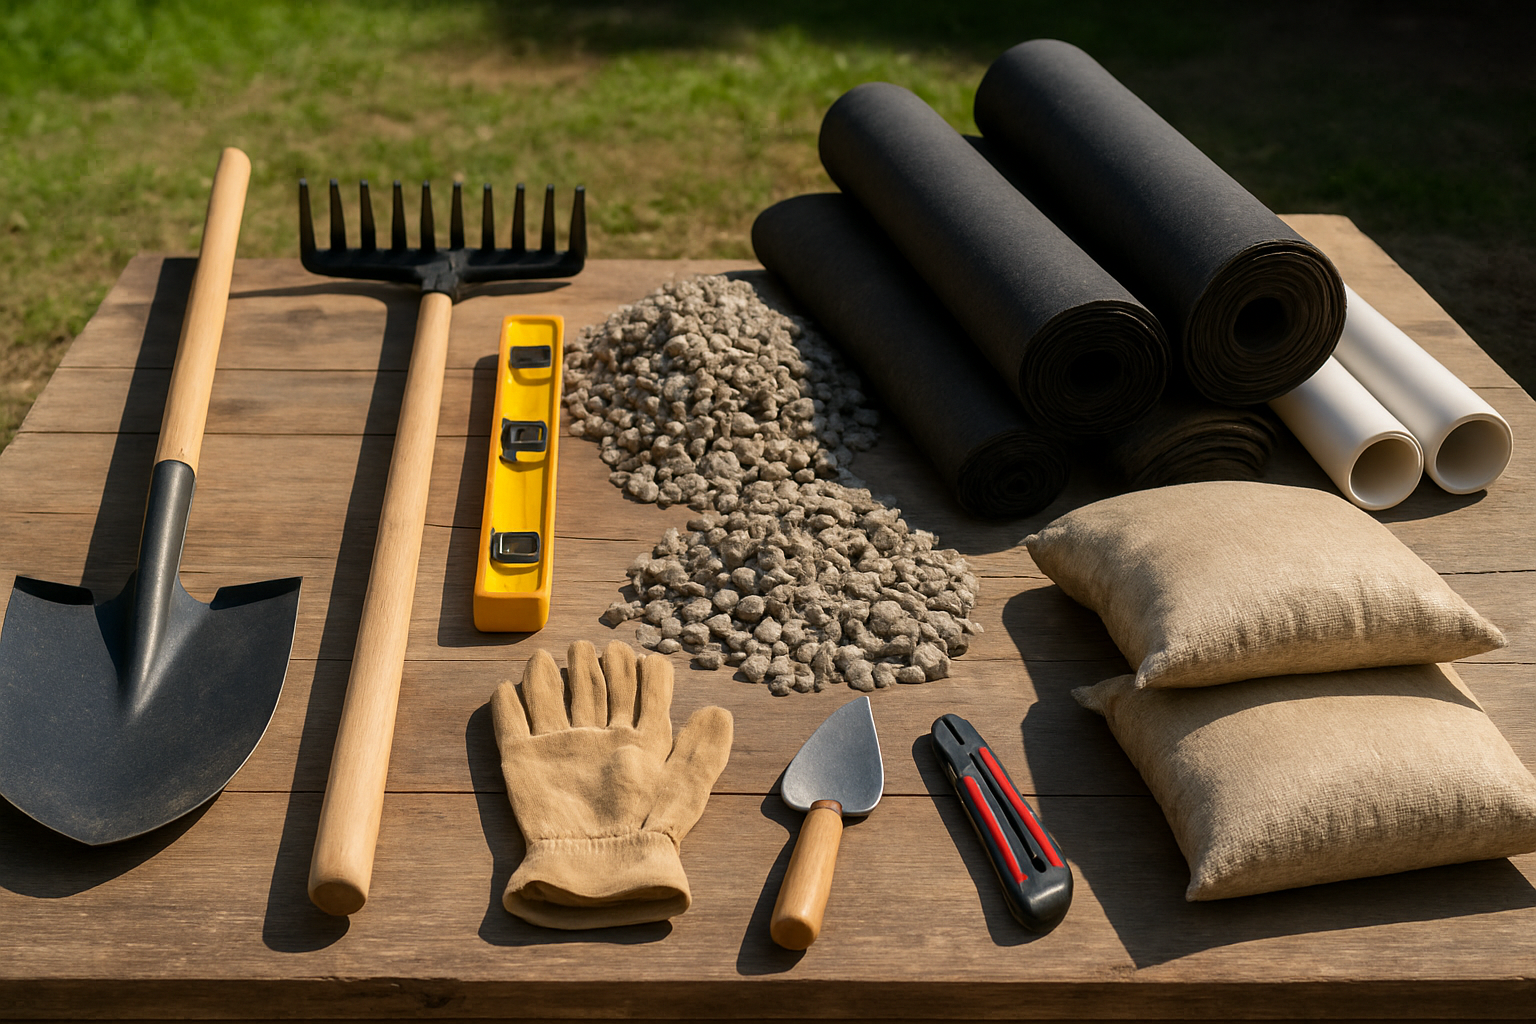
Drainage Materials Including Gravel and Sand
You’ll need coarse gravel (¾-inch) for your base drainage layer, fine gravel (⅜-inch) for the middle layer, and coarse sand for the top drainage foundation. Purchase landscape fabric to prevent weeds while allowing water flow. Get drainage pipes if your yard has poor natural drainage.
Ground Preparation Tools for Excavation
Grab a sturdy spade for cutting through grass and roots, plus a trenching shovel for precise digging. You’ll want a rake for leveling, a wheelbarrow for hauling debris, and a tamping tool to compact your layers. Don’t forget a measuring tape and string line for accuracy.
Surface Materials for Comfort and Hygiene
Choose pea gravel for excellent drainage and easy cleanup, artificial turf for a grass-like feel, or wood chips for natural absorption. Rubber mulch works great for senior dogs with joint issues. Each material offers different benefits for odor control, maintenance, and your dog’s comfort preferences.
Border Materials to Contain the Area
Install pressure-treated lumber, concrete pavers, or decorative stone edging to define your potty area boundaries. Metal landscape edging creates clean lines and prevents material spillage. Make sure your borders are tall enough to contain your chosen surface material while allowing easy access for cleaning.
Excavate and Prepare the Ground Foundation
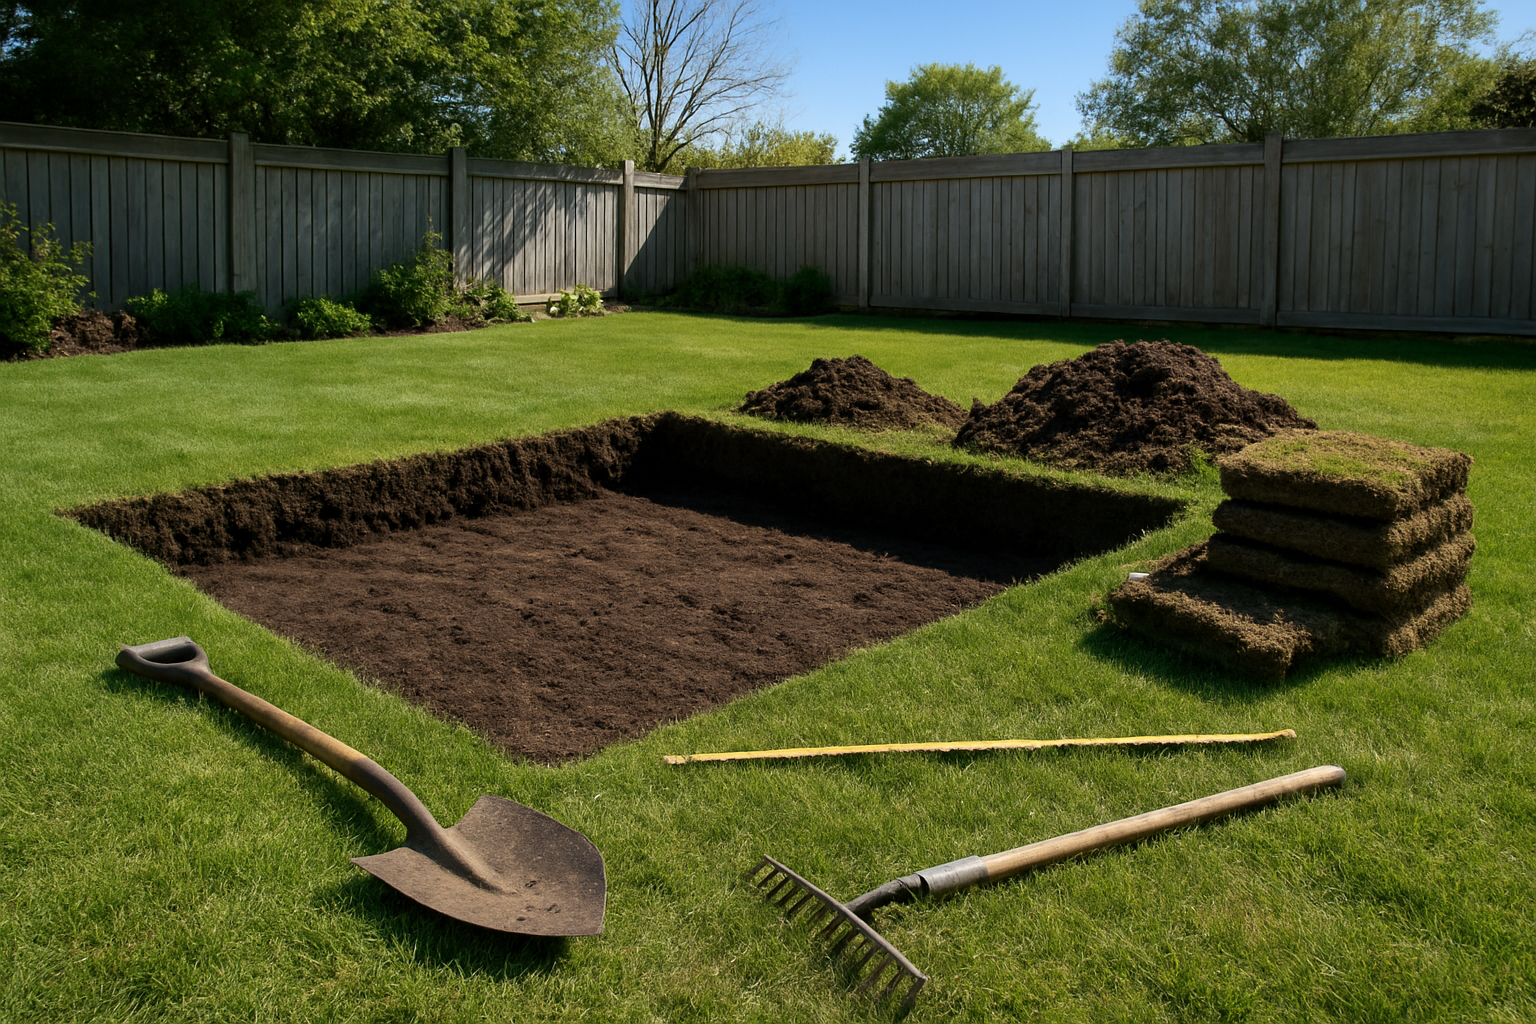
Mark the area boundaries with spray paint
Grab a can of bright spray paint and outline your planned potty area’s perimeter. Use landscaper’s marking paint for the cleanest lines that won’t wash away during construction. Walk around the marked area to double-check your measurements and make sure you’re happy with the size and shape before moving forward.
Dig to the proper depth for effective drainage
You’ll need to excavate between 6-8 inches deep for proper drainage functionality. Start digging from one corner and work systematically across the entire marked area. Remove all grass, roots, and debris as you go. Keep the excavated soil nearby – you might need some of it later for final grading around the edges.
Level the bottom surface for even water flow
Create a slight slope of about 1-2% grade toward your drainage outlet using a long level and rake. The lowest point should be where water will exit the area. Pack down any loose soil and fill in low spots with additional dirt. Run water from your hose across the surface to test the flow pattern before proceeding to the next step.
Install a Drainage System That Actually Works
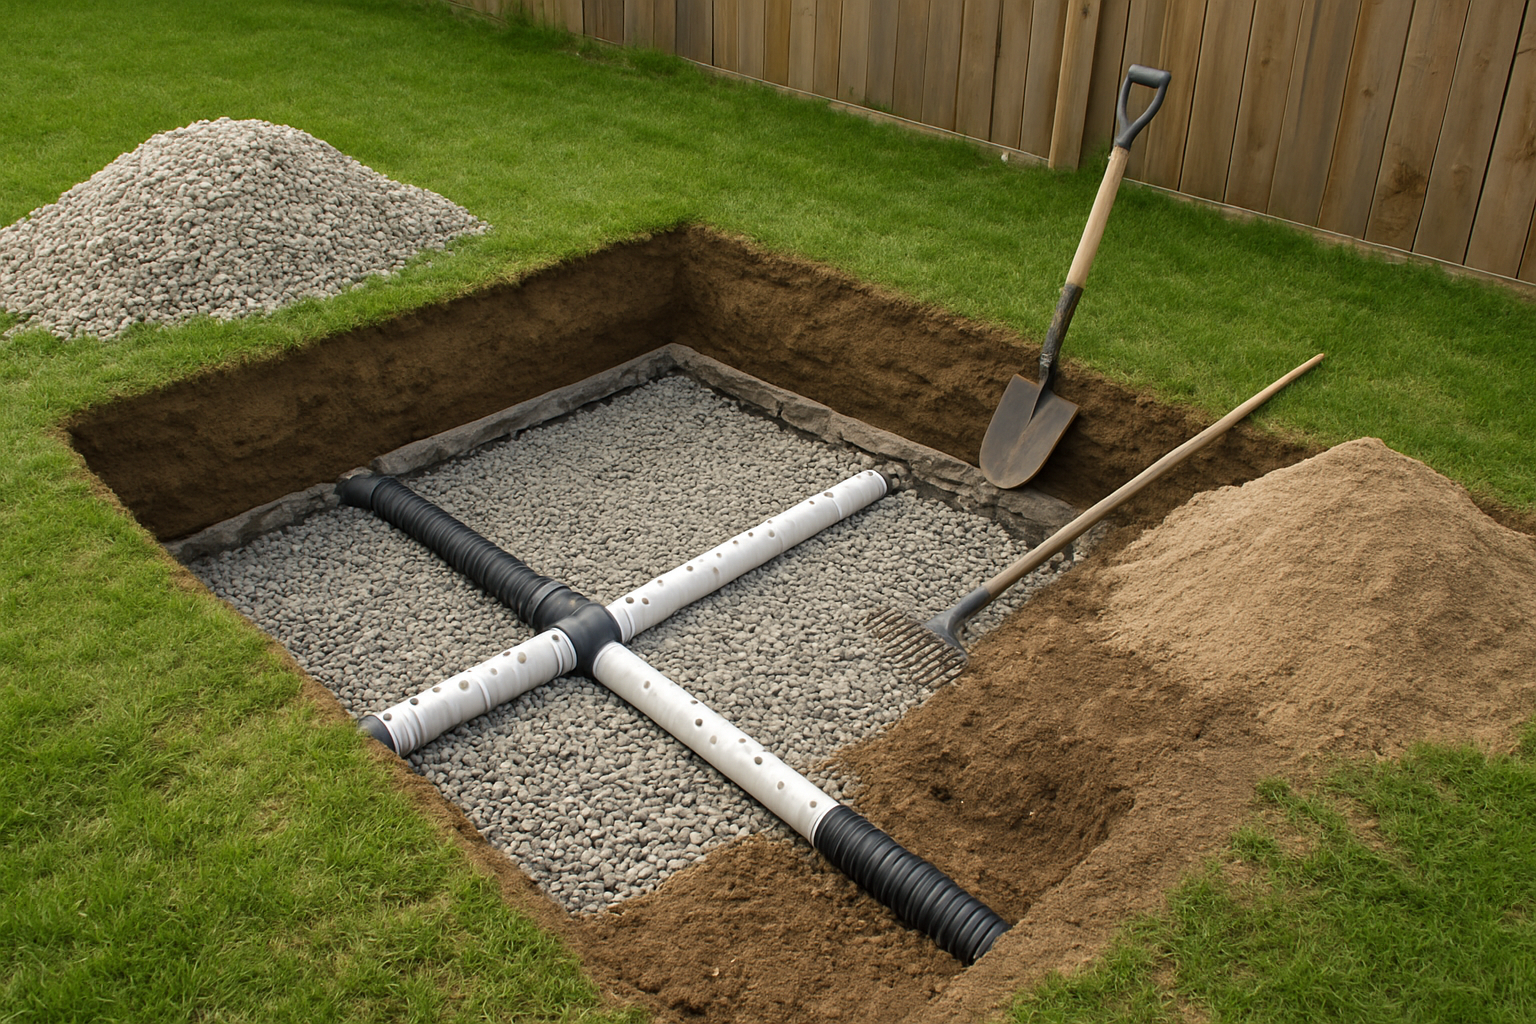
Create a gravel base layer for water absorption
Start by spreading a 4-6 inch layer of coarse gravel or crushed stone across your excavated area. This base layer acts as your primary drainage foundation, allowing water to flow freely rather than pooling on the surface. Choose gravel with varying sizes between ¼ inch to 1 inch for optimal drainage performance. Compact the gravel using a hand tamper or plate compactor, ensuring an even surface while maintaining the natural slope you created during excavation. The gravel creates essential air pockets that prevent water from backing up and keeps your dog’s potty area from becoming a muddy mess during rainy seasons.
Add sand layer for filtration and leveling
Apply a 1-2 inch layer of coarse sand over your compacted gravel base. This sand layer serves dual purposes: filtering smaller debris and waste particles while providing a smooth, level foundation for your final surface material. Avoid fine sand as it can compact too tightly and actually hinder drainage. Instead, use concrete sand or masonry sand with larger granules. Rake the sand evenly across the gravel, then lightly mist it with water and compact gently. The sand fills small gaps between gravel pieces and creates a stable platform that won’t shift under your dog’s weight or during weather changes.
Install optional drainage pipes for heavy rainfall areas
If you live in an area with frequent heavy rainfall or poor soil drainage, consider installing perforated drainage pipes within your gravel layer. Place 4-inch diameter perforated pipes along the lowest points of your excavated area, ensuring they slope toward a designated drainage outlet like a storm drain or garden bed. Wrap the pipes in landscape fabric to prevent clogging from dirt and debris. Connect multiple pipes with T-joints if covering a large area, and always ensure the outlet end sits lower than the intake points. This system quickly moves excess water away from the potty area, preventing standing water that could create unsanitary conditions.
Test water flow before adding surface materials
Before installing your final surface material, thoroughly test your drainage system’s effectiveness. Pour several buckets of water across different areas of your prepared base, paying special attention to corners and edges where water typically accumulates. Watch how quickly the water disappears and check for any pooling or slow-draining spots. Proper drainage should move water through the system within minutes, not hours. If you notice problem areas, add more gravel or adjust the slope as needed. This testing phase saves you from having to rebuild later and ensures your dog will always have a dry, clean area to use regardless of weather conditions.
Add the Perfect Surface Material for Your Dog
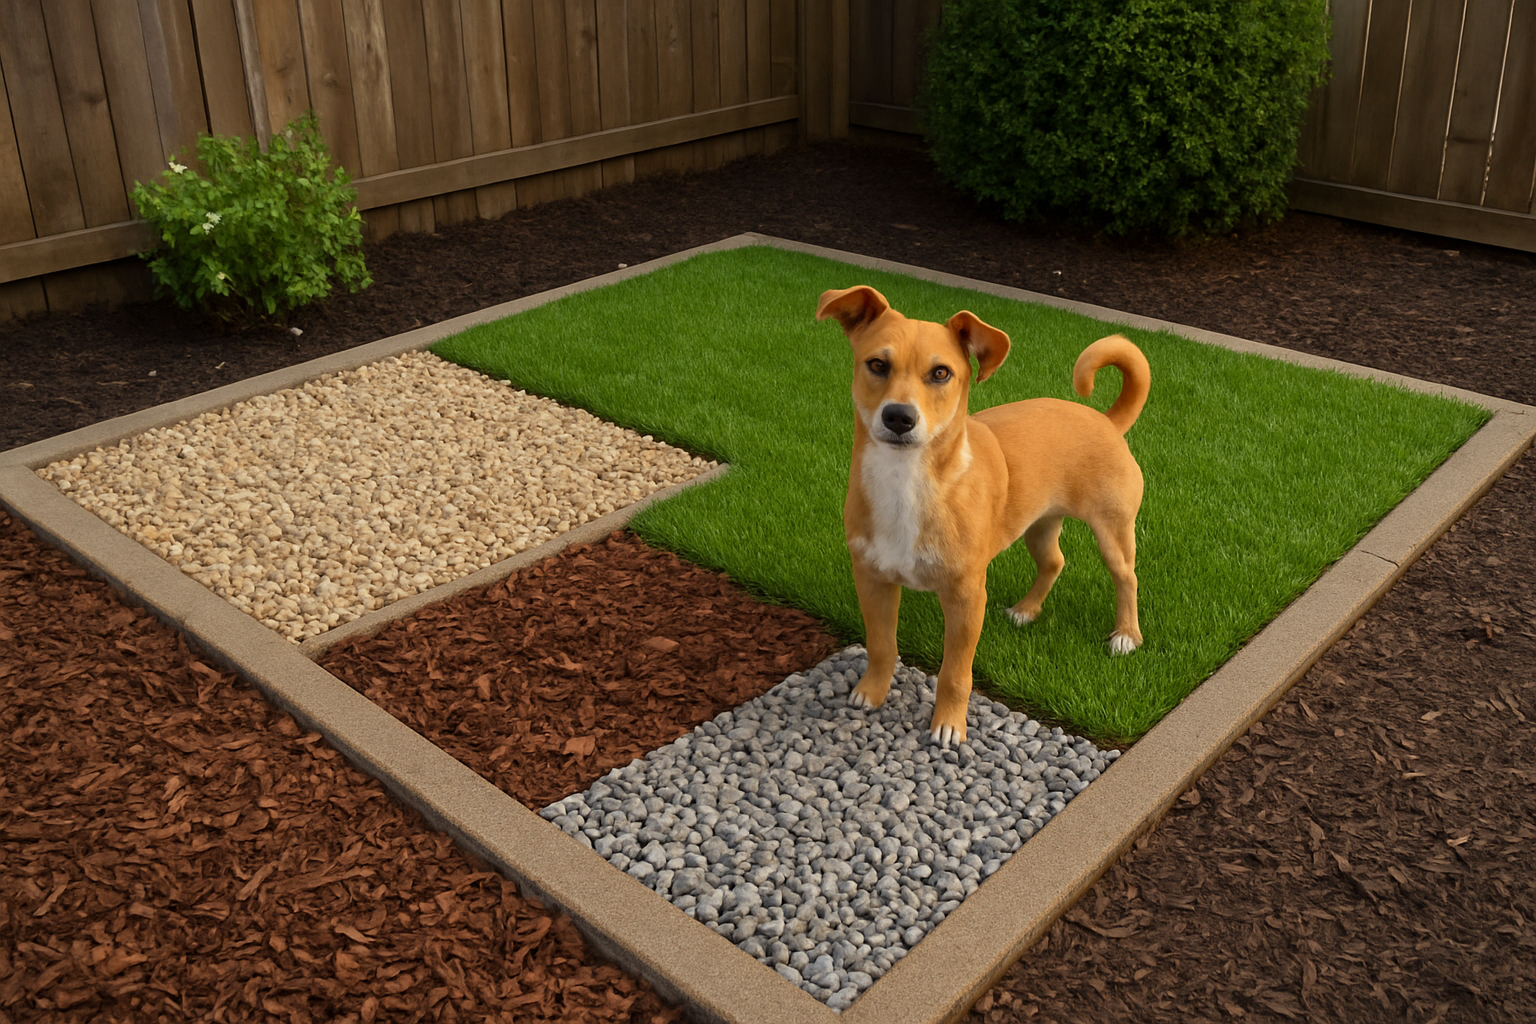
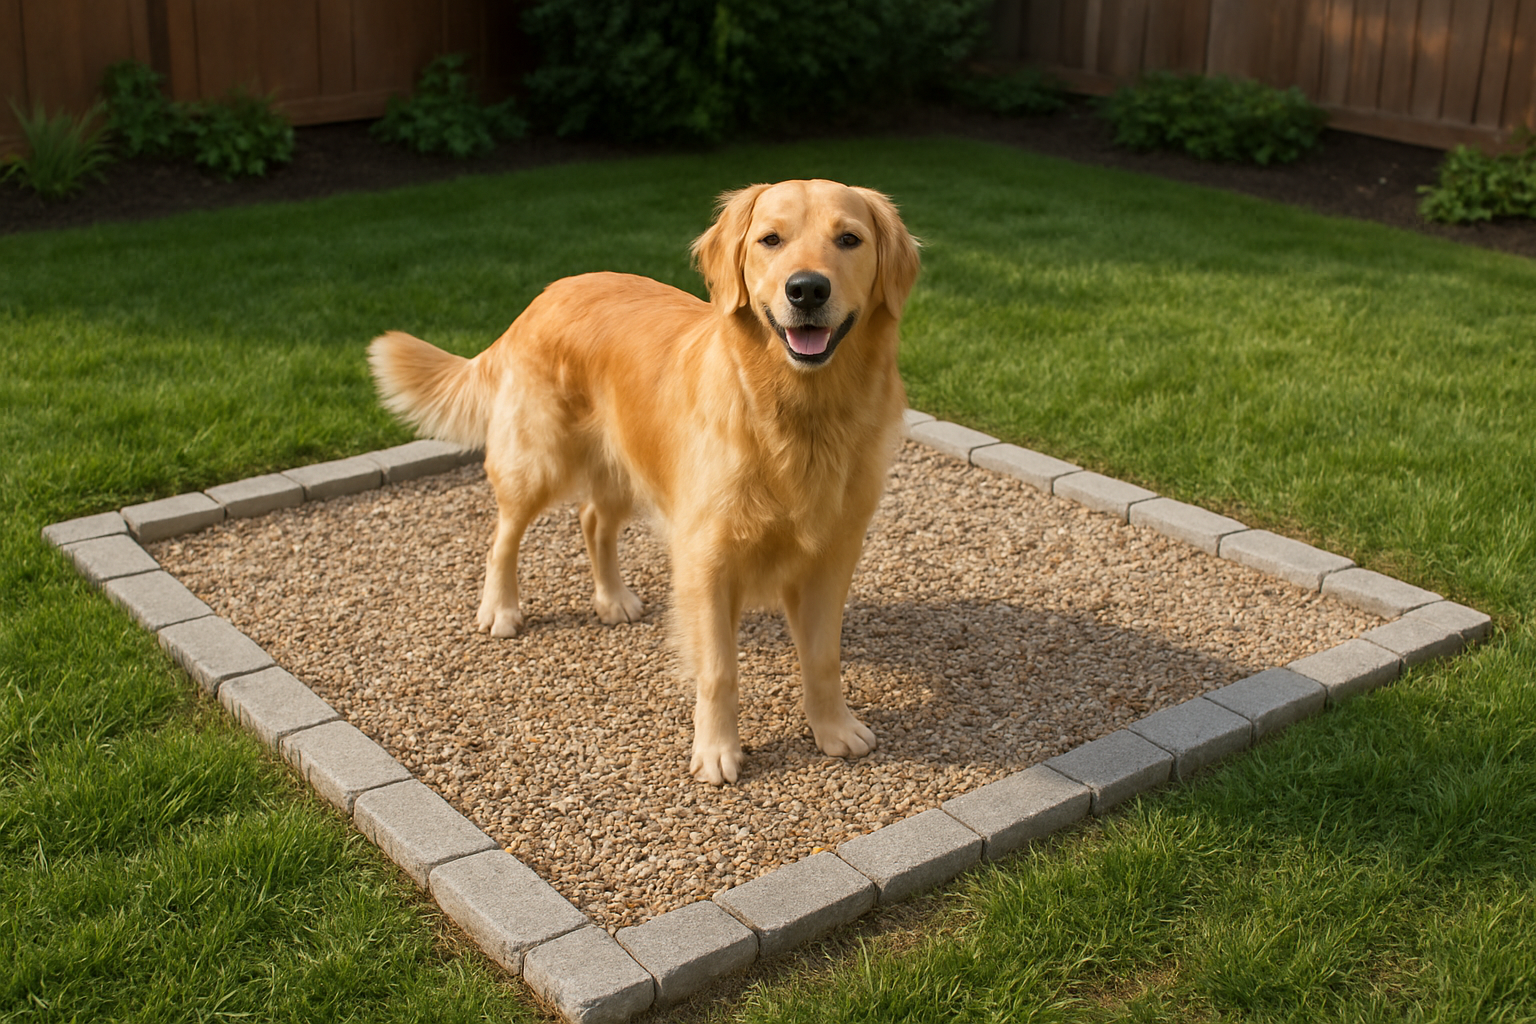
Choose between artificial turf, pea gravel, or mulch
Your surface material choice depends on your dog’s size, preferences, and your maintenance goals. Artificial turf offers the closest experience to real grass and works well for dogs already trained on natural surfaces. It drains quickly when installed over proper base materials but requires regular rinsing and occasional deep cleaning. Pea gravel provides excellent drainage and naturally controls odors, making it perfect for multiple dogs or heavy use areas. The smooth stones are gentle on paws and easy to rake clean. Cedar mulch creates a softer surface that many dogs prefer, plus it naturally repels insects and provides pleasant aromatics. However, mulch needs replacement every 6-8 months as it decomposes.
Install the surface material evenly across the area
Start by adding a thin layer of your chosen material and rake it to check coverage before adding more. For artificial turf, roll it out smoothly and trim edges with a sharp utility knife, ensuring seams align properly if using multiple pieces. Secure turf edges with landscape staples every 12 inches. With pea gravel, spread a 2-3 inch layer using a rake to maintain consistent depth across the entire area. Work systematically from one end to the other, checking for low spots that might collect water. For mulch installation, apply a 3-4 inch layer and use a bow rake to distribute evenly, breaking up any clumps that could create uneven surfaces.
Create proper borders to prevent material migration
Install edging materials like plastic landscape borders, metal strips, or pressure-treated lumber around the perimeter before adding surface materials. Dig a shallow trench around the area’s edge and set your chosen border material so it sits slightly above the finished surface level. This prevents gravel from scattering into surrounding areas and keeps mulch contained during weather events. Secure borders with stakes every 3 feet, ensuring corners are properly connected. For artificial turf installations, borders help maintain clean edges and prevent the turf from shifting over time, especially in areas with heavy foot traffic.
Train Your Dog to Use the New Potty Area
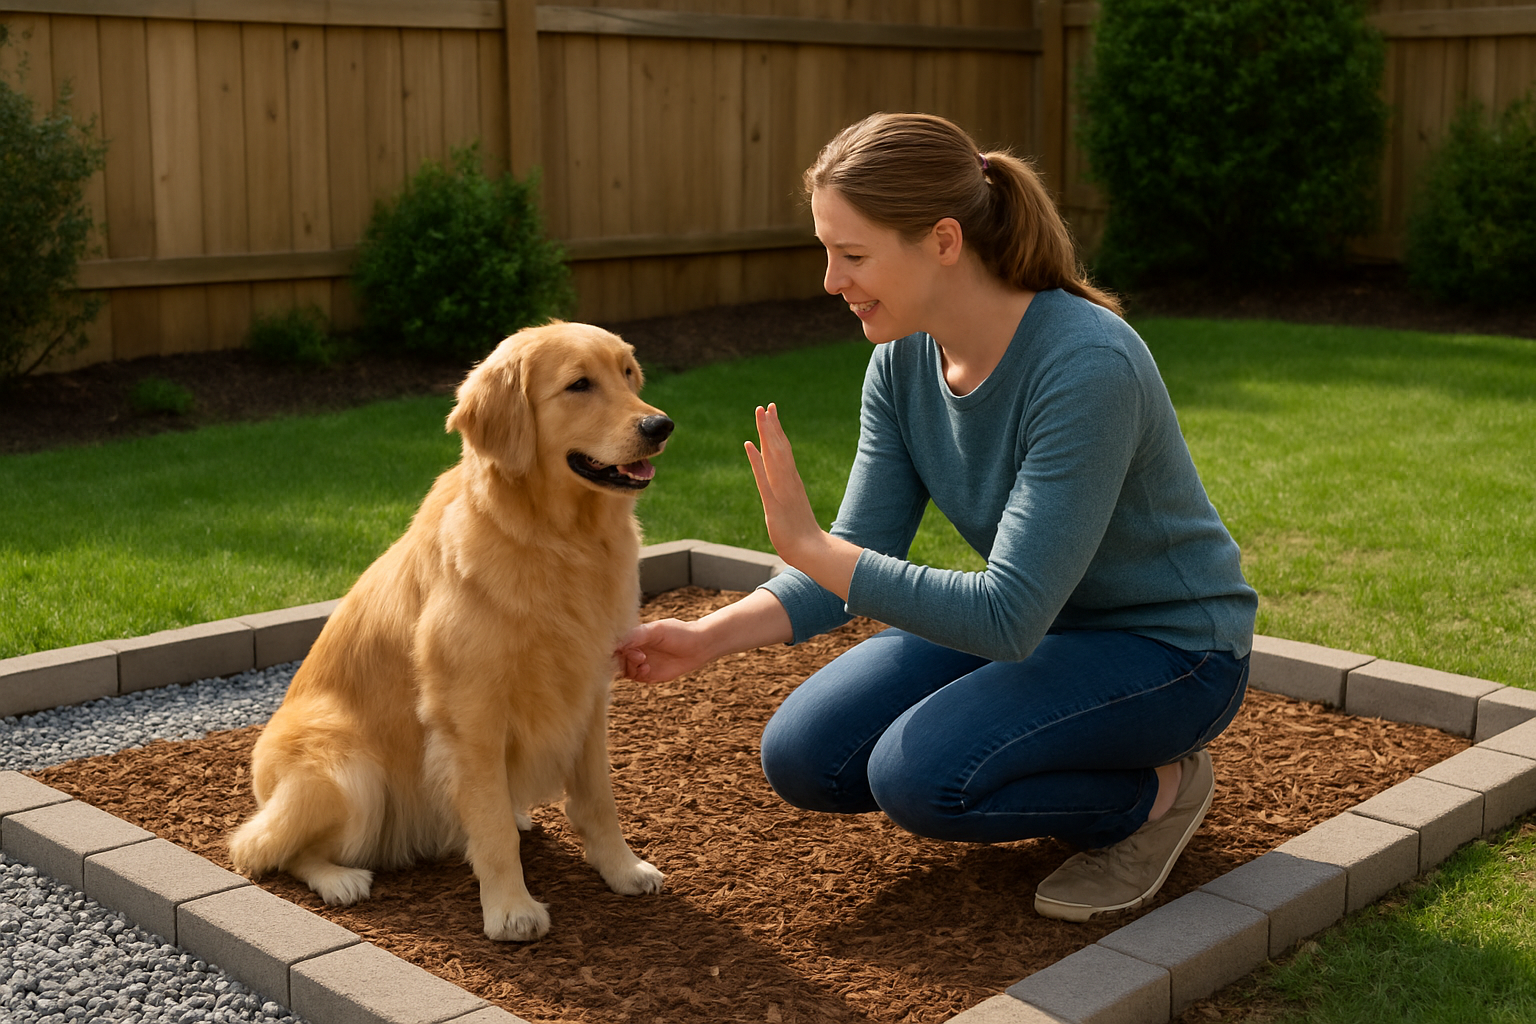
Use positive reinforcement techniques during transition
Start by taking your dog to the new potty area on a leash every time they need to go. The moment they use the designated spot, reward them with high-value treats, enthusiastic praise, and petting. Your excitement will help them understand this is exactly what you want. Never punish accidents in other areas – simply redirect them to the correct spot. Keep training sessions short and positive, focusing on building a strong association between the potty area and good things happening. Some dogs catch on within days, while others need several weeks of consistent practice.
Establish a consistent bathroom schedule
Take your dog to the potty area at the same times every day – first thing in the morning, after meals, before bed, and every few hours in between. Dogs thrive on routine, and predictable bathroom breaks help them learn faster. Watch for signs like sniffing, circling, or whining, then immediately guide them to the designated area. Stick to this schedule even on weekends and holidays. The more consistent you are, the quicker your dog will develop the habit of using their new outdoor bathroom.
Clean accidents promptly to maintain good habits
Clean any accidents outside the potty area immediately using an enzyme cleaner that completely eliminates odors. Dogs have incredible noses and will return to previously soiled spots if they can still smell traces of urine or feces. Regular household cleaners won’t remove the scent markers that attract your dog back to the wrong location. After cleaning, consider temporarily blocking access to accident-prone areas until your dog is fully trained. Keep the designated potty area clean too – remove waste daily and rinse the surface weekly to maintain an appealing bathroom environment.
Maintain Your Dog Potty Area for Long-Term Success
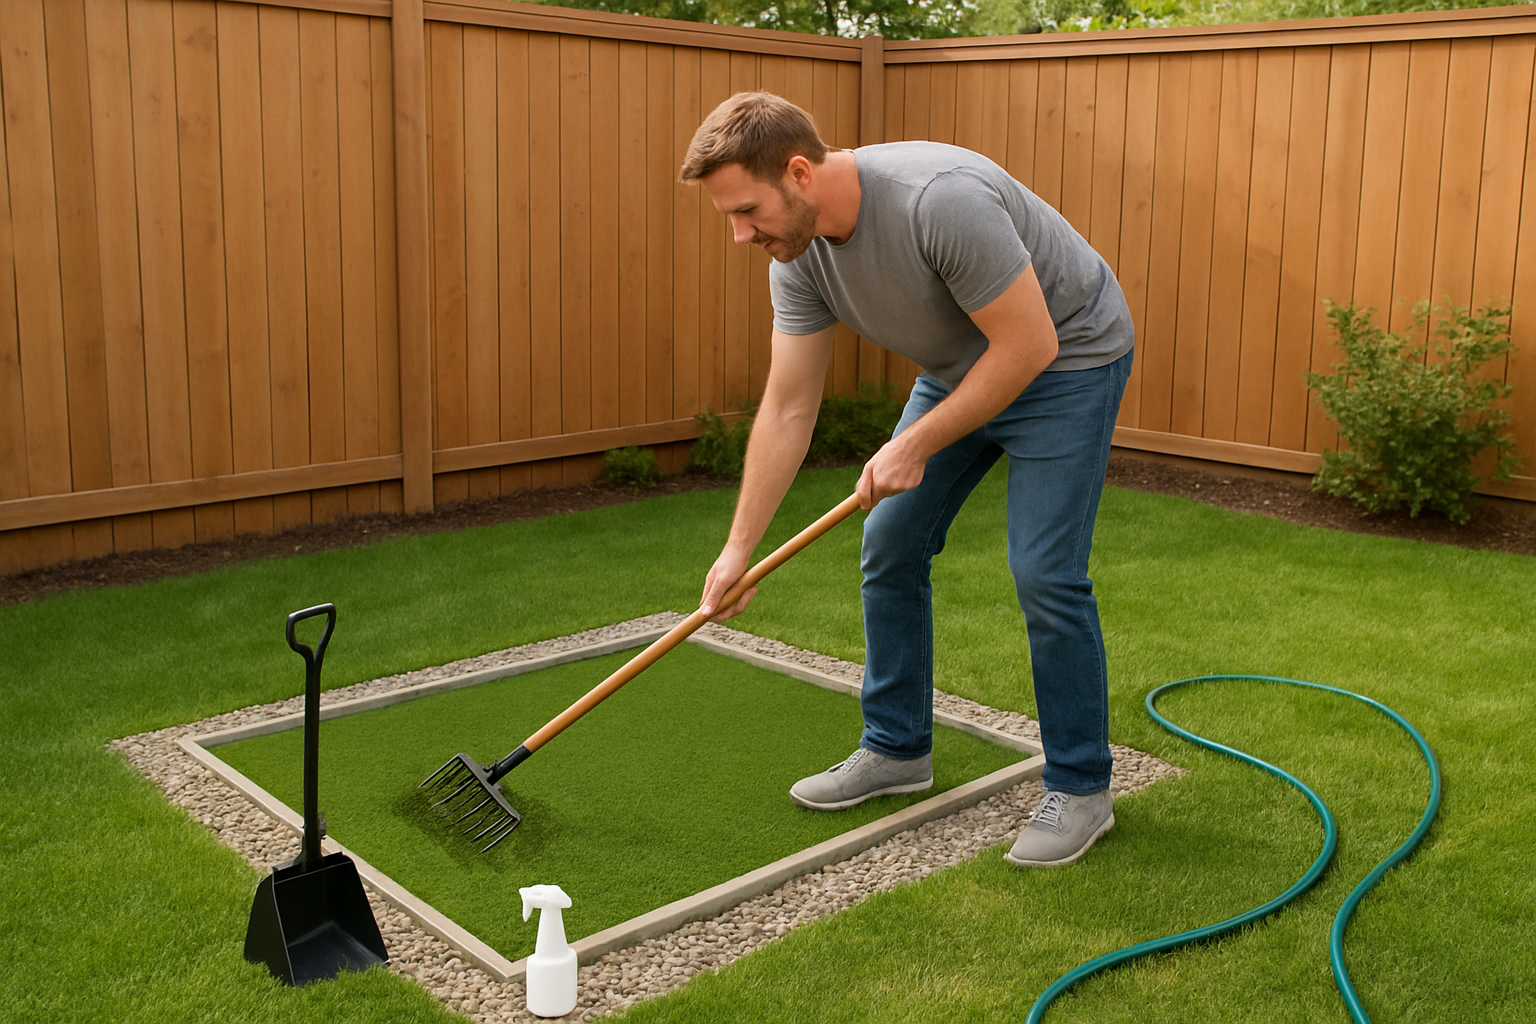
Daily Waste Removal and Spot Cleaning Routine
Remove solid waste immediately to prevent odor buildup and bacterial growth. Spray affected areas with an enzyme-based cleaner designed for pet waste, which breaks down organic compounds that cause lingering smells. Rinse the cleaning solution with water to prevent residue accumulation. Check drainage holes daily to ensure they’re not blocked by debris or waste particles.
Weekly Deep Cleaning and Odor Control Methods
Perform a thorough cleaning every seven days using a pressure washer or garden hose to flush the entire surface. Apply a pet-safe disinfectant to eliminate bacteria and neutralize persistent odors. For natural deodorizing, sprinkle baking soda across the area, let it sit for 30 minutes, then rinse thoroughly. Replace or refresh any absorbent materials like wood chips or artificial turf padding as needed.
Seasonal Maintenance to Preserve Drainage Effectiveness
Inspect your drainage system quarterly for clogs, especially after heavy rains or snow melt. Clear debris from drainage channels and check that gravel layers haven’t shifted. In spring, test water flow by running a hose over the area to identify any pooling spots. Fall maintenance should include leaf removal and ensuring proper grade angles. Winter preparation involves protecting exposed pipes from freezing and planning for snow removal that won’t damage your drainage infrastructure.
Building your own backyard dog potty area doesn’t have to be overwhelming when you break it down into manageable steps. You now have everything you need to create a designated space that keeps your yard clean while giving your dog a comfortable place to do their business. From choosing the right location and gathering your materials to installing proper drainage and selecting the best surface material, each step plays a crucial role in your project’s success.
Remember that training your dog to use the new area and keeping up with regular maintenance will make all the difference in how well your potty area works long-term. Start with the location that makes sense for both you and your dog, take your time with the drainage system since that’s what prevents messy problems down the road, and be patient during the training process. Your effort will pay off with a cleaner yard and a happier dog who knows exactly where to go.


