How To Make A DIY Goblet Fountain For Elegant Budget Curb Appeal

Creating an elegant garden fountain doesn’t require breaking the bank or hiring professionals. This DIY goblet fountain guide is perfect for homeowners who want to boost their curb appeal on a tight budget while adding a sophisticated water feature to their landscape.
You’ll learn how to transform simple materials into a stunning multi-tiered fountain that looks like it cost thousands. We’ll walk you through selecting the right materials and tools for your goblet fountain project, then show you how to build a sturdy base and set up an efficient water circulation system. You’ll also discover the best placement strategies to make your new fountain the showstopping focal point of your front yard.
Essential Materials and Tools for Your Goblet Fountain Project
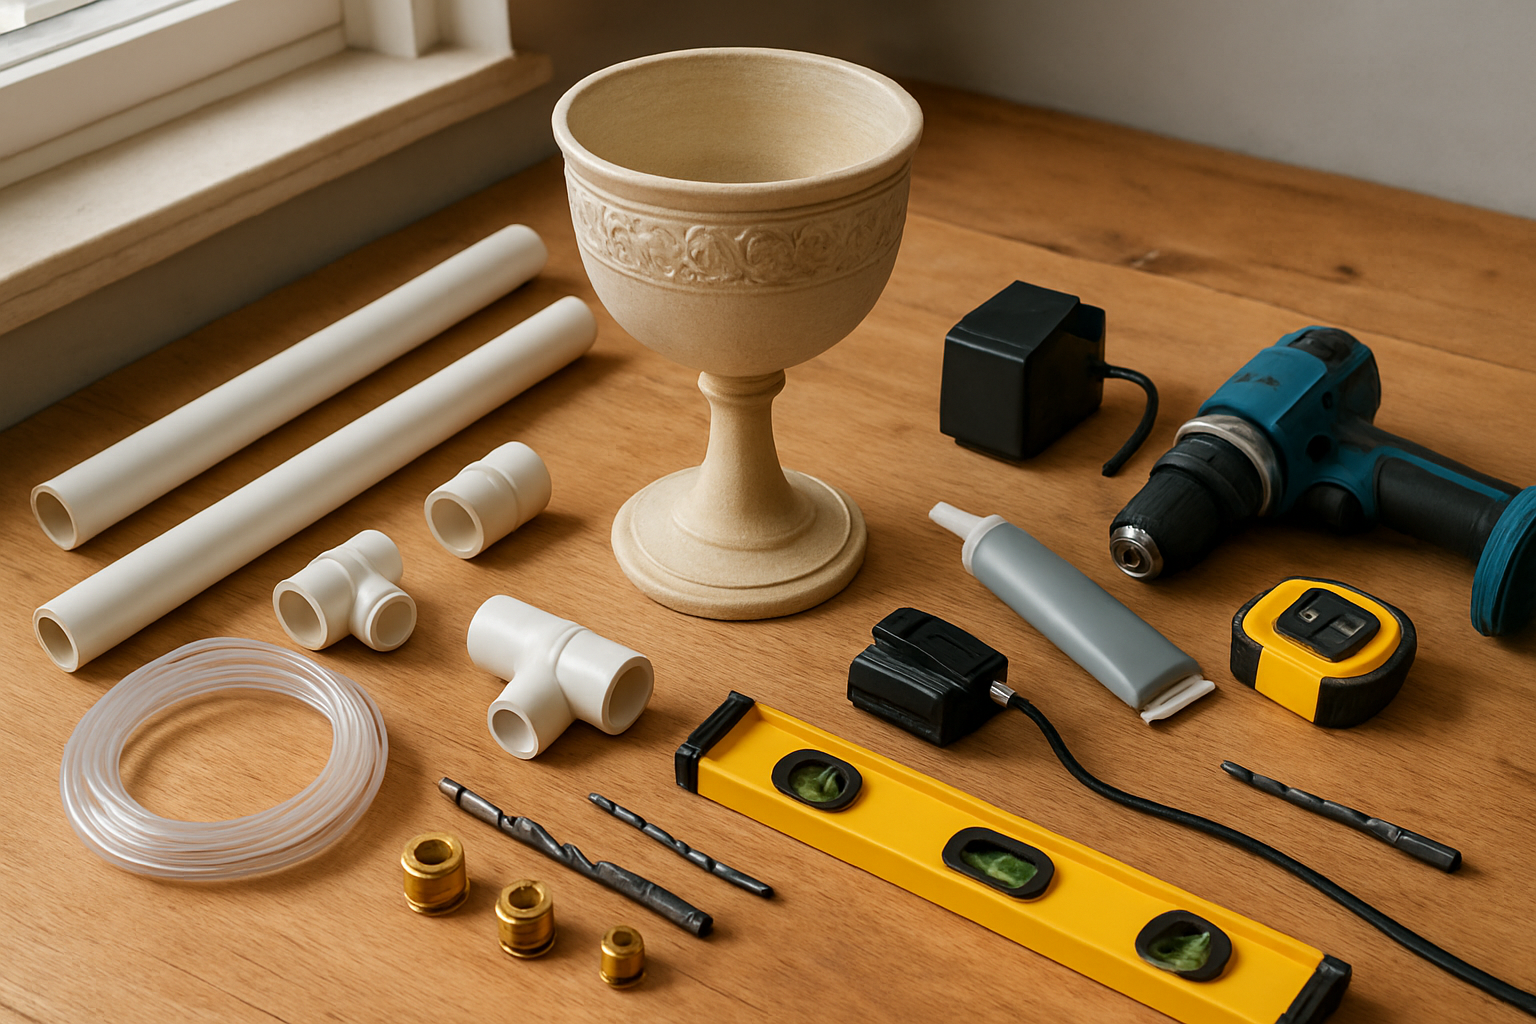
Budget-friendly goblet options and where to find them
Your local thrift stores and garage sales offer the best treasures for this project. Look for glass or ceramic goblets, wine glasses, and even old lampshades that create stunning fountain tiers. Dollar stores carry affordable plastic goblets that work perfectly when spray-painted with stone-texture finish. Estate sales often have mismatched stemware sets at rock-bottom prices. Check clearance sections at home improvement stores for discontinued planters and bowls that double as fountain basins.
You Might Also Love These Ideas


Water pump selection for optimal flow and energy efficiency
You need a submersible fountain pump rated between 50-200 gallons per hour for most goblet designs. Small aquarium pumps work great for single-tier fountains, while larger setups require pond pumps with adjustable flow controls. Choose pumps with built-in filters to reduce maintenance headaches. Energy-efficient models cost more upfront but save money on electricity bills. Most hardware stores carry suitable pumps, or order online for better selection and reviews from other fountain builders.
Basic plumbing supplies and waterproofing materials
Pick up clear vinyl tubing that fits your pump’s outlet – quarter-inch diameter works for most small fountains. Aquarium-safe silicone sealant prevents leaks where tubes connect to goblets. You’ll need plastic zip ties or small clamps to secure tubing along your fountain structure. Grab a few rubber grommets to create clean holes in goblet bases. Waterproof electrical tape protects pump connections, and marine-grade caulk seals any gaps in your base reservoir.
Simple tools you already own that work perfectly
Your basic drill with various bit sizes handles most fountain modifications. Glass and tile bits cut clean holes in ceramic goblets without cracking. Regular screwdrivers adjust pump flow rates and secure clamps. A level ensures your fountain sits properly for even water distribution. Measuring tape helps plan spacing between tiers, while a permanent marker marks drilling spots. Most homeowners already have these tools sitting in their garage or basement workshop.
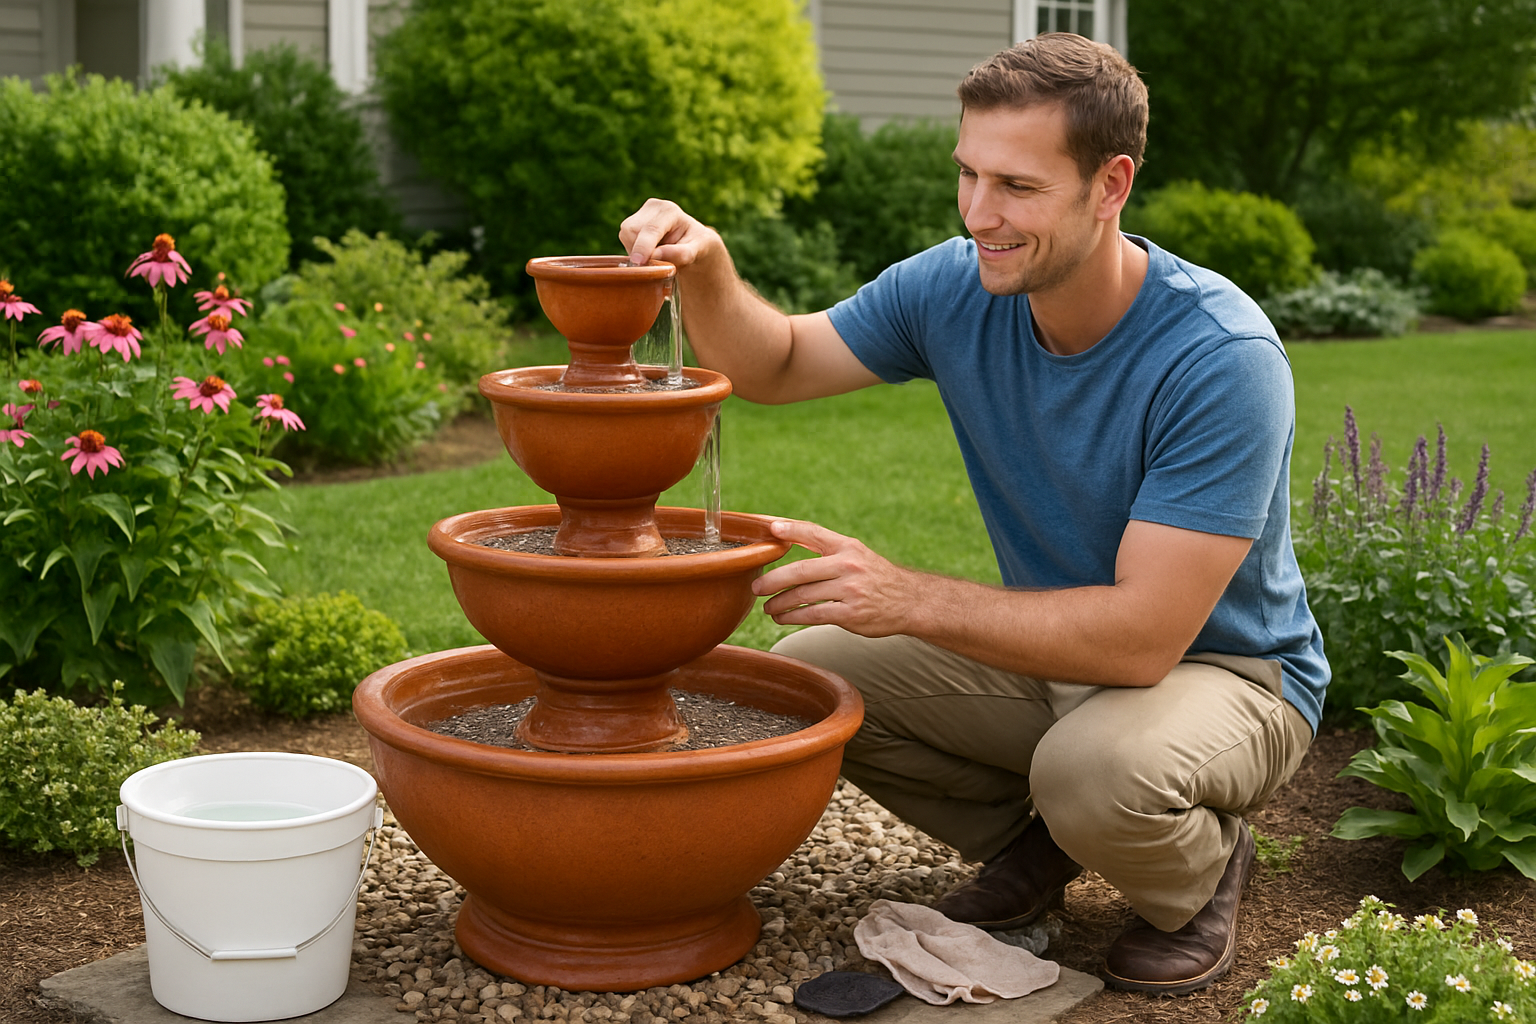
Preparing Your Fountain Base and Water System
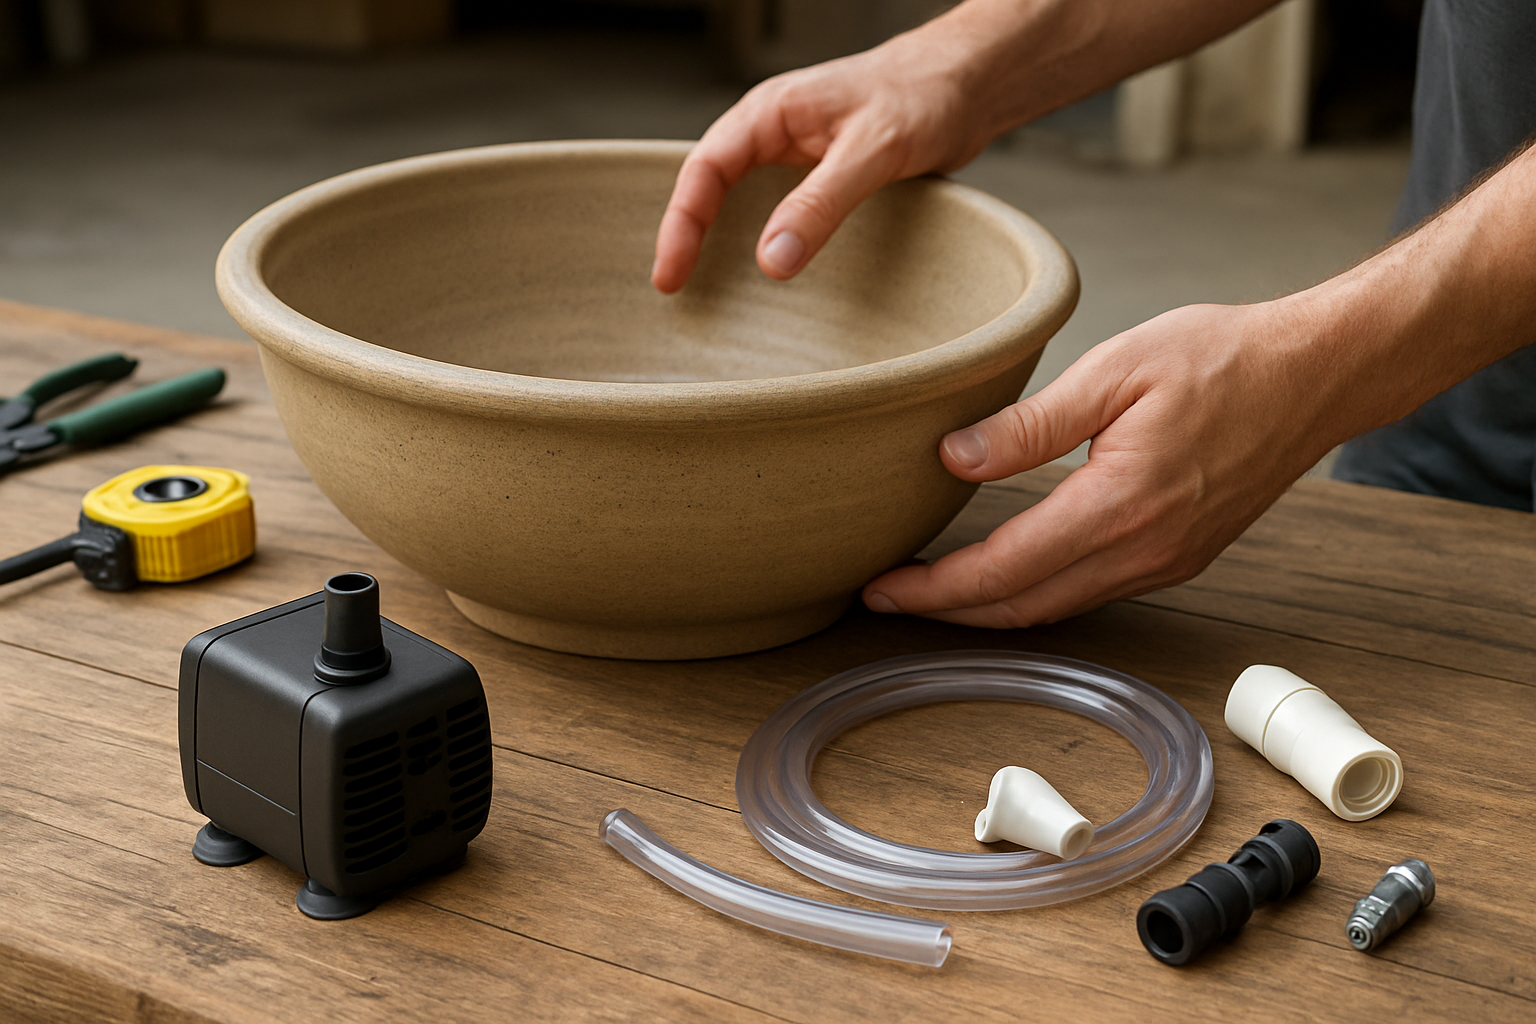
Creating a stable foundation that prevents tilting and damage
Start by choosing level ground and digging a hole 6 inches wider than your fountain base. Pack crushed gravel in 2-inch layers, creating a solid platform that won’t shift over time. Place concrete pavers or a pre-cast foundation on top, using a level to ensure perfect alignment. This sturdy base prevents your fountain from wobbling or sinking into soft soil during heavy rains.
Installing the water pump for consistent circulation
Select a submersible pump rated for your fountain’s height and water volume. Position the pump at the lowest point of your base reservoir, connecting waterproof tubing that runs up through your goblet tiers. Hide electrical connections inside weatherproof junction boxes, and always use GFCI outlets for safety. Test your pump’s flow rate before final assembly to ensure smooth water circulation.
Setting up proper drainage to avoid water overflow issues
Install an overflow drain near the rim of your base reservoir, connecting it to a French drain or gravel-filled trench that directs excess water away from your foundation. Add a mesh screen over the drain to prevent debris buildup. Position your fountain with a slight slope away from walkways and buildings, ensuring rainwater doesn’t pool around the base or create muddy areas in your landscape.
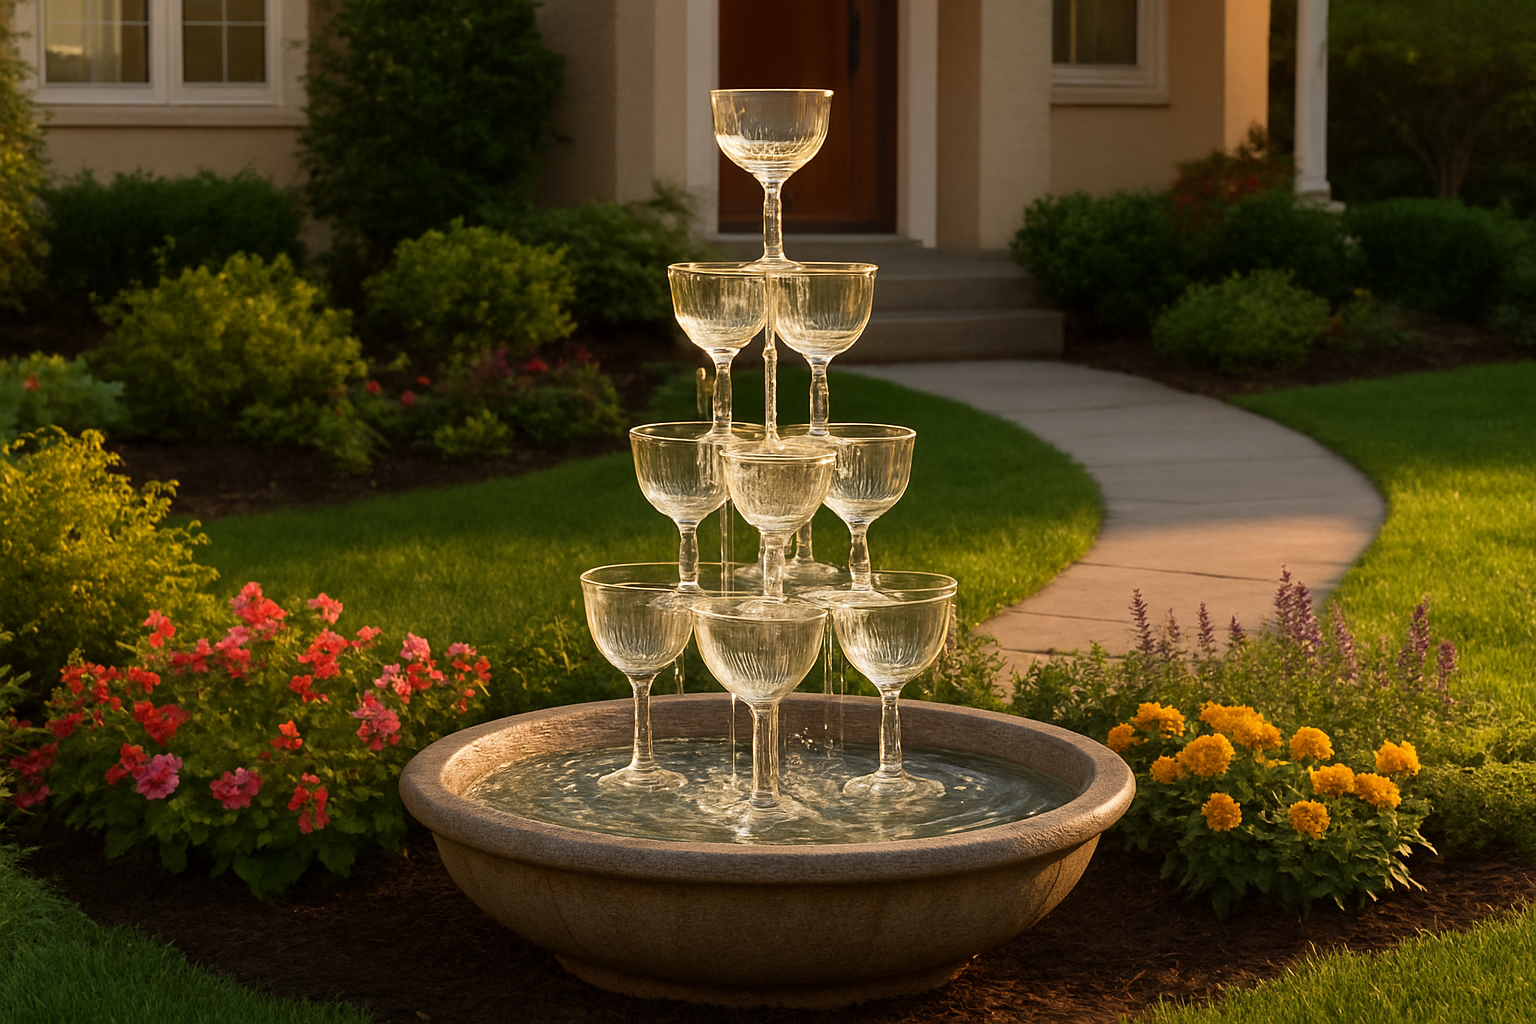
Assembling Your Multi-Tier Goblet Design
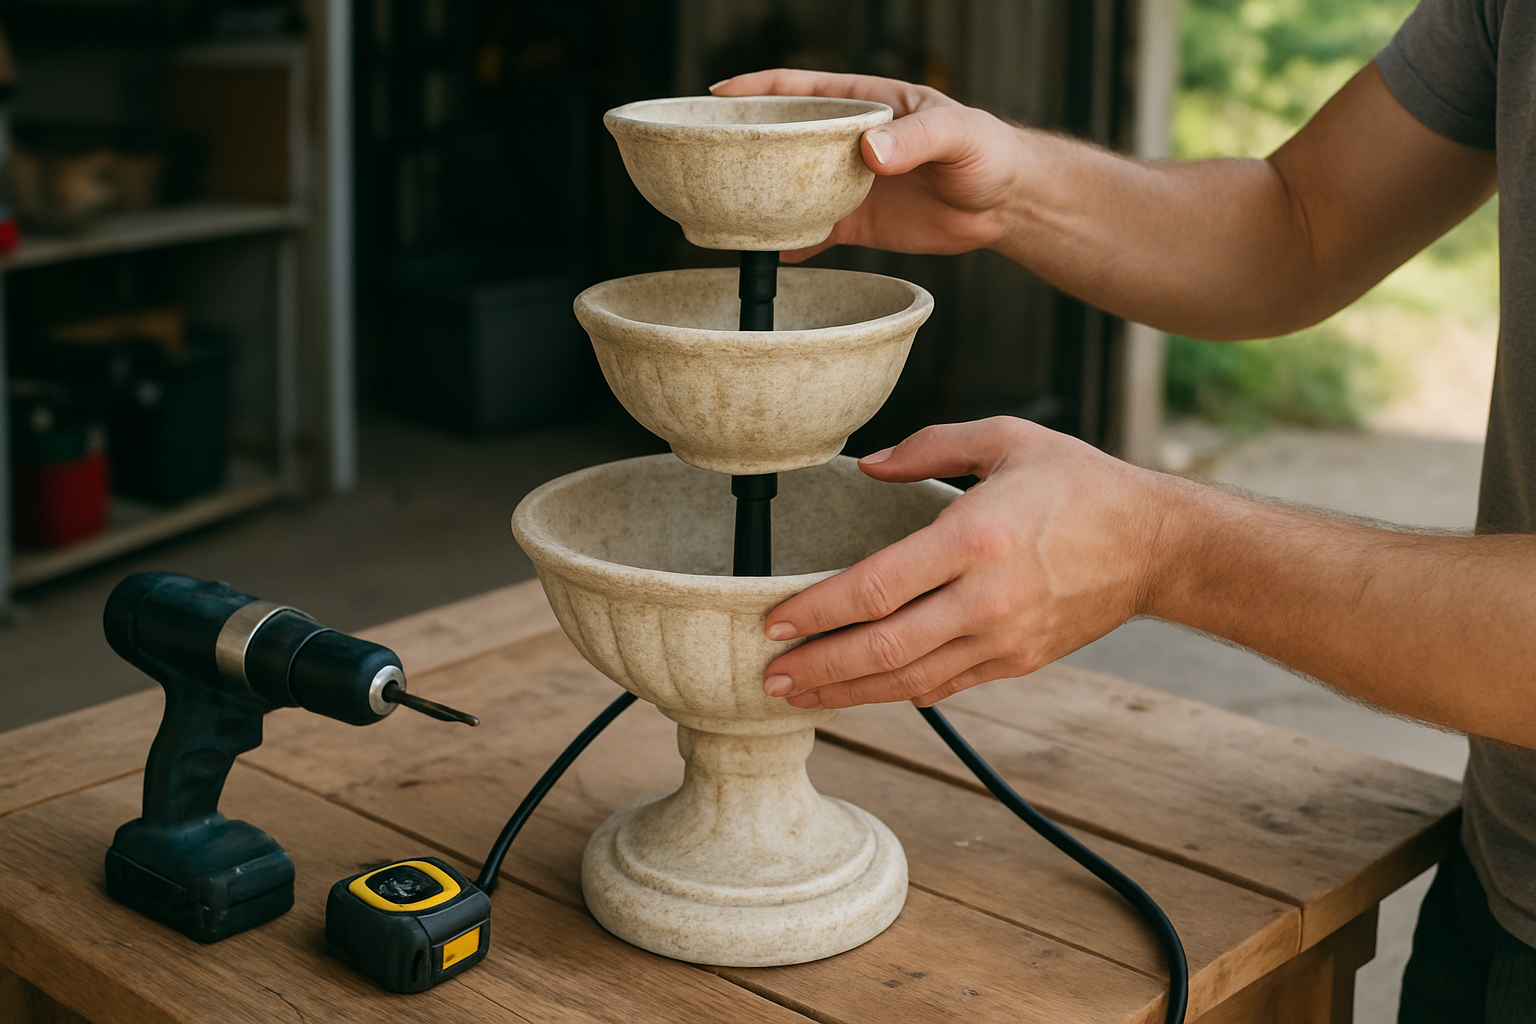
Drilling Precise Holes for Seamless Water Flow
Start by marking the exact center of each goblet’s base using a waterproof marker and ruler. Use a 3/8-inch diamond-tipped drill bit to create clean entry and exit holes, working slowly to prevent cracking. Keep the drill steady and apply gentle, consistent pressure while drilling through ceramic or glass surfaces.
Securing Goblets at Perfect Angles for Cascading Effect
Position your largest goblet at the base, tilting it approximately 15 degrees toward the center for optimal water collection. Stack smaller goblets above, offsetting each tier by 45 degrees to create an elegant spiral pattern. Use marine-grade silicone adhesive to bond each connection point, ensuring goblets remain stable while maintaining their decorative angles.
Testing Water Pressure and Adjusting Flow Rates
Connect your pump system and run initial tests at the lowest setting first. Gradually increase water pressure while observing flow patterns between tiers. Adjust pump settings until you achieve a gentle, consistent cascade that fills each goblet rim without splashing. Fine-tune flow rates by partially restricting tubing connections with adjustable clamps.
Sealing Connections to Prevent Leaks and Maintenance Headaches
Apply plumber’s putty around all tubing entry points before inserting water lines through drilled holes. Wrap threaded connections with Teflon tape to create watertight seals. Use clear aquarium-safe silicone to seal any remaining gaps around goblet bases and tubing exits, smoothing joints with your finger for professional-looking finishes.
Strategic Placement for Maximum Curb Appeal Impact
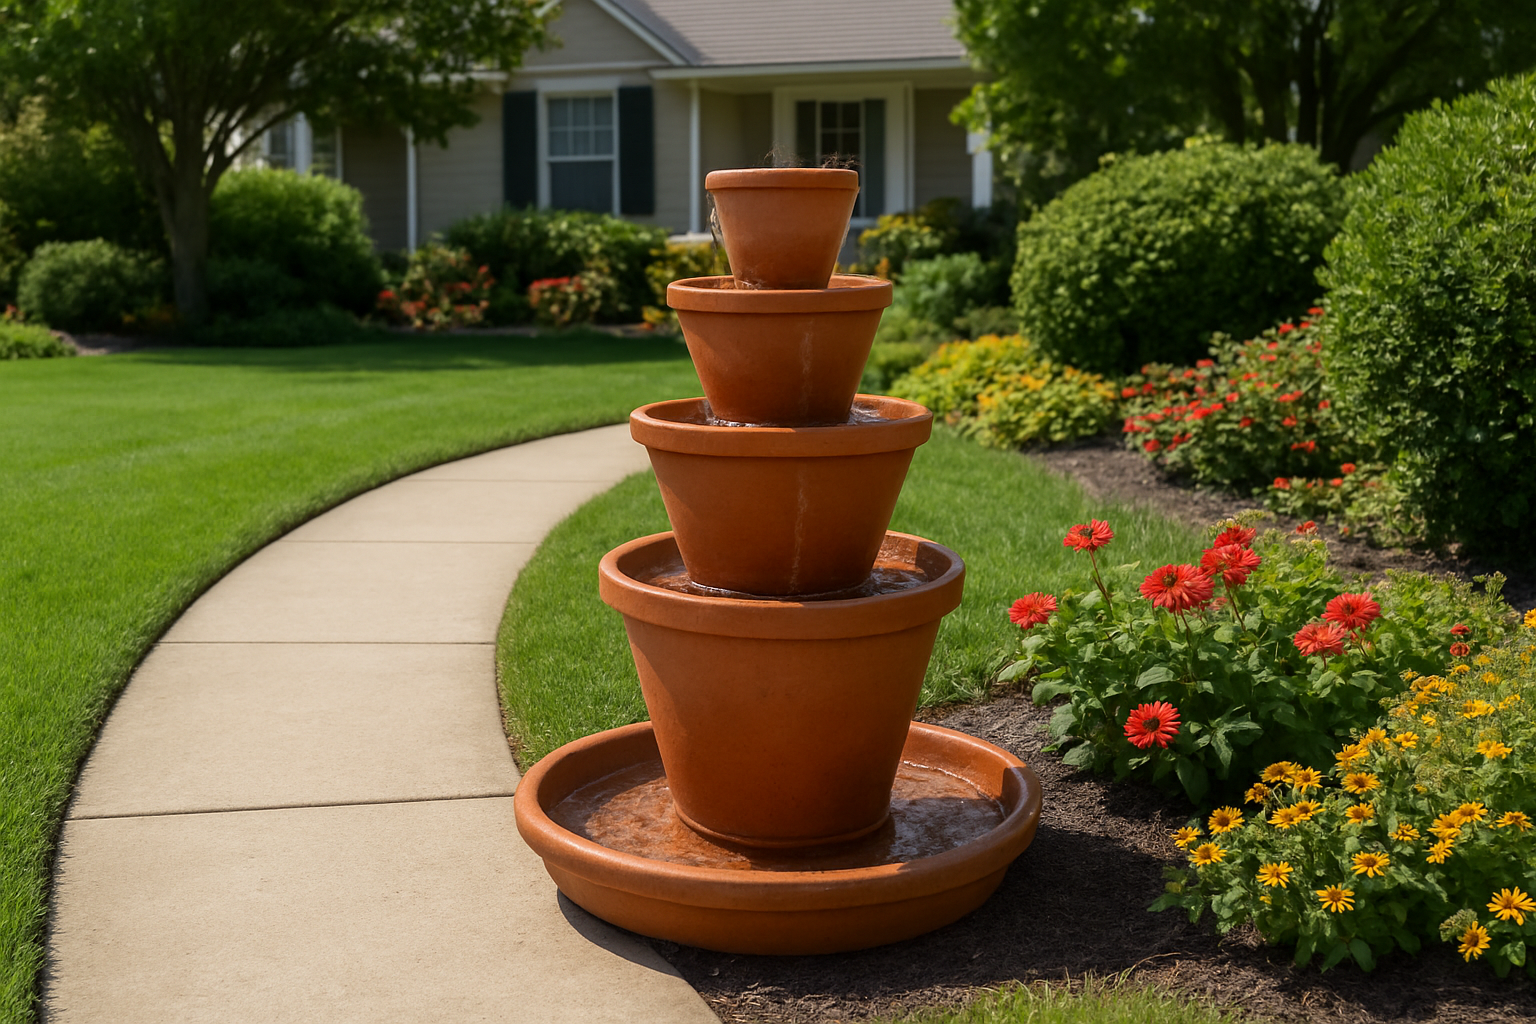
Choosing the ideal location for visibility and safety
Position your goblet fountain where it commands attention from the street while remaining safely away from high-traffic areas. Your front yard’s focal point should be visible from multiple angles, typically 6-10 feet from walkways to prevent splashing on guests. Consider your home’s architectural lines and place the fountain where it enhances rather than competes with your entrance.
Incorporating surrounding landscaping elements
Create a cohesive design by surrounding your fountain with complementary plants and hardscaping. Low-maintenance perennials like hostas or ornamental grasses work beautifully around the base, while decorative stones or mulch define the fountain area. Your existing garden colors should guide your choices – if you have warm-toned flowers, select materials that echo those hues for seamless integration.
Adding lighting options for stunning nighttime display
Transform your fountain into an evening showpiece with strategic lighting placement. Submersible LED lights inside the water create magical reflections, while spotlights positioned at ground level highlight the fountain’s silhouette. Solar-powered options offer eco-friendly illumination without electrical work. Warm white lights (3000K) provide elegant ambiance, while colored LEDs let you customize the mood for special occasions or seasons.
Maintenance Tips to Keep Your Fountain Looking Professional
Weekly cleaning routine that takes less than 10 minutes
Your fountain stays stunning with just a quick weekly scrub-down. Start by turning off the pump and removing any floating debris with a small net or your hands. Wipe down the goblets with a soft cloth to remove water spots and algae buildup. Check the water level and top off if needed, then restart your pump. This simple routine prevents major cleaning headaches later.
Seasonal preparation to protect your investment
Winter demands special attention to keep your fountain intact through freezing temperatures. Drain all water completely from the system, including the pump reservoir and connecting tubes. Store your pump indoors to prevent freeze damage. Cover exposed goblets with breathable fabric to shield them from harsh weather while allowing air circulation. When spring arrives, inspect all components for cracks before refilling and restarting your beautiful water feature.
Creating your own goblet fountain transforms your outdoor space without breaking the bank. You’ve learned how to gather the right materials, build a solid water system, and assemble those beautiful cascading tiers that make guests stop and admire your home. The strategic placement tips will help you showcase your creation where it makes the biggest visual impact.
Your DIY fountain doesn’t have to look homemade when you follow proper maintenance routines. Clean water, regular inspections, and seasonal care keep everything running smoothly and looking elegant year-round. Start planning your fountain project today – your curb appeal will thank you, and so will your wallet.


