I Tried the Viral Mowing Strip Technique – The Results Will Shock You

You’ve probably seen the viral mowing strip technique flooding your social media feeds, promising to eliminate tedious grass trimming around flower beds and walkways forever. This game-changing lawn edging method has homeowners everywhere ditching their string trimmers for good reason – it actually works.
This guide is for busy homeowners who are tired of spending weekends hunched over a weed whacker, trying to get clean edges around their landscaping. You want a professional-looking yard without the professional price tag or constant maintenance headaches.
We’ll walk you through the complete mowing strip installation process, from planning your design for maximum mowing efficiency to selecting the right finishing materials that’ll stand up to years of wear. You’ll also discover the professional installation tricks that separate DIY disasters from magazine-worthy results that’ll have your neighbors asking for your secret.
The results speak for themselves – you’ll cut your lawn maintenance time in half while creating crisp, clean borders that make your entire landscape look professionally maintained.


Plan Your Mowing Strip Design for Maximum Efficiency

Measure and mark your desired strip width
Start by determining the optimal width for your mowing strip – typically 4-6 inches works best for most lawns. Use spray paint or stakes with string to mark the boundaries along your grass edges. This viral lawn hack requires precise measurements to create that professional landscape border look you’re after.
Choose the best location along lawn edges
Focus on areas where your mower struggles most, like around flower beds, trees, and fence lines. Your mowing strip installation will have the biggest impact along curved edges and tight corners where grass trimming becomes tedious. Walk your property and identify spots where this DIY mowing strip technique will save you the most time during weekly maintenance.
Determine materials needed for your project
You’ll need edging material (plastic, metal, or stone), landscape fabric, and your chosen fill material like mulch, gravel, or decorative stones. Calculate the linear footage of your planned garden border strip and add 10% extra for waste. Most homeowners find that rubber mulch or small river rock creates the most durable and attractive grass edging technique results.
Select appropriate tools for installation
Gather a sharp spade or edging tool, measuring tape, wheelbarrow, and tamping tool for your mowing strip project. A mattock helps break through tough soil and tree roots, while a string trimmer cleans up grass edges before installation. Having the right tools makes this easy lawn maintenance upgrade go smoothly and delivers professional lawn edging results that last for years.
Prepare the Ground for Professional Results
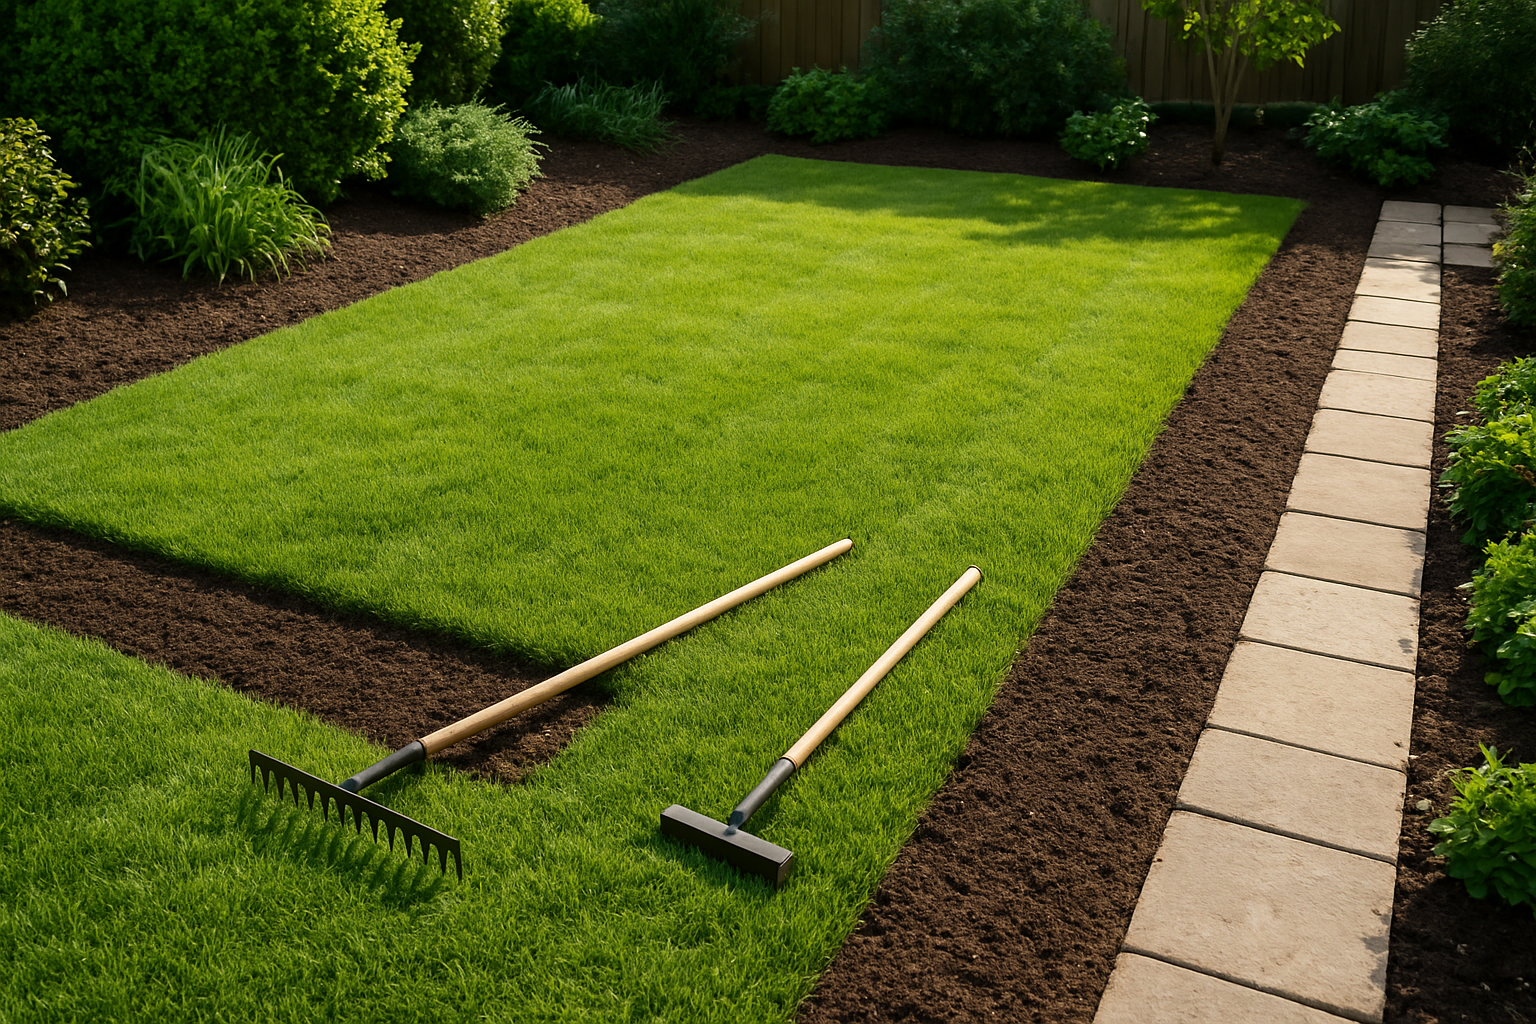
Remove existing grass and weeds completely
Start by cutting your grass as short as possible, then use a sharp spade to slice through the turf in manageable sections. Peel back the grass strips like carpet, ensuring you remove all root systems. For stubborn weeds along your future mowing strip path, apply a targeted herbicide or manually extract them with their entire root structure.
Level the soil surface using proper grading techniques
Check your soil level using a long straight board or string line to identify high and low spots. Fill depressions with quality topsoil and remove excess dirt from raised areas. Your mowing strip installation requires a consistent grade that follows your lawn’s natural contour while maintaining proper drainage away from your house and garden beds.
Compact the base for long-lasting stability
Pack down your prepared soil using a hand tamper or plate compactor, working in overlapping passes across the entire strip area. Add a thin layer of sand or crushed stone base material, then compact again until the surface feels firm underfoot. This crucial step prevents your landscape border from settling unevenly over time, ensuring your DIY mowing strip maintains its professional appearance for years.
Install Your Mowing Strip Foundation

Lay landscape fabric to prevent weed growth
Roll out your landscape fabric along the entire mowing strip foundation, ensuring complete coverage from edge to edge. This crucial barrier stops weeds from pushing through your base material and ruining your professional lawn edging results.
Add and level your chosen base material
Pour your base material—whether gravel, sand, or crushed stone—evenly across the fabric-covered strip. Use a rake to spread it uniformly, then compact with a hand tamper or plate compactor. Your mowing strip installation depends on this solid, level foundation for long-term durability.
Create proper drainage for water runoff
Slope your base material slightly away from your lawn and garden beds to prevent water pooling. This garden border strip should direct moisture toward natural drainage areas or storm drains. Poor drainage kills grass and creates muddy mess around your landscape border.
Ensure consistent depth throughout the strip
Measure depth every few feet using a ruler or measuring stick—aim for 2-3 inches of base material thickness. Inconsistent depth creates weak spots that sink over time, destroying your viral lawn hack’s professional appearance and making maintenance difficult.
Check alignment with string lines
Keep your string lines taut and reference them frequently as you work. Your DIY mowing strip should follow these guides perfectly for that crisp, professional lawn edging look. Remove any base material that extends beyond your marked boundaries—precision makes all the difference in easy lawn maintenance results.
Add Finishing Materials for Durability and Appeal
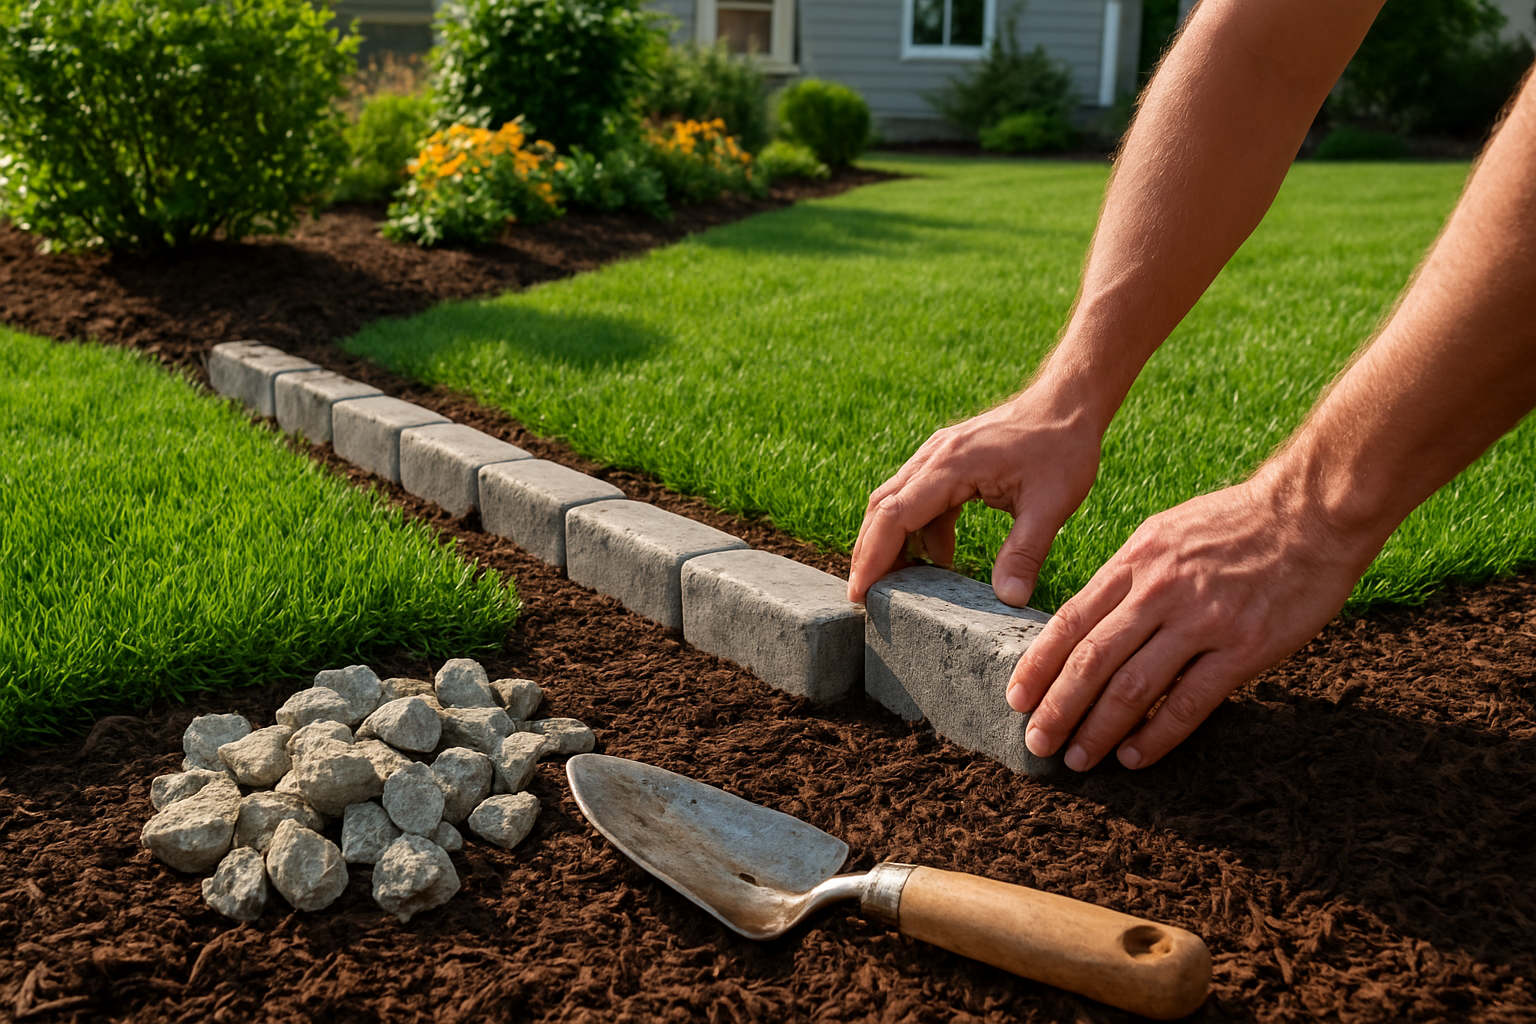
Install Your Selected Strip Material Evenly
Start laying your mowing strip material from one end, working systematically along your planned border. Keep each piece level and maintain consistent spacing between elements. Check alignment frequently using a string line or straight edge to ensure your professional lawn edging stays perfectly straight throughout the installation process.
Secure Edges to Prevent Shifting Over Time
Anchor your landscape border firmly by tamping down loose materials and adding edge restraints where needed. For brick or stone strips, pack soil tightly against the outer edges. This viral lawn hack works best when your materials can’t shift during regular mowing, so spend extra time securing these critical connection points.
Fill Gaps with Appropriate Jointing Material
Complete your DIY mowing strip by filling spaces between materials with sand, crushed stone, or polymeric sand depending on your chosen design. Work the filler material into every crevice using a brush or broom, then lightly mist with water to help everything settle. This final step transforms your garden border strip from amateur to professional-grade installation.
Complete the Installation with Professional Touches
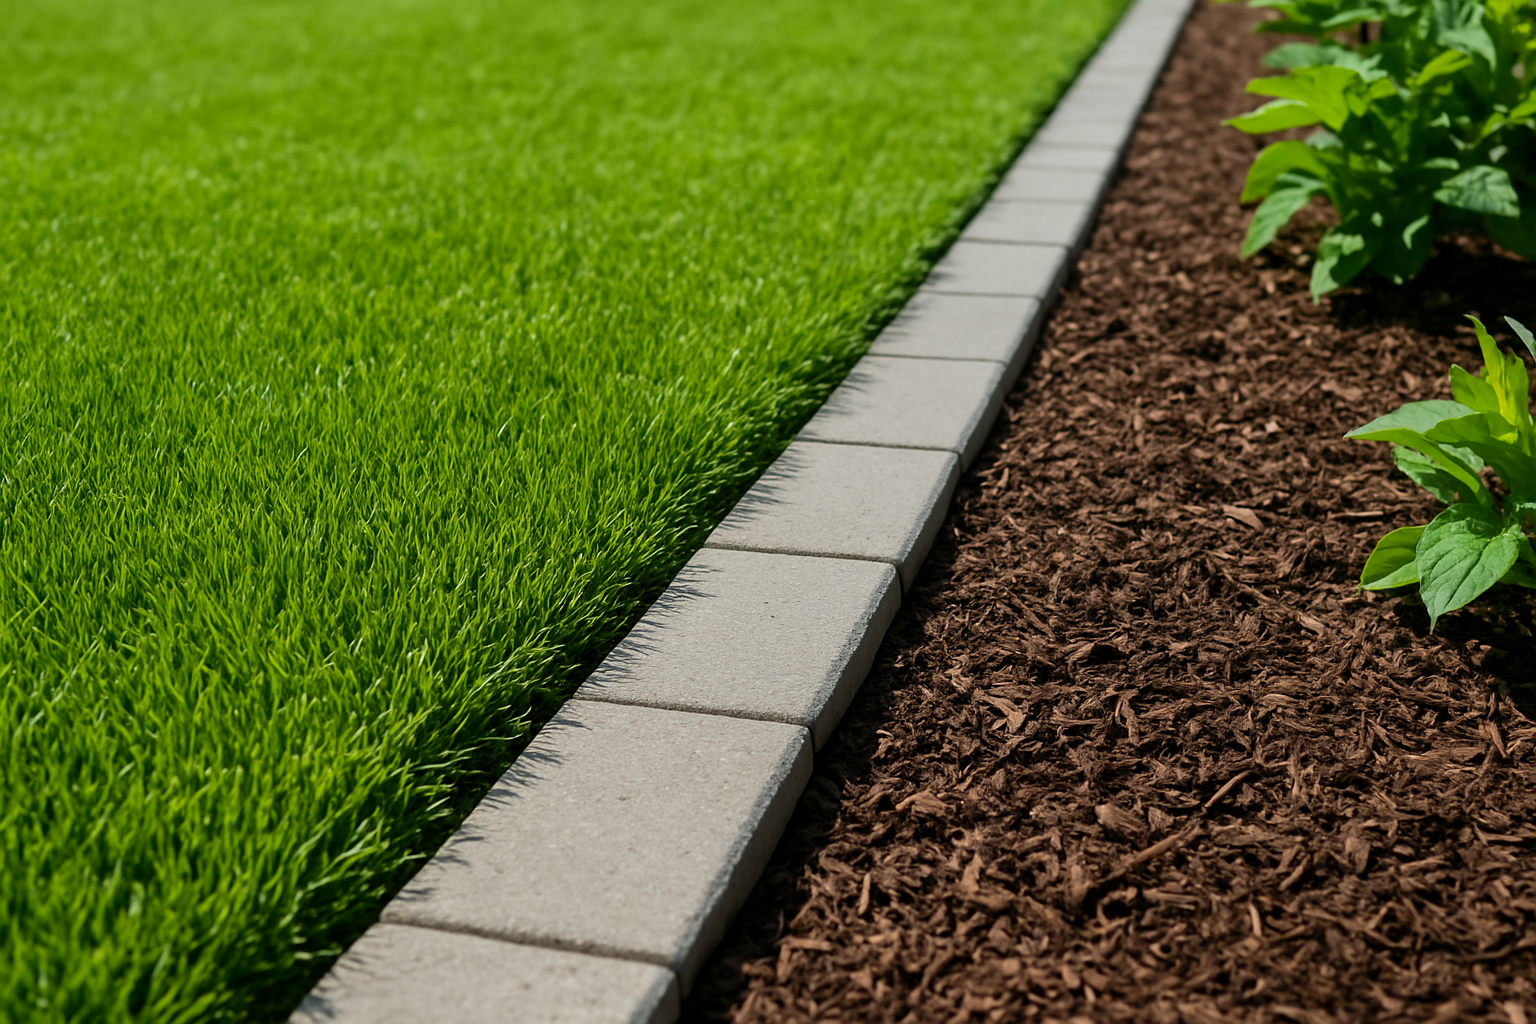
Clean excess debris from surrounding areas
Remove all loose soil, stone fragments, and installation materials from your newly completed mowing strip and surrounding lawn areas. Use a leaf blower or rake to clear debris that might interfere with your first mowing session. Pay special attention to removing any excess border material that could damage your mower blades.
Water the adjacent lawn to settle soil
Gently water the grass areas immediately bordering your new landscape border to help settle any disturbed soil. This professional lawn edging technique ensures the ground around your DIY mowing strip compacts properly and eliminates air pockets that could cause uneven surfaces during future maintenance.
Apply final inspection for quality assurance
Walk the entire length of your mowing strip installation, checking for loose materials, uneven sections, or gaps in your grass edging technique. Test the stability of your border materials by applying gentle pressure, and verify that your viral lawn hack creates a smooth transition for easy lawn maintenance without catching your mower wheels.
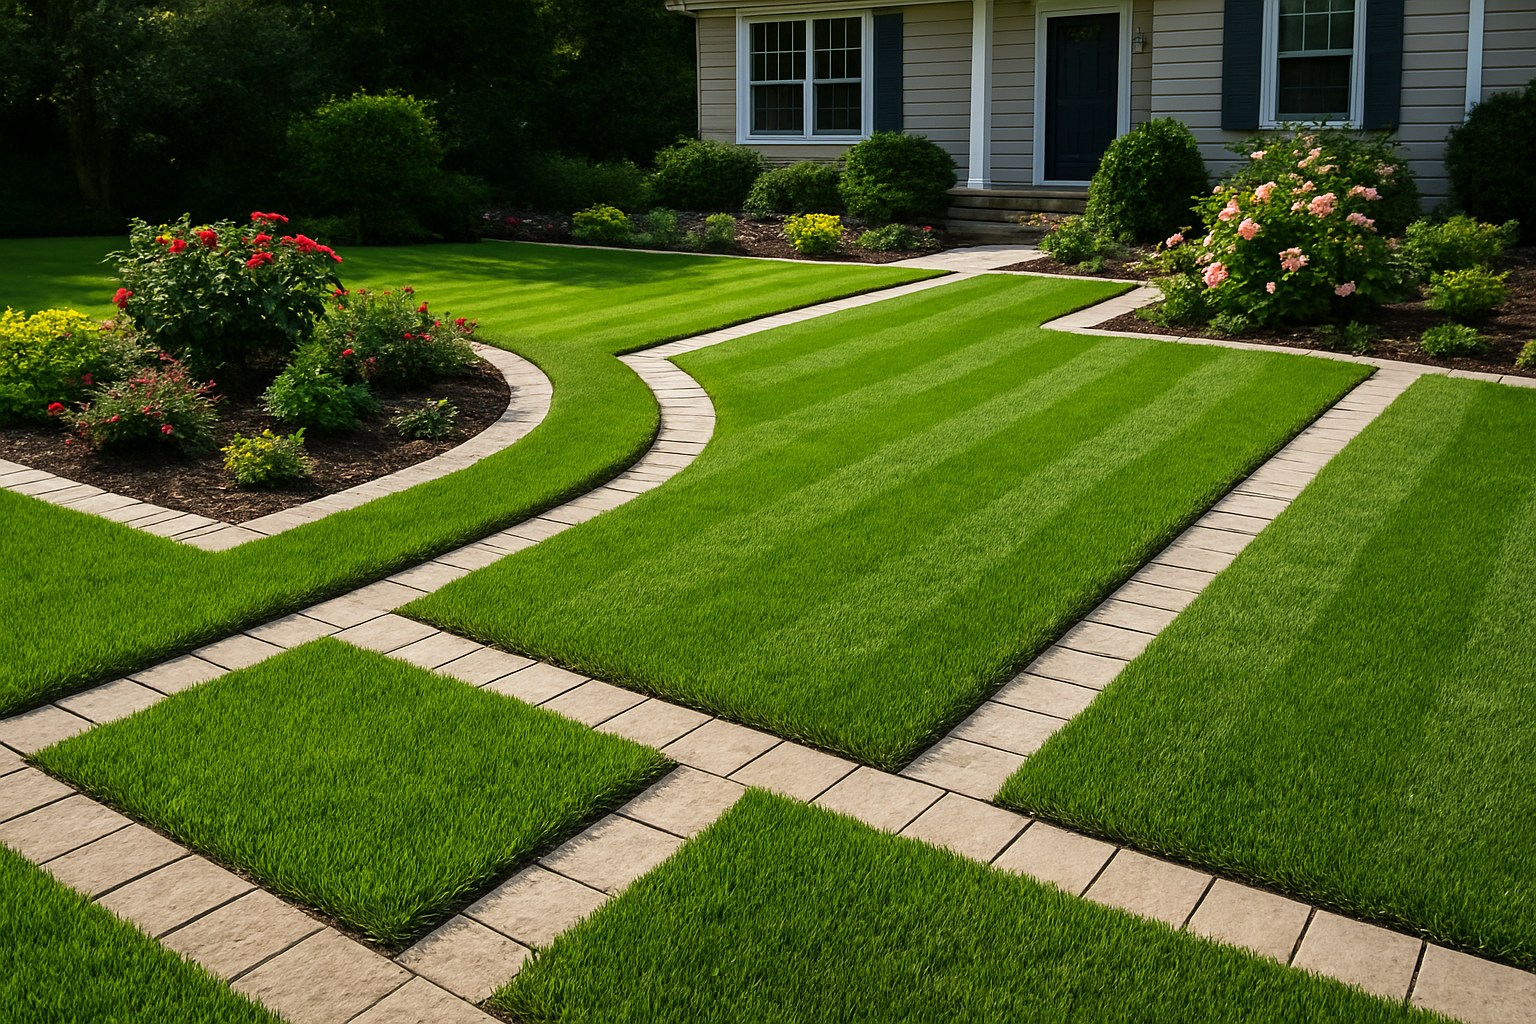
Your mowing strip doesn’t have to be just another weekend project that falls flat. By planning your design carefully, preparing the ground properly, and installing everything with attention to detail, you can create a professional-looking border that makes lawn maintenance a breeze. The key is taking your time with each step and choosing quality materials that will stand up to weather and regular use.
The difference between a strip that looks great for a few months and one that lasts for years comes down to proper installation and finishing touches. When you invest the effort upfront to do things right, you’ll save yourself countless hours of trimming and edging down the road. Give this technique a try in your own yard – you might be surprised at how much easier your lawn care routine becomes.


