Skip to content

[email protected] | About Us | Privacy Policy | Terms Of Use

Facebook Pinterest
logo
  • Home ImprovementExpand
    • Deck
    • Barn Doors
    • Patio
    • Bathroom
    • Garden Beds
    • Winter Home Prep
  • Mobile HomeExpand
    • Crawl Space
    • Skirting
  • BackyardExpand
    • Landscaping
    • Curb Appeal
    • Water Features
  • Porch
  • Garden
  • Contact
logo
Garden Beds

How to Fill a Raised Garden Bed for Under $30 (No Expensive Soil Needed)

If you’ve been putting off building a raised garden bed because you thought you’d need bags and bags of expensive soil, good news — you don’t. Filling a raised garden bed on a tight budget is completely doable, and plenty of gardeners do it every season without spending a fortune.

This guide is for you if you’re a beginner gardener working with a small budget, or someone who just wants to stop overpaying at the garden center. You don’t need a green thumb or a big yard. You just need a plan.

Here’s what you’ll walk away knowing: how to track down free and low-cost filling materials you probably already have access to, how to layer those materials the right way so your plants actually thrive, and how to make every dollar of your $30 budget count. You’ll also learn what common mistakes to skip so you’re not wasting money or starting over mid-season.

By the end, your raised bed will be filled, ready to plant, and proof that you don’t need to spend big to grow well.

Contents

Toggle
    • You Might Also Love These Ideas
      • 10 Materials You Can Put Under Raised Beds: The Complete…
      • 12 Best Vegetables to Grow in Raised Beds: Genius Ideas…
      • How to Make a Dry Creek Bed for Your Backyard:…
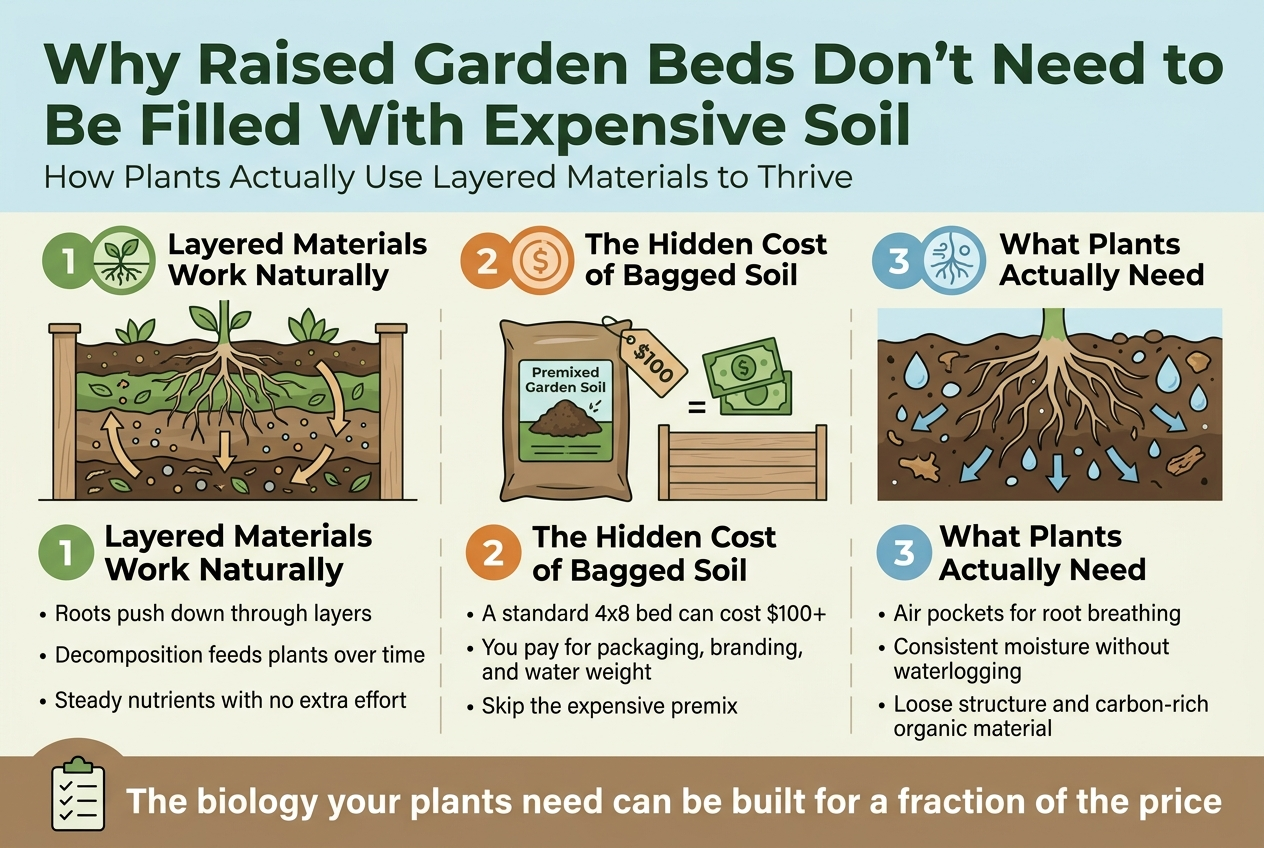
  • Why Raised Garden Beds Don’t Need to Be Filled With Expensive Soil
      • How Plants Actually Use Layered Materials to Thrive
      • The Hidden Cost of Premixed Garden Soil and Why You Can Skip It
      • What Really Matters for Healthy Root Growth and Drainage
  • Gather Free and Low-Cost Filling Materials Before You Spend a Dime
      • A. Raid Your Yard for Logs, Sticks, and Woody Debris
      • B. Source Cardboard and Newspaper from Local Stores for Free
      • C. Collect Grass Clippings, Leaves, and Kitchen Scraps
      • D. Find Cheap Compost or Aged Manure from Local Farms or Municipalities
  • Build Your Raised Bed in Budget-Friendly Layers for Maximum Results
      • Start with the Bottom Drainage Layer to Prevent Waterlogging
      • Add a Carbon-Rich Middle Layer to Break Down into Nutrients
      • Top Off with a Thin Affordable Growing Mix for Seeds and Roots
  • Stretch Your $30 Budget With Smart Spending Choices
      • The Only Items Worth Buying and Where to Find Them Cheapest
      • Compare Bulk Compost Versus Bagged Options at Big Box Stores
      • Use a Simple Cost Tracker to Stay Under Budget Before You Buy
      • Swap Materials With Neighbors to Cut Costs Even Further
  • Speed Up the Filling Process So Your Bed Is Ready to Plant Faster
      • A. Chop Materials Small to Accelerate Breakdown and Settle Faster
      • B. Water Each Layer Properly to Kickstart Decomposition
      • C. Use a Temporary Top Layer So You Can Plant Immediately
      • You Might Also Like!

You Might Also Love These Ideas

How to Stop Grass Growing on Flower Beds

How to Stop Grass Growing on Flower Beds: 7 Proven…

13 Raised Bed Garden Layouts for a Stunning DIY Yard

Dry Creek Bed for Your Backyard

How to Make a Dry Creek Bed for Your Backyard:…

Why Raised Garden Beds Don’t Need to Be Filled With Expensive Soil

Create a clean, professional full-bleed infographic in 3:2 aspect ratio with a wide horizontal layout, modern sans-serif fonts, and a natural gardening color palette of earthy greens, soil browns, beige, and soft sky blue accents. Top header across the full width: large bold title text in dark green, centered-left:"Why Raised Garden Beds Don't Need to Be Filled With Expensive Soil"Subtitle directly below in smaller lighter text:"How Plants Actually Use Layered Materials to Thrive"Use three wide horizontal sections across the page, each with a clear numbered badge and icon.Left section: a cross-section illustration of a raised garden bed with stacked organic layers, roots growing downward through the layers, small nutrient particles and decomposition arrows. Add a green circular badge with number "1" and a leaf/roots icon. Include heading text:"Layered Materials Work Naturally"Include short body text:"Roots push down through layers""Decomposition feeds plants over time""Steady nutrients with no extra effort"Center section: show a bag of premixed garden soil with a price tag, next to a raised bed outline and money icons, with a simple cost comparison graphic. Add an orange circular badge with number "2" and a dollar-sign icon. Include heading text:"The Hidden Cost of Bagged Soil"Include short body text:"A standard 4x8 bed can cost $100+""You pay for packaging, branding, and water weight""Skip the expensive premix"Right section: show healthy roots in loose soil with air pockets, moisture droplets, drainage arrows, and organic matter pieces. Add a blue circular badge with number "3" and a root/air icon. Include heading text:"What Plants Actually Need"Include short body text:"Air pockets for root breathing""Consistent moisture without waterlogging""Loose structure and carbon-rich organic material"Add a bottom-wide summary band with a simple checklist icon and bold text:"The biology your plants need can be built for a fraction of the price"Use clear visual hierarchy, bold section headings, smaller readable body text, subtle dividers between sections, and clean icons throughout.

How Plants Actually Use Layered Materials to Thrive

When you stack different organic materials in your raised bed, your plants don’t just sit in dirt — they work through a living system. Roots push down through layers, pulling different nutrients from each level as decomposition happens naturally beneath them, feeding your plants steadily over time without any extra effort from you.

Also Read  13 Raised Bed Garden Layouts for a Stunning DIY Yard

The Hidden Cost of Premixed Garden Soil and Why You Can Skip It

Bagged premixed garden soil looks convenient, but once you do the math, filling a standard 4×8 raised bed that way can easily cost you $100 or more. You’re mostly paying for packaging, branding, and water weight. The actual biology your plants need? You can build that yourself for a fraction of the price using materials you likely already have access to.


What Really Matters for Healthy Root Growth and Drainage

Your plants care about three things: air pockets so roots can breathe, consistent moisture without waterlogging, and a steady supply of nutrients as organic matter breaks down. You don’t need fancy soil to deliver any of that. Good drainage, loose structure, and carbon-rich organic material do the heavy lifting — and none of those things require you to spend big.

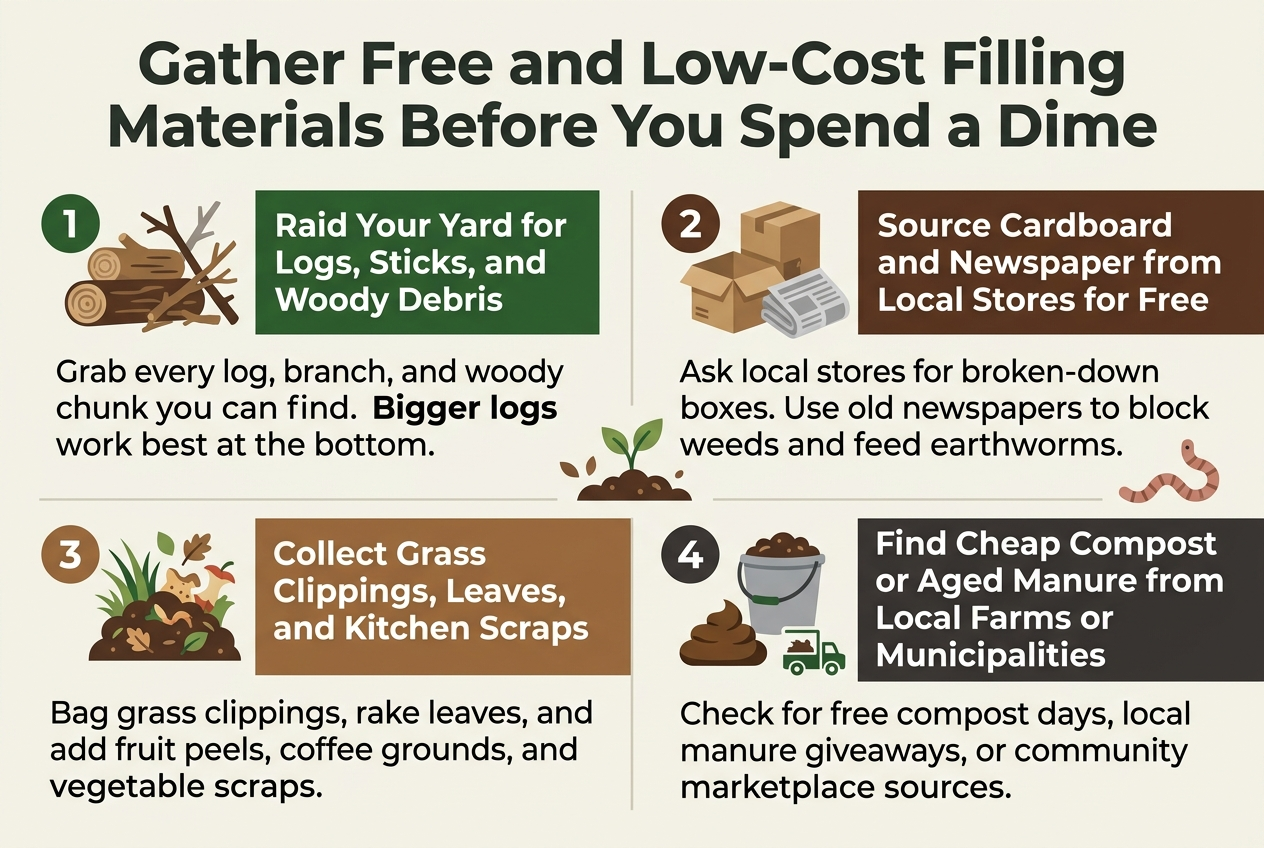
Gather Free and Low-Cost Filling Materials Before You Spend a Dime
Create a full-bleed infographic in a clean modern flat vector style, aspect ratio 3:2, with a wide horizontal layout and no poster frame or inset border. Use a natural earthy color palette of forest green, warm brown, muted tan, soft gray, and dark charcoal text on an off-white background. Add a bold, large top heading spanning the width: "Gather Free and Low-Cost Filling Materials Before You Spend a Dime"Below the heading, arrange four wide horizontal sections in a 2x2 grid with clear spacing, each section with a numbered circle, a simple icon, a bold subheading, and short supporting text. Use clean sans-serif fonts, strong visual hierarchy, and crisp flat icons.Top left section:Numbered circle "1"Icon: yard logs, sticks, and woody debrisSubheading text: "Raid Your Yard for Logs, Sticks, and Woody Debris"Body text: "Grab every log, branch, and woody chunk you can find. Bigger logs work best at the bottom."Top right section:Numbered circle "2"Icon: stacked cardboard boxes and folded newspaperSubheading text: "Source Cardboard and Newspaper from Local Stores for Free"Body text: "Ask local stores for broken-down boxes. Use old newspapers to block weeds and feed earthworms."Bottom left section:Numbered circle "3"Icon: grass clippings, leaves, and kitchen scraps in a compost pileSubheading text: "Collect Grass Clippings, Leaves, and Kitchen Scraps"Body text: "Bag grass clippings, rake leaves, and add fruit peels, coffee grounds, and vegetable scraps."Bottom right section:Numbered circle "4"Icon: bucket of compost, manure, and a small farm or municipal pickup symbolSubheading text: "Find Cheap Compost or Aged Manure from Local Farms or Municipalities"Body text: "Check for free compost days, local manure giveaways, or community marketplace sources."Add subtle visual accents between sections using small leaf, soil, and worm motifs. Keep all text readable, balanced, and aligned left within each block. Use bold colored section headers, lighter body text, and consistent icon style throughout.

A. Raid Your Yard for Logs, Sticks, and Woody Debris

Before you spend a single dollar, walk around your yard and grab every log, branch, and woody chunk you can find. These materials form the bottom layer of your bed, breaking down slowly and feeding your soil for years. Bigger logs work best at the very bottom.

B. Source Cardboard and Newspaper from Local Stores for Free

Hit up your local grocery store, furniture shop, or appliance retailer and ask for their broken-down boxes. You can also grab old newspapers from neighbors or recycling bins. Lay these flat inside your bed to block weeds while giving earthworms something they absolutely love to munch through.

Also Read  How to Create Beautiful Flower Beds That Transform Your Garden

C. Collect Grass Clippings, Leaves, and Kitchen Scraps

Your own backyard is basically a free material goldmine. Bag up grass clippings after mowing, rake together fallen leaves, and toss in fruit peels, coffee grounds, and vegetable scraps from your kitchen. These nitrogen-rich and carbon-rich materials stack together beautifully, breaking down into rich, dark organic matter your plants will thrive in.

D. Find Cheap Compost or Aged Manure from Local Farms or Municipalities

Check whether your town or city offers free compost pickup or drop-off days — many do. Local horse stables, chicken farms, and cattle ranches often give away aged manure for free or next to nothing since they need to get rid of it anyway. A quick Facebook Marketplace search or post in a local community group can connect you with bags of the good stuff within hours.

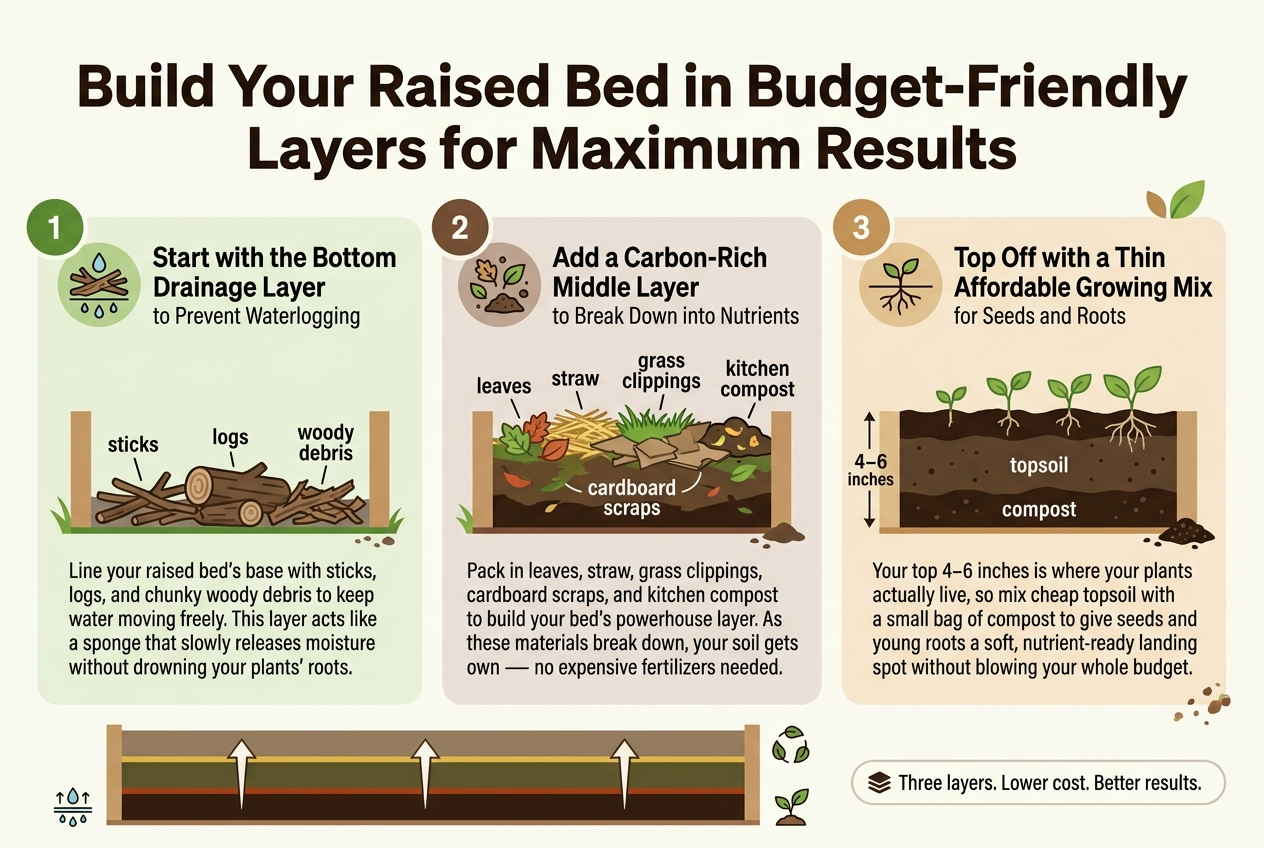
Build Your Raised Bed in Budget-Friendly Layers for Maximum Results
Create a clean professional infographic illustration in a wide 3:2 aspect ratio, full-bleed background with no frame, no poster border, and no narrow centered stack. Use a bright natural gardening palette with earthy browns, leafy greens, soft cream, and warm tan accents. Modern sans-serif fonts, bold title at top, clear hierarchy, crisp vector-style icons, balanced multi-section horizontal layout.TOP HEADER:Large bold heading across the top: "Build Your Raised Bed in Budget-Friendly Layers for Maximum Results"MAIN BODY:Divide the infographic into three wide horizontal sections or three side-by-side panels across the center, each with a numbered circle icon and a small illustrated layer diagram.LEFT SECTION:A green numbered circle with "1" and a drainage icon of sticks, logs, and woody debris at the bottom of a raised bed illustration.Heading text: "Start with the Bottom Drainage Layer"Subtext text: "to Prevent Waterlogging"Body text: "Line your raised bed's base with sticks, logs, and chunky woody debris to keep water moving freely. This layer acts like a sponge that slowly releases moisture without drowning your plants' roots."Visual labels near the layer: "sticks", "logs", "woody debris"CENTER SECTION:A brown numbered circle with "2" and an icon showing leaves, straw, grass clippings, cardboard scraps, and compost piled in the middle layer of a raised bed illustration.Heading text: "Add a Carbon-Rich Middle Layer"Subtext text: "to Break Down into Nutrients"Body text: "Pack in leaves, straw, grass clippings, cardboard scraps, and kitchen compost to build your bed's powerhouse layer. As these materials break down, your soil gets richer on its own — no expensive fertilizers needed."Visual labels near the layer: "leaves", "straw", "grass clippings", "cardboard scraps", "kitchen compost"RIGHT SECTION:A tan numbered circle with "3" and an icon showing a thin top growing mix layer with seedlings and roots.Heading text: "Top Off with a Thin Affordable Growing Mix"Subtext text: "for Seeds and Roots"Body text: "Your top 4–6 inches is where your plants actually live, so mix cheap topsoil with a small bag of compost to give seeds and young roots a soft, nutrient-ready landing spot without blowing your whole budget."Visual labels near the layer: "4–6 inches", "topsoil", "compost"BOTTOM STRIP:A simple horizontal visual of the three stacked layers in one raised bed cross-section with arrows pointing upward from base to top, and small icons for drainage, decomposition, and seedlings. Include a concise footer note in a small badge: "Three layers. Lower cost. Better results."STYLE DETAILS:Use clean white or very light cream background, subtle shadows, rounded rectangles for each section, and clear spacing. Add small leaf and soil texture accents, but keep it uncluttered. Emphasize the layered bed diagram with bold colored bands: dark brown bottom, mixed earthy middle, light topsoil top. Use high contrast text and simple gardening icons throughout.

Start with the Bottom Drainage Layer to Prevent Waterlogging

Line your raised bed’s base with sticks, logs, and chunky woody debris to keep water moving freely. This layer acts like a sponge that slowly releases moisture without drowning your plants’ roots.

Add a Carbon-Rich Middle Layer to Break Down into Nutrients

Pack in leaves, straw, grass clippings, cardboard scraps, and kitchen compost to build your bed’s powerhouse layer. As these materials break down, your soil gets richer on its own — no expensive fertilizers needed.

Top Off with a Thin Affordable Growing Mix for Seeds and Roots

Your top 4–6 inches is where your plants actually live, so mix cheap topsoil with a small bag of compost to give seeds and young roots a soft, nutrient-ready landing spot without blowing your whole budget.

Also Read  12 Best Vegetables to Grow in Raised Beds: Genius Ideas for Stunning Yields

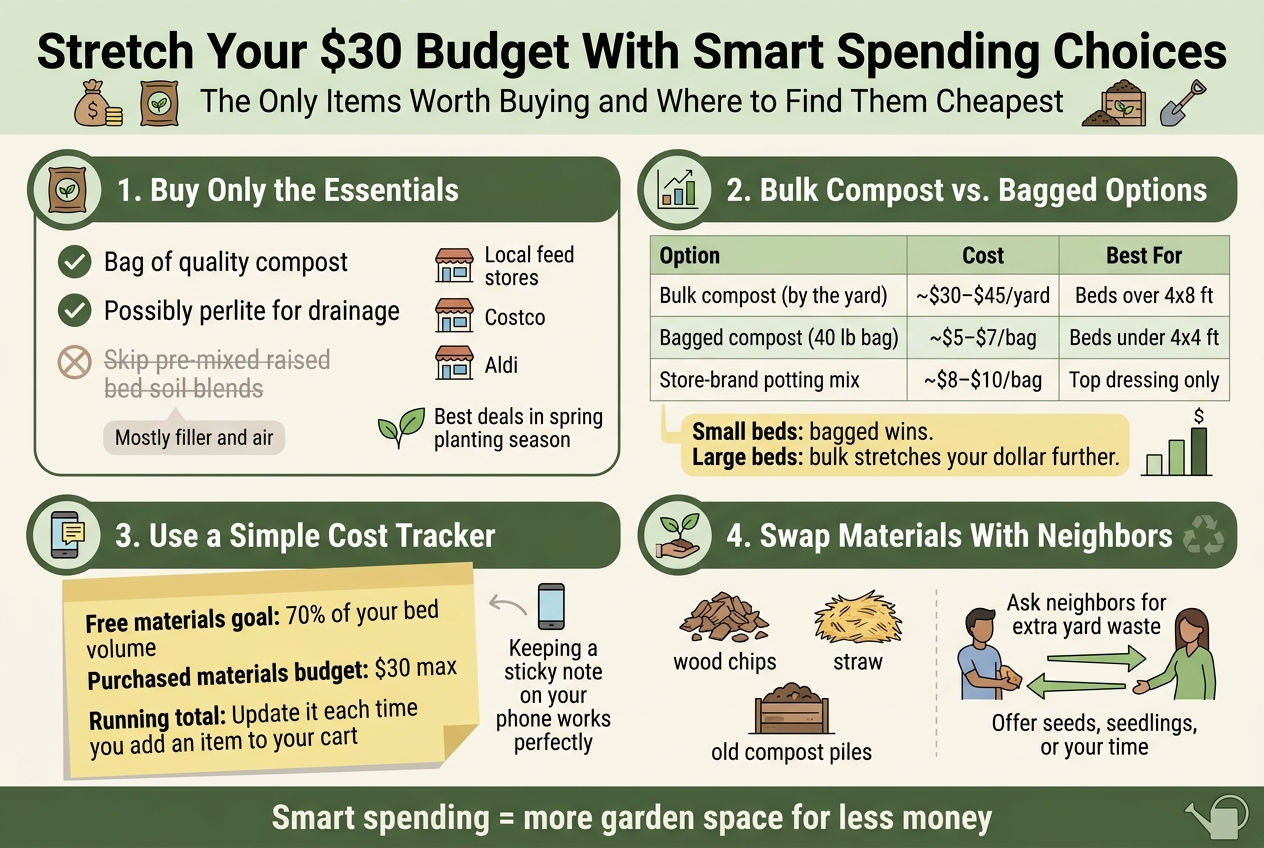
Stretch Your $30 Budget With Smart Spending Choices
Create a clean, professional full-bleed infographic in a 3:2 aspect ratio with a wide horizontal layout, modern flat vector style, crisp sans-serif fonts, and a color palette of earthy greens, tan, brown, and soft blue accents. Use strong visual hierarchy with a bold title at the top and four organized content sections across the page in wide blocks, not a vertical poster.Top header across the full width:Large bold title text: "Stretch Your $30 Budget With Smart Spending Choices"Smaller subtitle beneath: "The Only Items Worth Buying and Where to Find Them Cheapest"Add a small icon row near the title: a money bag icon, a compost bag icon, and a shovel icon.Section 1 on the upper left, in a wide rounded rectangle with a compost bag icon:Heading text: "1. Buy Only the Essentials"Bullets with checkmark icons:"Bag of quality compost""Possibly perlite for drainage"Add a crossed-out icon next to a faded line of text: "Skip pre-mixed raised bed soil blends"Small note text at bottom of section: "Mostly filler and air"Add small store icons labeled: "Local feed stores", "Costco", "Aldi", with a spring leaf icon and text: "Best deals in spring planting season"Section 2 on the upper right, in a comparison table style block with a chart icon:Heading text: "2. Bulk Compost vs. Bagged Options"Create a clean 3-column table with headers:"Option" | "Cost" | "Best For"Row 1: "Bulk compost (by the yard)" | "~$30–$45/yard" | "Beds over 4x8 ft"Row 2: "Bagged compost (40 lb bag)" | "~$5–$7/bag" | "Beds under 4x4 ft"Row 3: "Store-brand potting mix" | "~$8–$10/bag" | "Top dressing only"Add a short highlighted callout beneath the table: "Small beds: bagged wins. Large beds: bulk stretches your dollar further."Use a simple bar icon or dollar-sign scale graphic beside the callout.Section 3 across the lower left, in a checklist block with a phone sticky-note icon:Heading text: "3. Use a Simple Cost Tracker"Show a sticky note graphic with three bold lines of text:"Free materials goal: 70% of your bed volume""Purchased materials budget: $30 max""Running total: Update it each time you add an item to your cart"Small phone icon with text beside it: "Keeping a sticky note on your phone works perfectly"Section 4 across the lower right, in a neighbor-sharing block with a seedling and swap icon:Heading text: "4. Swap Materials With Neighbors"Show small illustrated items with labels: "wood chips", "straw", "old compost piles"Add a friendly neighbor handoff illustration with arrows between two people and text:"Ask neighbors for extra yard waste""Offer seeds, seedlings, or your time"Use warm friendly icons and a subtle reuse/recycle motif.Footer band across the bottom in smaller bold text:"Smart spending = more garden space for less money"Add a subtle watering can icon at the far right.Keep all text sharp and readable, with balanced spacing, clear section dividers, and a clean infographic layout with no photo realism.

The Only Items Worth Buying and Where to Find Them Cheapest

You really only need to spend money on two things: a bag of quality compost and possibly some perlite for drainage. Skip the pre-mixed “raised bed soil” blends at garden centers — they’re mostly filler and air. Your best deals are at local feed stores, Costco, or Aldi during spring planting season.

Compare Bulk Compost Versus Bagged Options at Big Box Stores

OptionCostCoverageBest For
Bulk compost (by the yard)~$30–$45/yardLarge bedsBeds over 4×8 ft
Bagged compost (40 lb bag)~$5–$7/bagSmall fillsBeds under 4×4 ft
Store-brand potting mix~$8–$10/bagTop dressing onlySeed starting

If your bed is small, bagged wins. For anything bigger, bulk compost stretches your dollar way further.

Use a Simple Cost Tracker to Stay Under Budget Before You Buy

Before you pull out your wallet, jot this down:

  • Free materials goal: 70% of your bed volume
  • Purchased materials budget: $30 max
  • Running total: Update it each time you add an item to your cart

Keeping a sticky note on your phone works perfectly for this.

Swap Materials With Neighbors to Cut Costs Even Further

Ask your neighbors if they have extra wood chips, straw, or old compost piles sitting around. You’d be surprised how many people are happy to give away yard waste. Offer to trade something you have — seeds, seedlings, or even your time helping with their garden project.

Speed Up the Filling Process So Your Bed Is Ready to Plant Faster
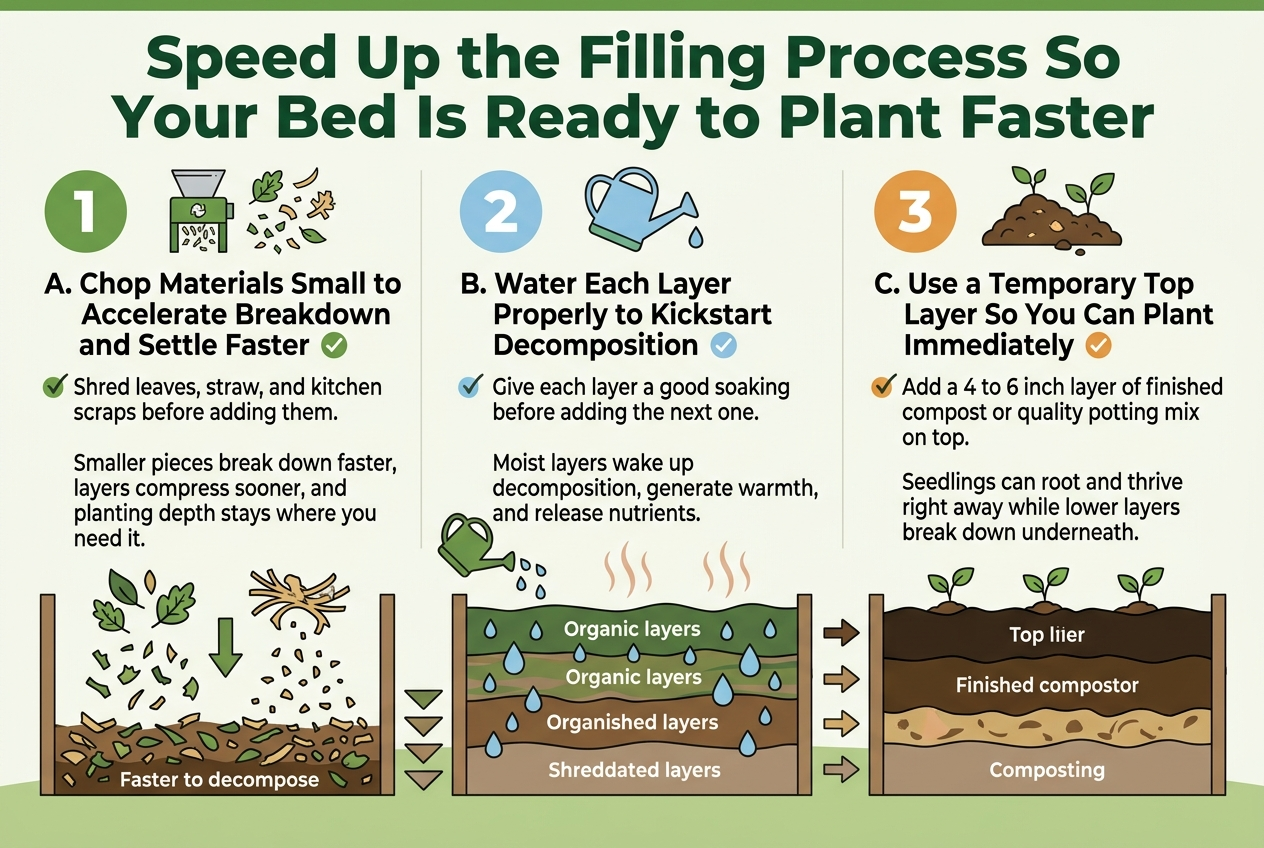
Full-bleed clean professional infographic illustration in 3:2 aspect ratio, landscape layout, no border, no inset frame. Top header band across the full width with a large bold title in dark green sans-serif: "Speed Up the Filling Process So Your Bed Is Ready to Plant Faster". Use a fresh gardening color palette of deep green, leaf green, earthy brown, warm beige, and soft sky blue accents. Below the title, create three wide horizontal content blocks or three equal columns across the page, each with a large numbered circle, a simple icon, a bold subheading, and short explanatory text. Use clear visual hierarchy, crisp typography, and plenty of white space.Left section, numbered "1" in a green circle with a small shredder/mulching icon and chopped leaves/straw scraps:"A. Chop Materials Small to Accelerate Breakdown and Settle Faster""Shred leaves, straw, and kitchen scraps before adding them.""Smaller pieces break down faster, layers compress sooner, and planting depth stays where you need it."Show shredded fragments becoming smaller and faster to decompose with downward settling arrows.Center section, numbered "2" in a blue circle with a watering can icon and layered bed being watered:"B. Water Each Layer Properly to Kickstart Decomposition""Give each layer a good soaking before adding the next one.""Moist layers wake up decomposition, generate warmth, and release nutrients."Show water droplets soaking through stacked organic layers with subtle warmth lines rising from the bed.Right section, numbered "3" in an orange circle with a compost mound and seedling icon:"C. Use a Temporary Top Layer So You Can Plant Immediately""Add a 4 to 6 inch layer of finished compost or quality potting mix on top.""Seedlings can root and thrive right away while lower layers break down underneath."Show a dark rich top layer over lighter composting layers, with small seedlings planted in the top layer.Use small arrows or layered cross-section graphics to show the bed filling from bottom to top. Include neat labels for the layers, a subtle garden-bed cross-section illustration spanning the lower half, and small checkmark accents near each main point. Keep all text exact and legible, with bold subheadings and smaller body text beneath.

A. Chop Materials Small to Accelerate Breakdown and Settle Faster

Run your leaves, straw, and kitchen scraps through a shredder or bag them up and run a lawn mower over them before tossing them into your bed. Smaller pieces break down significantly faster, meaning your layers compress and settle within weeks rather than months, so your planting depth stays where you need it.

B. Water Each Layer Properly to Kickstart Decomposition

As you build each layer, give it a good soaking before adding the next one. Your organic materials need moisture to get decomposition started — think of it like waking them up. A dry pile just sits there doing nothing, but a moist one gets to work almost immediately, generating the warmth and nutrients your plants will love.

C. Use a Temporary Top Layer So You Can Plant Immediately

You don’t have to wait for everything below to fully break down before you start planting. Spread a four to six inch layer of finished compost or quality potting mix right at the top, and your seedlings have everything they need to root and thrive while the lower layers slowly do their thing underneath.

You Might Also Like!

  • The $50 Raised Garden Bed Hack That Grows More Food Than a $500 Kit
  • How to Fill a Raised Garden Bed
    How to Fill a Raised Garden Bed Without Going Broke (Or Killing Your Plants)
  • DIY Garden Box
    DIY Garden Box, Step by Step Guide
Rafay Khan

Post navigation

Previous Previous
The Container Drainage Trick That Saves Every Plant (Most Beginners Skip This)
NextContinue
The Mobile Home Paint Trick That Adds $15,000 in Value for $300

You Might Also Like!

  • The $50 Raised Garden Bed Hack That Grows More Food Than a $500 Kit
  • How to Fill a Raised Garden Bed
    How to Fill a Raised Garden Bed Without Going Broke (Or Killing Your Plants)
  • DIY Garden Box
    DIY Garden Box, Step by Step Guide

Search More!

About DearWorld

We share practical DIY tips, budget-friendly ideas, and creative inspiration for mobile homes, backyards, patios, porches, gardens, and skirting. Helping you make every space feel like home — one project at a time.

  • About Us
  • Privacy Policy
  • Terms & Conditions
  • Blog

© 2026 Dear World - WordPress Theme by Kadence WP

Facebook Instagram Pinterest
Scroll to top
  • Home Improvement
    • Deck
    • Barn Doors
    • Patio
    • Bathroom
    • Garden Beds
    • Winter Home Prep
  • Mobile Home
    • Crawl Space
    • Skirting
  • Backyard
    • Landscaping
    • Curb Appeal
    • Water Features
  • Porch
  • Garden
  • Contact
Search