Why You Need A Designated Dog Potty Area Outside (And How To Plan It)

Training your dog to go potty in random spots around your yard creates messy cleanup, dead grass patches, and unpleasant surprises for your family. A designated dog potty area outside solves these problems while making your life easier and your yard more enjoyable.
This guide is for dog owners who want to protect their lawn, create cleaner outdoor spaces, and establish better bathroom routines for their pets. You’ll discover the key benefits of having a dedicated potty zone, learn how to choose the best location on your property, and get a complete breakdown of the materials and installation steps needed to create a successful dog bathroom area.
Benefits of Creating a Dedicated Dog Potty Area
Protects your lawn and garden from damage
Your beautiful grass and prized flower beds take a beating when your dog goes wherever they please. Concentrated urine creates unsightly brown spots that can kill grass permanently, while frequent digging and trampling destroys delicate plants. A designated potty area keeps the damage contained to one specific spot, preserving the rest of your outdoor space.
You Might Also Love These Ideas


Reduces odors and unsanitary conditions
Nobody wants their backyard smelling like a public restroom. When waste gets scattered across your entire yard, odors build up and create an unpleasant environment for outdoor activities. A dedicated area allows you to manage smells more effectively with proper drainage and regular cleaning, keeping your outdoor space fresh for family gatherings and playtime.
Makes cleanup faster and more efficient
Hunting around your entire yard for waste turns a simple chore into a treasure hunt you’d rather skip. With a designated potty area, you know exactly where to look, cutting cleanup time in half. You can even add gravel or mulch to make waste easier to spot and remove, turning this daily task into a quick two-minute routine.
Creates consistent bathroom habits for your dog
Dogs thrive on routine and predictability. When you establish a specific potty location, your dog learns to associate that area with bathroom time, making house training more successful. This consistency also helps during travel or visits to other homes, as your dog understands the concept of designated bathroom spaces and adapts more easily to new environments.
Health and Safety Advantages for Your Family

Minimizes exposure to harmful bacteria and parasites
Your dedicated potty area acts as a containment zone for dangerous pathogens like E. coli, salmonella, and parasites including roundworms and hookworms that thrive in dog waste. When waste is scattered randomly across your yard, these harmful organisms spread to areas where your family walks, plays, and relaxes. By concentrating waste in one designated spot, you dramatically reduce the risk of accidentally tracking these contaminants into your home on shoes and clothing.
Prevents children from accidentally stepping in waste
Kids love running barefoot through grass and playing outdoor games without watching where they step. A designated potty area keeps waste away from play zones, swing sets, and pathways your children use daily. You’ll have peace of mind knowing your little ones can explore your yard freely without the unpleasant surprise of stepping in something they shouldn’t. This setup protects both their physical health and saves you from dealing with contaminated shoes and upset children.
Reduces pest attraction to your property
Dog waste attracts flies, rodents, and other unwanted pests that can spread disease and create additional problems around your home. When waste is confined to a specific area with proper drainage and regular maintenance, you eliminate the scattered food sources that draw these creatures to your property. This concentrated approach makes pest control more manageable and keeps your outdoor living spaces more pleasant for family gatherings and entertaining guests.
Choosing the Perfect Location for Maximum Success
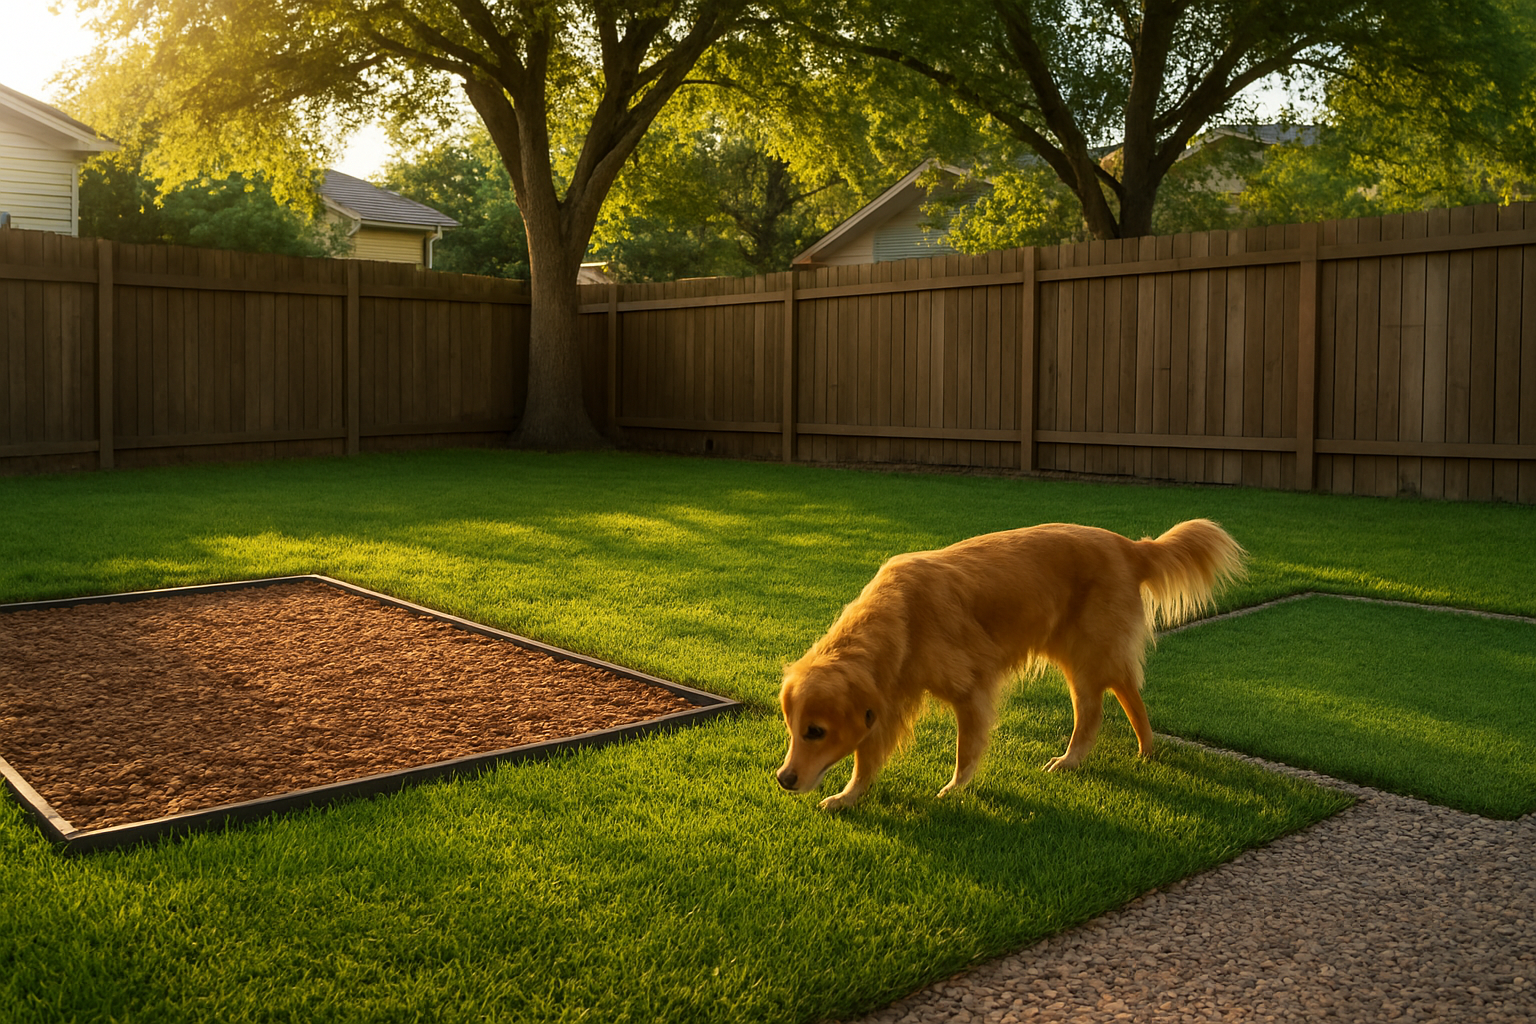
Select an easily accessible spot for daily use
Choose a location within 50-100 feet of your main exit door to make those frequent potty trips manageable, especially during bad weather or nighttime outings.
Consider drainage and water runoff patterns
Pick a spot that naturally drains well or slopes away from your home to prevent standing water and odors from becoming a problem during rainy seasons.
Ensure adequate distance from living and dining areas
Position your dog’s potty area at least 20 feet away from patios, decks, and windows where you spend time to keep odors from drifting into your living spaces.
Factor in sun exposure and wind direction
Look for a spot that gets some morning sun to help dry waste naturally, but avoid areas where prevailing winds blow directly toward your house or outdoor entertaining spaces.
Account for privacy from neighbors
Select a location that’s partially screened from neighboring properties with existing landscaping, fencing, or natural barriers to maintain good relationships and your dog’s comfort while doing their business.
Essential Materials and Supplies You’ll Need
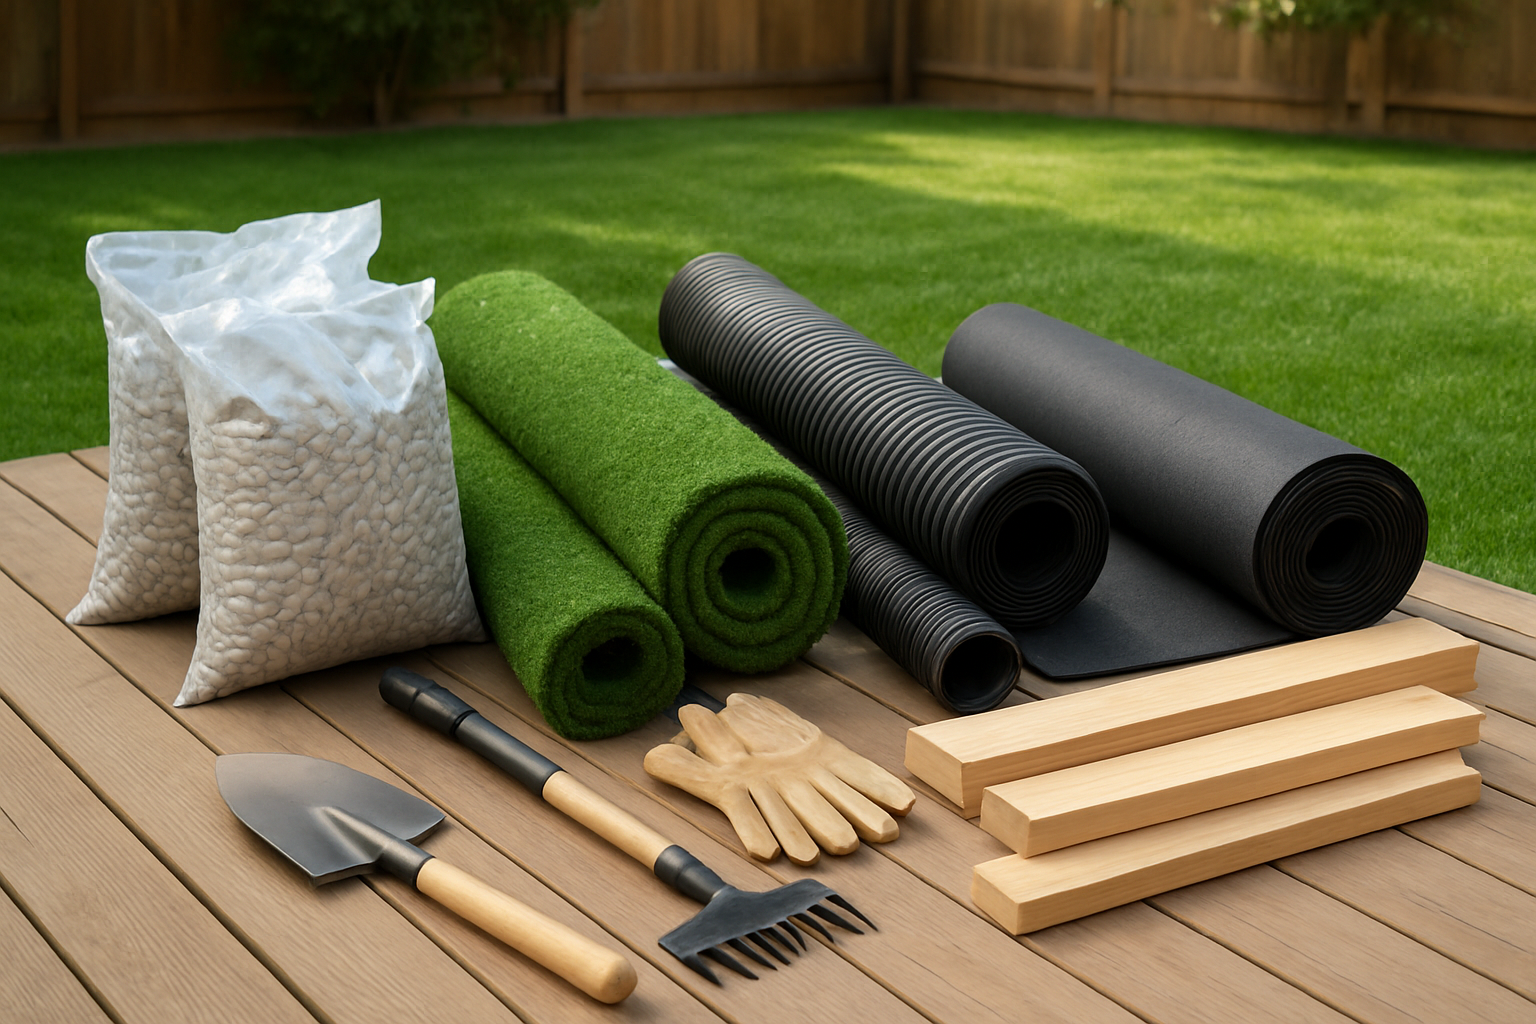
Ground cover options that work best
Your ground cover choice makes or breaks your dog potty area’s success. Wood chips and bark mulch absorb odors naturally while providing excellent drainage, making cleanup easier. Pea gravel offers superior drainage and doesn’t retain smells, but some dogs dislike the texture on their paws. Sand works well for smaller dogs and drains quickly, though it requires more frequent replacement. Artificial grass gives you a lawn-like appearance with minimal maintenance, but you’ll need proper drainage underneath. Pine pellets break down into sawdust when wet, creating natural odor control, though they need regular replenishing.
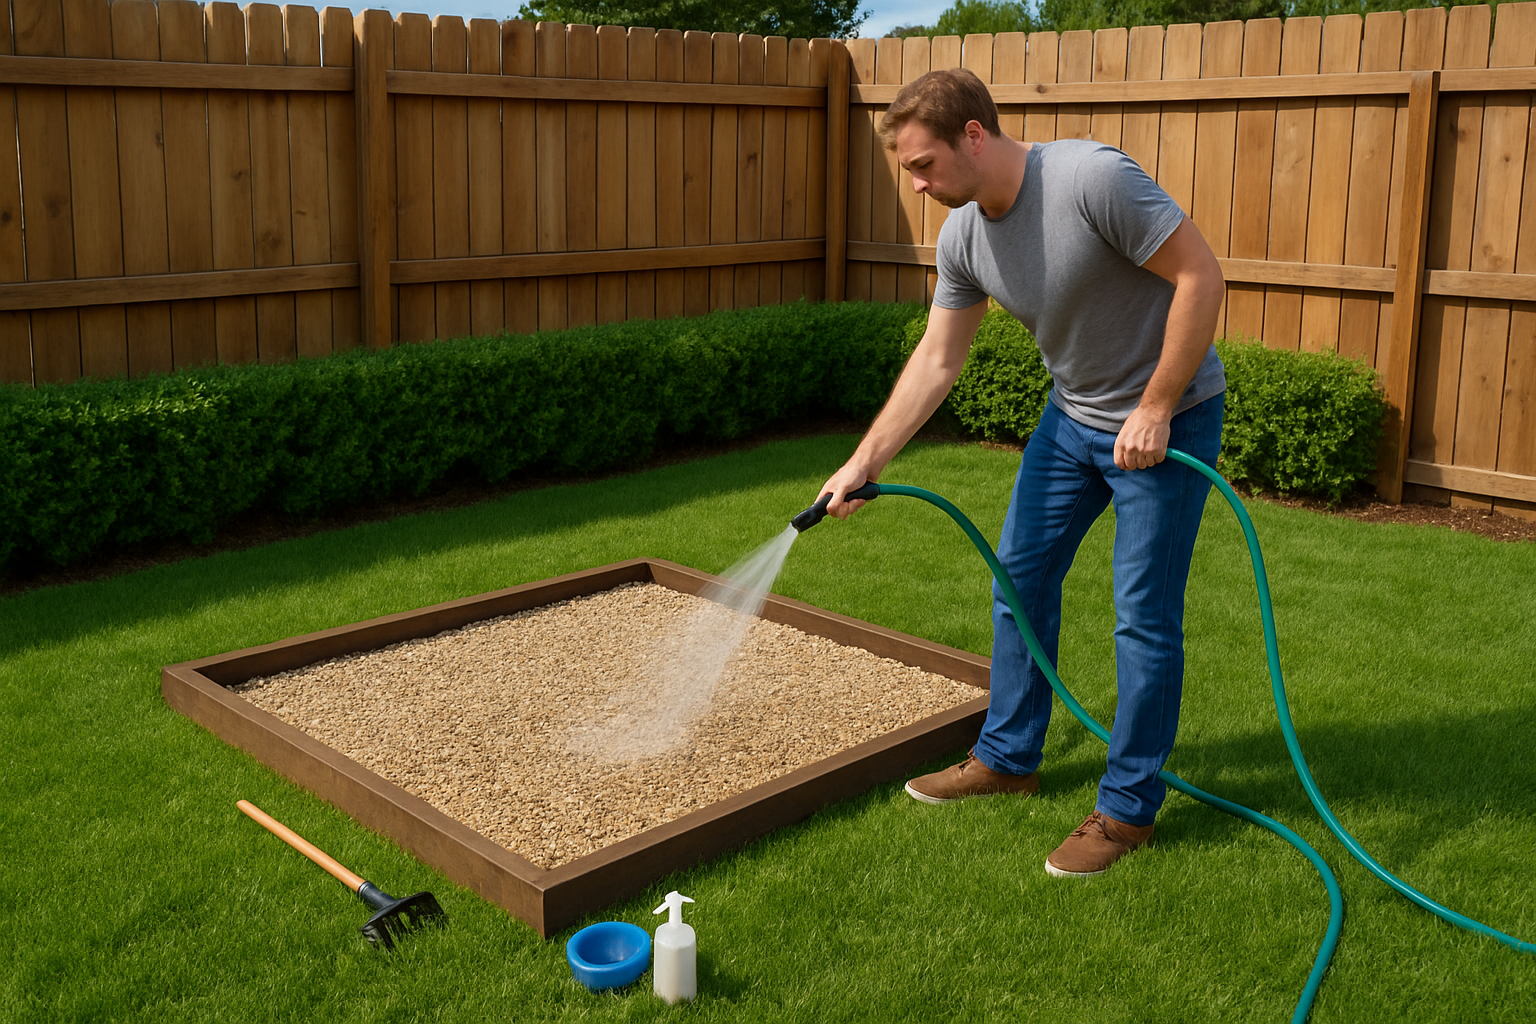
Drainage solutions to prevent standing water
Standing water creates health hazards and nasty smells, so proper drainage is non-negotiable. French drains work best for areas with poor natural drainage – dig down 18 inches, add gravel, and install perforated pipe. Sloping your area at a 2% grade directs water away from the space naturally. Adding a gravel base under your chosen ground cover prevents water from pooling at the surface. Drainage mats under artificial grass ensure water flows through rather than sitting on top. For heavy clay soils, soil amendments like coarse sand improve water movement through the ground.
Waste disposal tools and storage containers
You need the right tools to keep your potty area clean and sanitary. Long-handled scoopers save your back and keep you at a comfortable distance from waste. Biodegradable waste bags break down naturally and won’t harm your landscape. Sealed storage containers with tight-fitting lids prevent odors and keep pests away – look for ones with foot pedals for hands-free operation. Hose attachments with spray nozzles help rinse away residue from hard surfaces. Disposable gloves provide extra protection during cleanup. Disinfectant sprays designed for outdoor use kill bacteria and eliminate lingering odors between deep cleanings.
Step-by-Step Installation Process
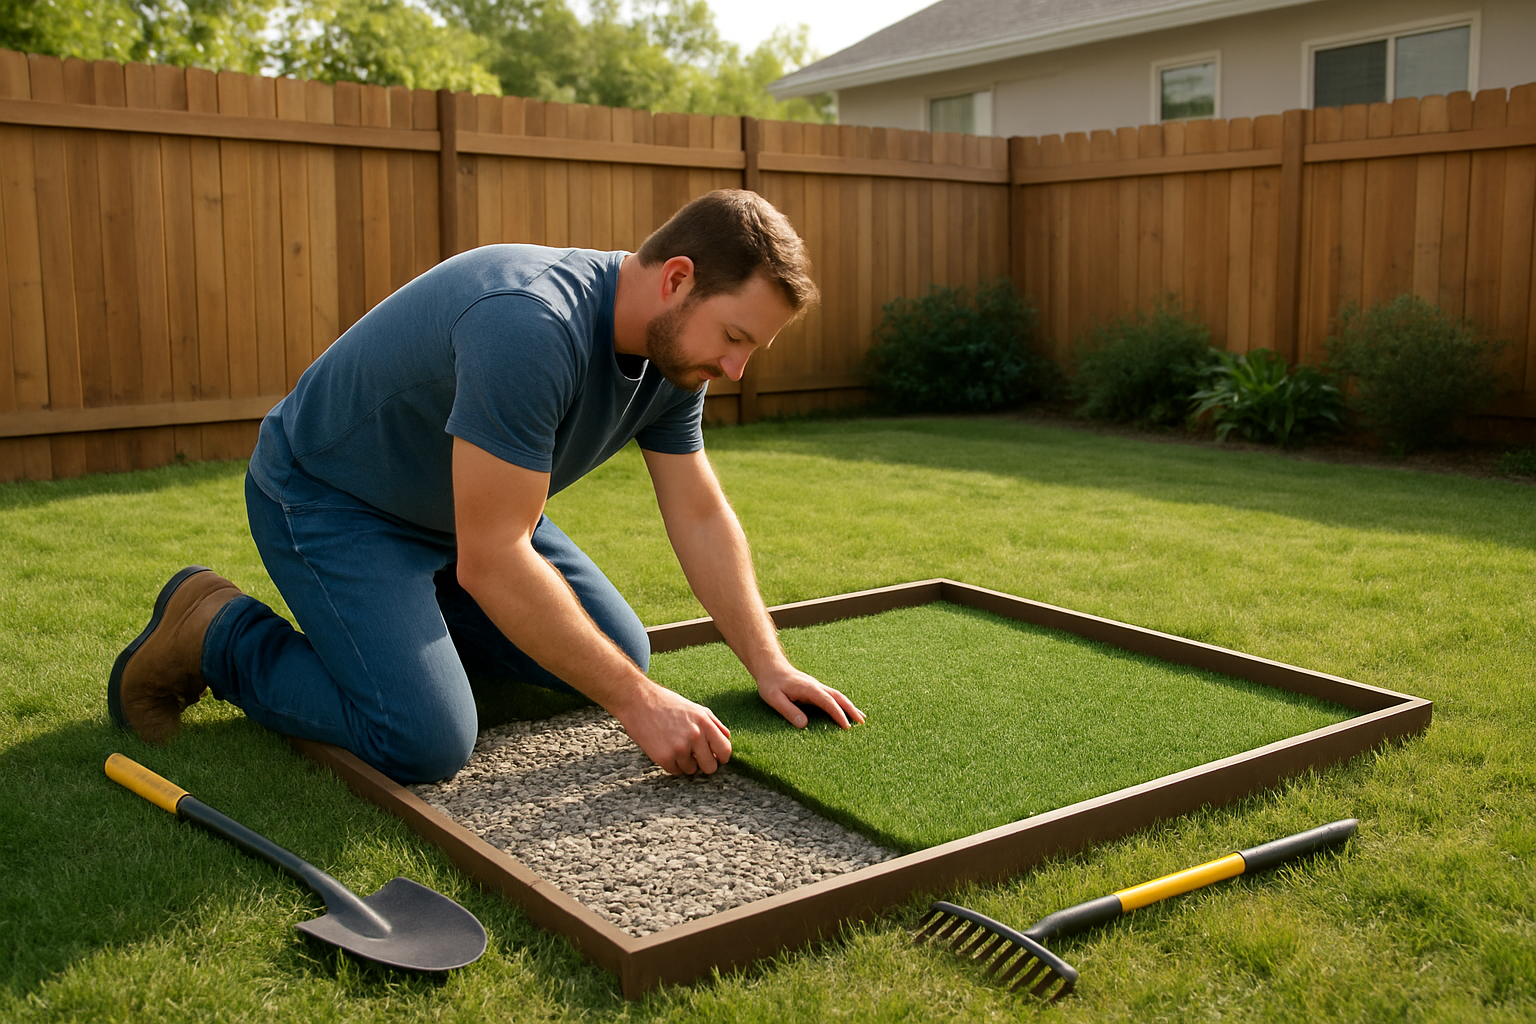
Prepare the ground and remove existing vegetation
Start by marking your chosen area with spray paint or stakes. Clear all grass, weeds, and debris using a shovel or sod cutter. Rake the soil smooth and level any uneven spots. Remove rocks and roots that could interfere with drainage or create puddles.
Install proper drainage if necessary
Check your soil’s drainage by digging a small test hole and filling it with water. If water sits for more than a few hours, you’ll need to improve drainage. Dig down 6-8 inches and add a layer of gravel or coarse sand. This prevents standing water that attracts pests and creates odors.
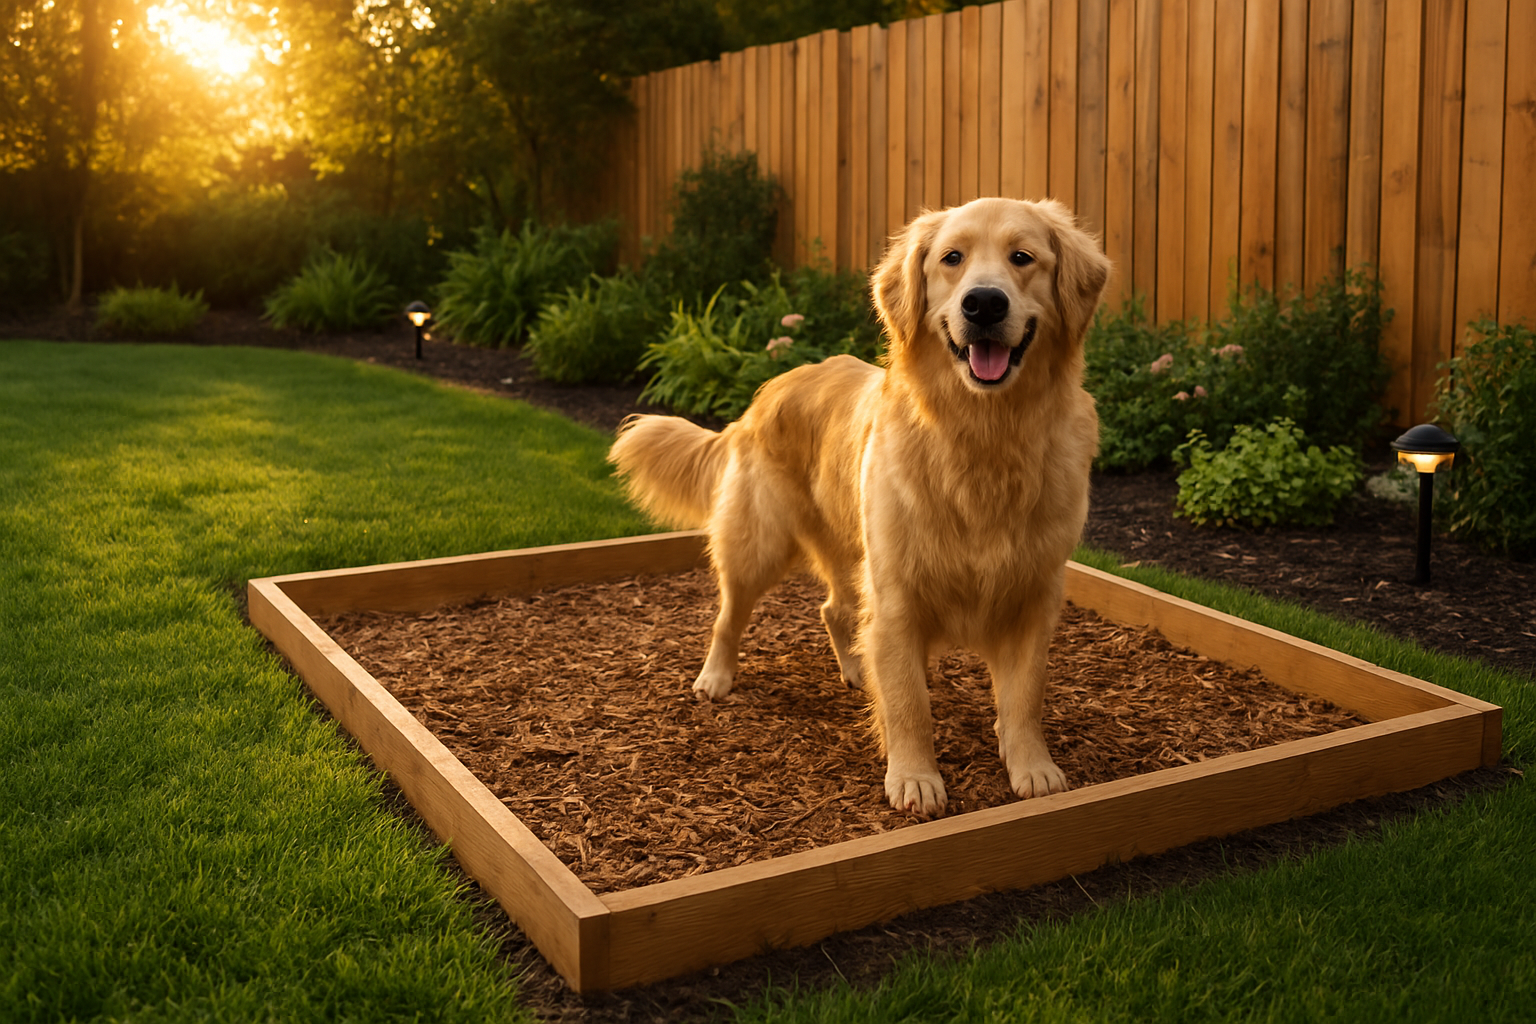
Add your chosen ground cover material
Spread your selected material evenly across the prepared area. Popular options include pea gravel, wood chips, or artificial turf. Create a slight slope away from your home to encourage runoff. For gravel, aim for 2-3 inches deep. Wood chips should be 1-2 inches thick for optimal absorption and easy cleanup.
Create clear boundaries and pathways
Install edging materials like plastic strips, stones, or small fencing to define the potty area boundaries. This keeps your ground cover contained and creates visual cues for your dog. Add stepping stones or a small path leading to the area so you can access it easily for cleaning without stepping in the designated space.
Training Your Dog to Use the New Area
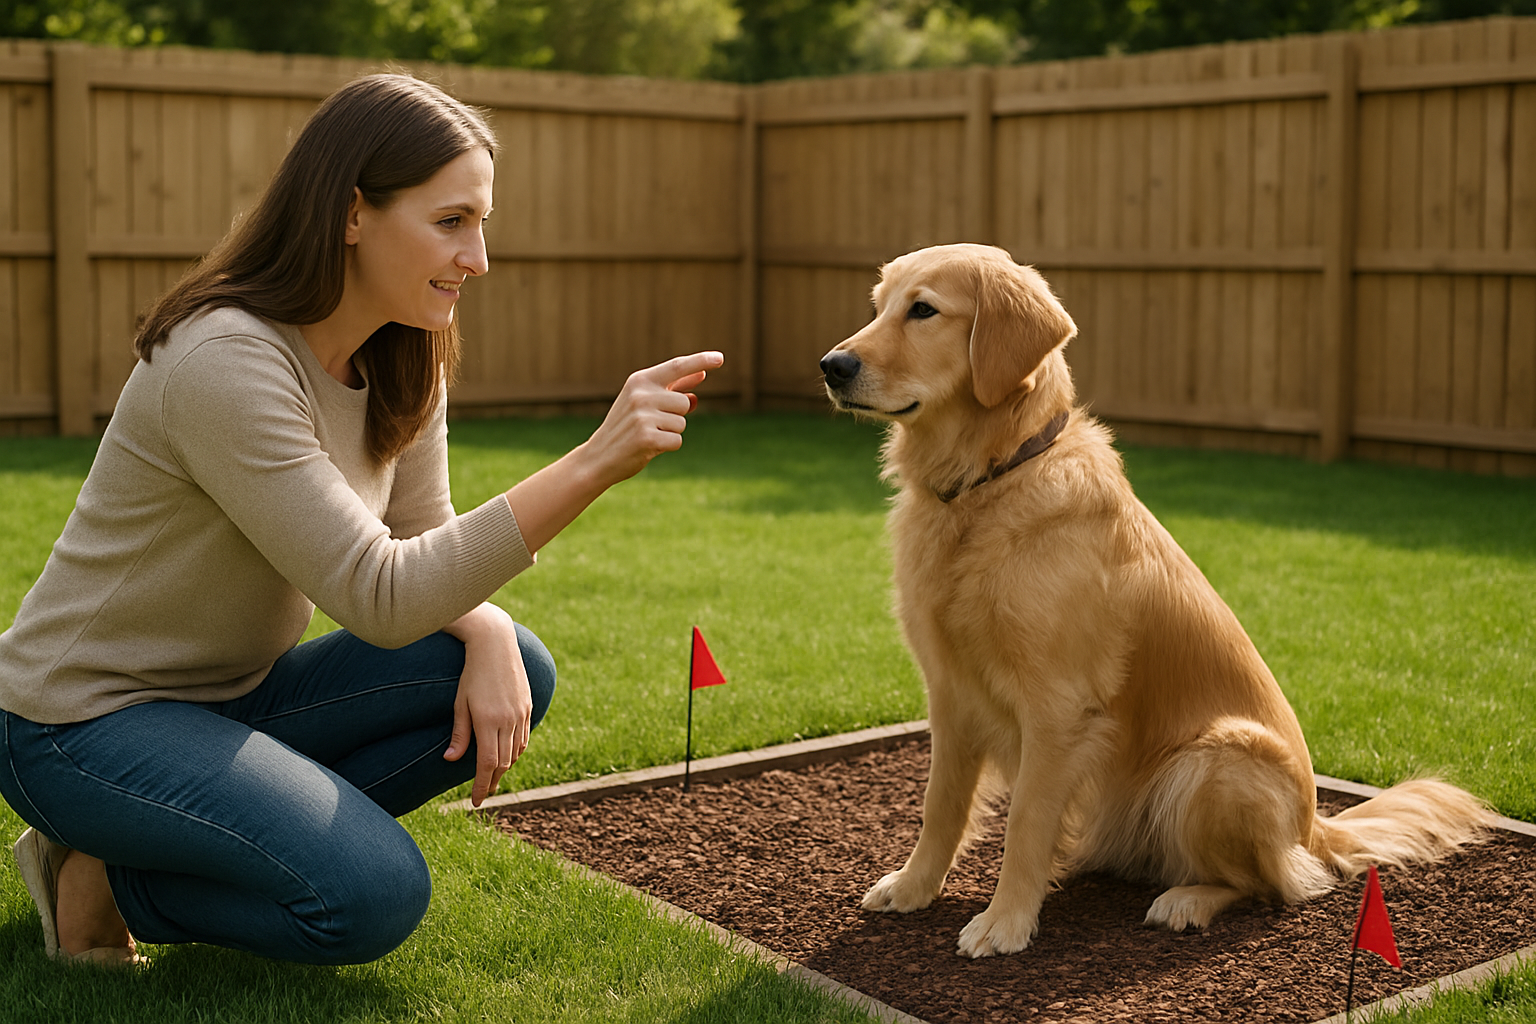
Establish a consistent routine and schedule
Your dog learns best through predictable patterns, so take them to the designated potty area at the same times every day – first thing in the morning, after meals, before bed, and every few hours in between. Stick to this schedule religiously for at least two weeks, as consistency helps your dog understand when and where they should go. Set phone alarms if needed to maintain these regular potty breaks, especially during the initial training phase.
Use positive reinforcement techniques
Reward your dog immediately when they use the designated area correctly with high-value treats, enthusiastic praise, or their favorite toy. The key is timing – give the reward within seconds of them finishing to create a strong positive association with the spot. Keep special training treats in your pocket so you’re always ready to celebrate success. Never punish accidents, as this can create anxiety and actually slow down the training process.
Redirect accidents back to the designated spot
When you catch your dog having an accident elsewhere in the yard, gently interrupt them with a calm “no” and immediately guide them to the correct area. If they finish going in the right spot, still offer praise and a treat. Clean accident areas thoroughly with an enzyme cleaner to remove scent markers that might attract them back to the wrong location. Stay calm during redirections – getting upset will only confuse your dog.
Be patient during the adjustment period
Most dogs need 2-4 weeks to fully adapt to using a new potty area, with some taking longer depending on their age, previous training, and personality. Expect some setbacks and accidents during this transition period – they’re completely normal. Senior dogs or those with established habits might take extra time to adjust, so don’t get discouraged if progress seems slow. Celebrate small wins and remember that consistent practice will eventually lead to success.
Ongoing Maintenance for Long-Term Success
Daily Waste Removal Best Practices
Remove waste immediately after your dog uses the area to prevent odors and bacterial growth. Use biodegradable waste bags and dispose of them in your regular trash. Check the area twice daily, even on days when you don’t see your dog using it, as small waste pieces can be easily missed.
Regular Cleaning and Sanitizing Schedule
Clean your designated potty area weekly with an enzymatic cleaner specifically designed for pet waste. Rinse the surface thoroughly and allow it to air dry completely. Monthly deep cleaning should include scrubbing any permanent fixtures and replacing absorbing materials like wood chips or gravel as needed.
Seasonal Maintenance and Material Replacement
Spring calls for fresh mulch or gravel replacement after winter weather damage. Summer requires more frequent watering of grass areas and shade structure checks. Fall means removing leaves and debris that accumulate in the space. Winter maintenance includes snow removal and checking that drainage systems remain clear and functional year-round.


