Dog Potty Area With Drain: How To Prevent Smell, Mud, And Standing Water

A muddy, smelly dog potty area with standing water makes outdoor cleanup a nightmare for any pet owner. Dog owners who want a clean, functional outdoor bathroom space need proper drainage solutions to eliminate odors, prevent messy conditions, and create a hygienic environment their dogs will actually use.
Installing a dog potty area with drain transforms your yard maintenance routine from a daily headache into a simple, manageable task. You’ll discover how to select the perfect location and drainage materials that work with your specific yard conditions. We’ll also cover smart design strategies that prevent odor buildup naturally and show you maintenance techniques that keep your system working efficiently for years to come.
Choose the Right Location and Materials for Your Dog Potty Area
Select a well-draining spot away from high-traffic areas
Position your dog’s potty area in a naturally well-draining location, preferably on slightly elevated ground or where water doesn’t pool after rain. Choose a spot that’s convenient for your dog but away from windows, patios, and areas where you entertain guests. Avoid low-lying areas where water naturally collects, as these will create muddy conditions and drainage problems.
You Might Also Love These Ideas


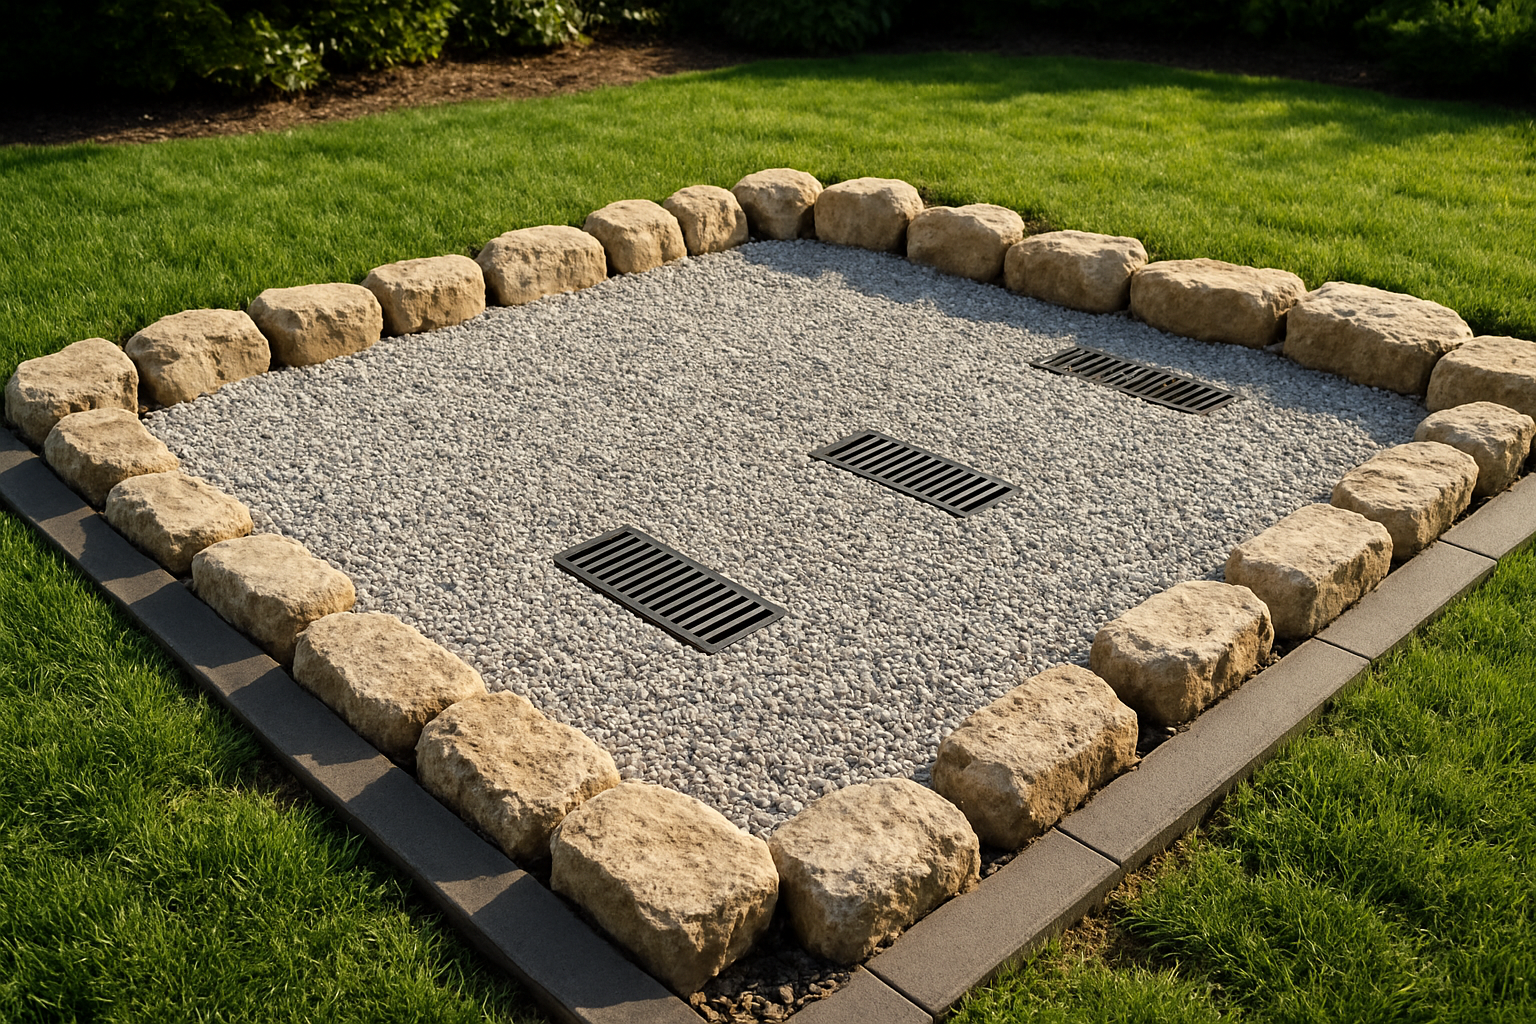
Use permeable materials like gravel or artificial turf
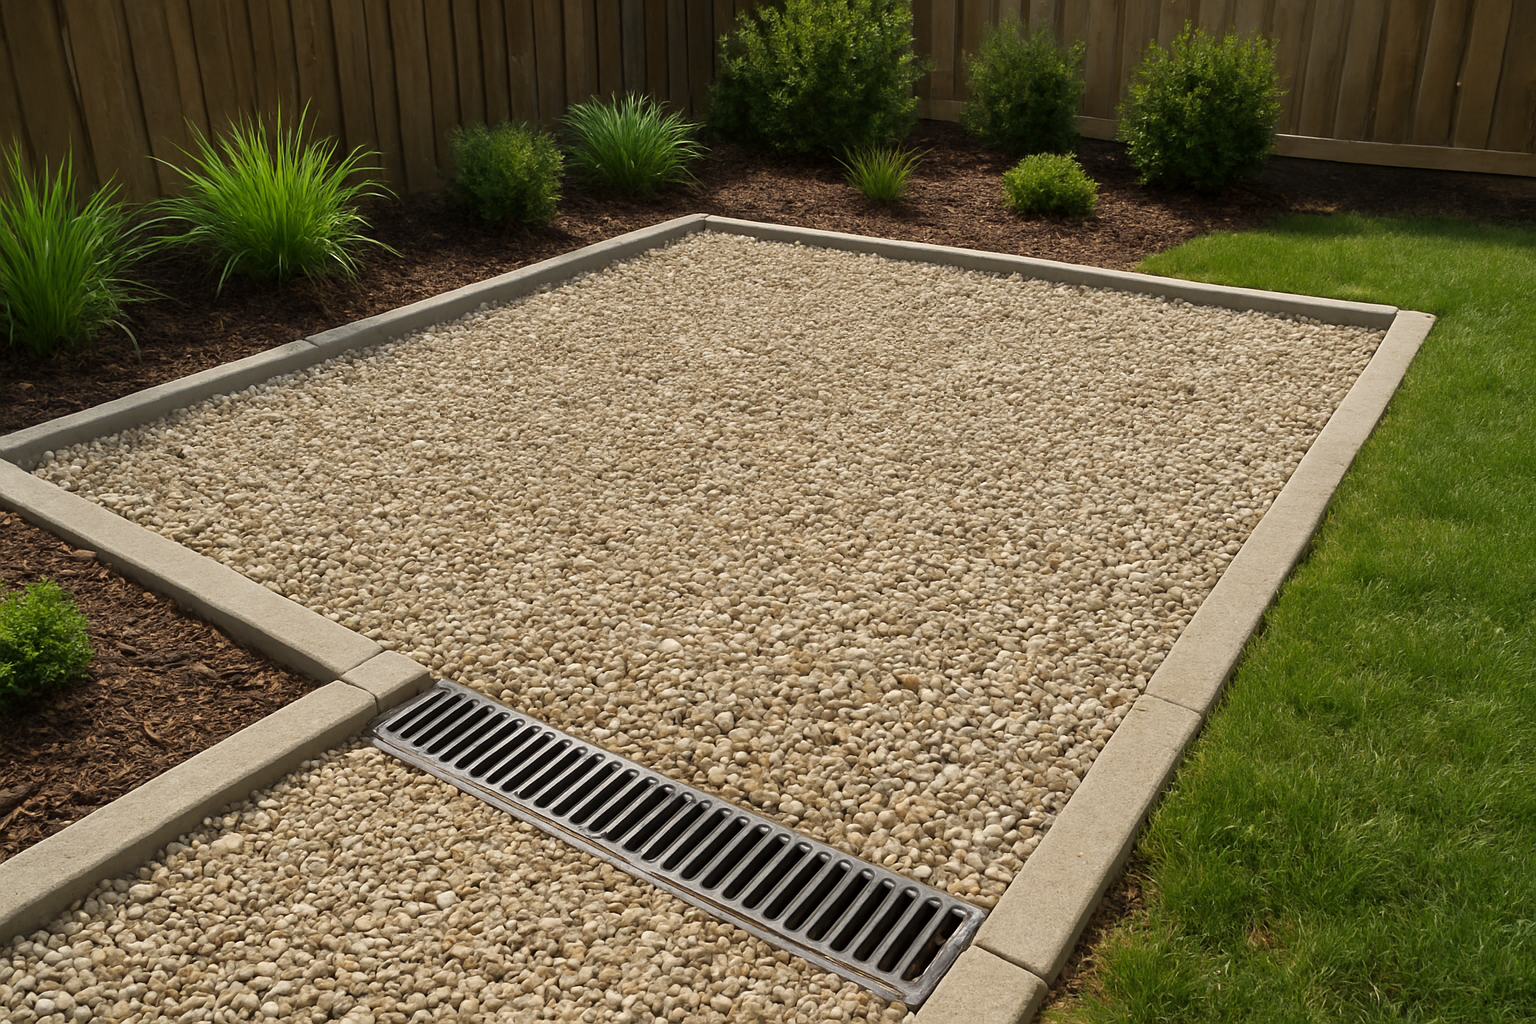
Replace traditional grass with materials that allow water to pass through easily. Pea gravel, decomposed granite, or high-quality artificial turf designed for pet areas work exceptionally well. These materials prevent standing water while providing a comfortable surface for your dog. Artificial turf with good drainage backing offers easy cleanup and eliminates the mud problem entirely.
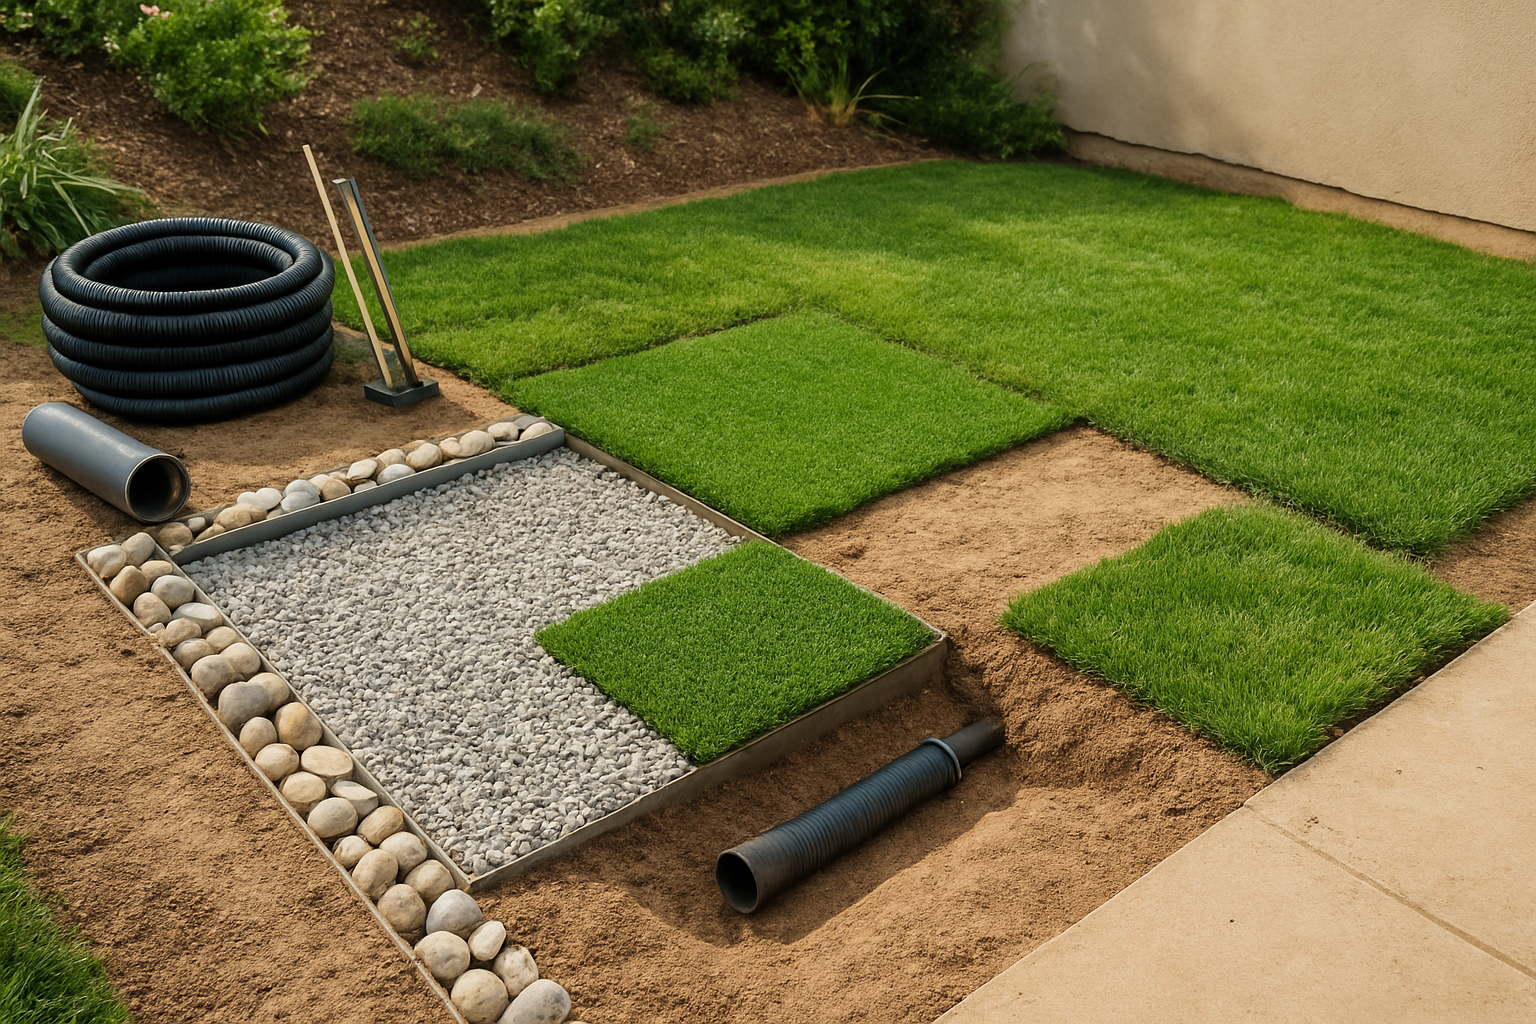
Install proper base layers for optimal drainage
Create a solid foundation by excavating 6-8 inches deep and layering different materials. Start with landscape fabric at the bottom, add 3-4 inches of crushed stone or coarse gravel, then 2-3 inches of sand for leveling. This layered approach ensures water moves through the system efficiently rather than pooling on the surface or creating soggy conditions underneath.
Consider slope requirements for effective water flow
Build a gentle slope of 1-2% (about 1-2 inches per 8 feet) to encourage water runoff toward your drainage point. The slope should be subtle enough that your dog feels comfortable but sufficient to prevent standing water. Direct the flow toward a storm drain, rain garden, or designated drainage area. Test the slope with a garden hose before finalizing your installation to ensure proper water movement.
Install an Effective Drainage System
Design the drain placement for maximum efficiency
Position your drain at the lowest point of your potty area, ideally in the center or slightly off-center where your dog typically goes. Create a gentle slope of 2-4% toward the drain to ensure water flows naturally without pooling. This strategic placement captures both urine and rainwater effectively.
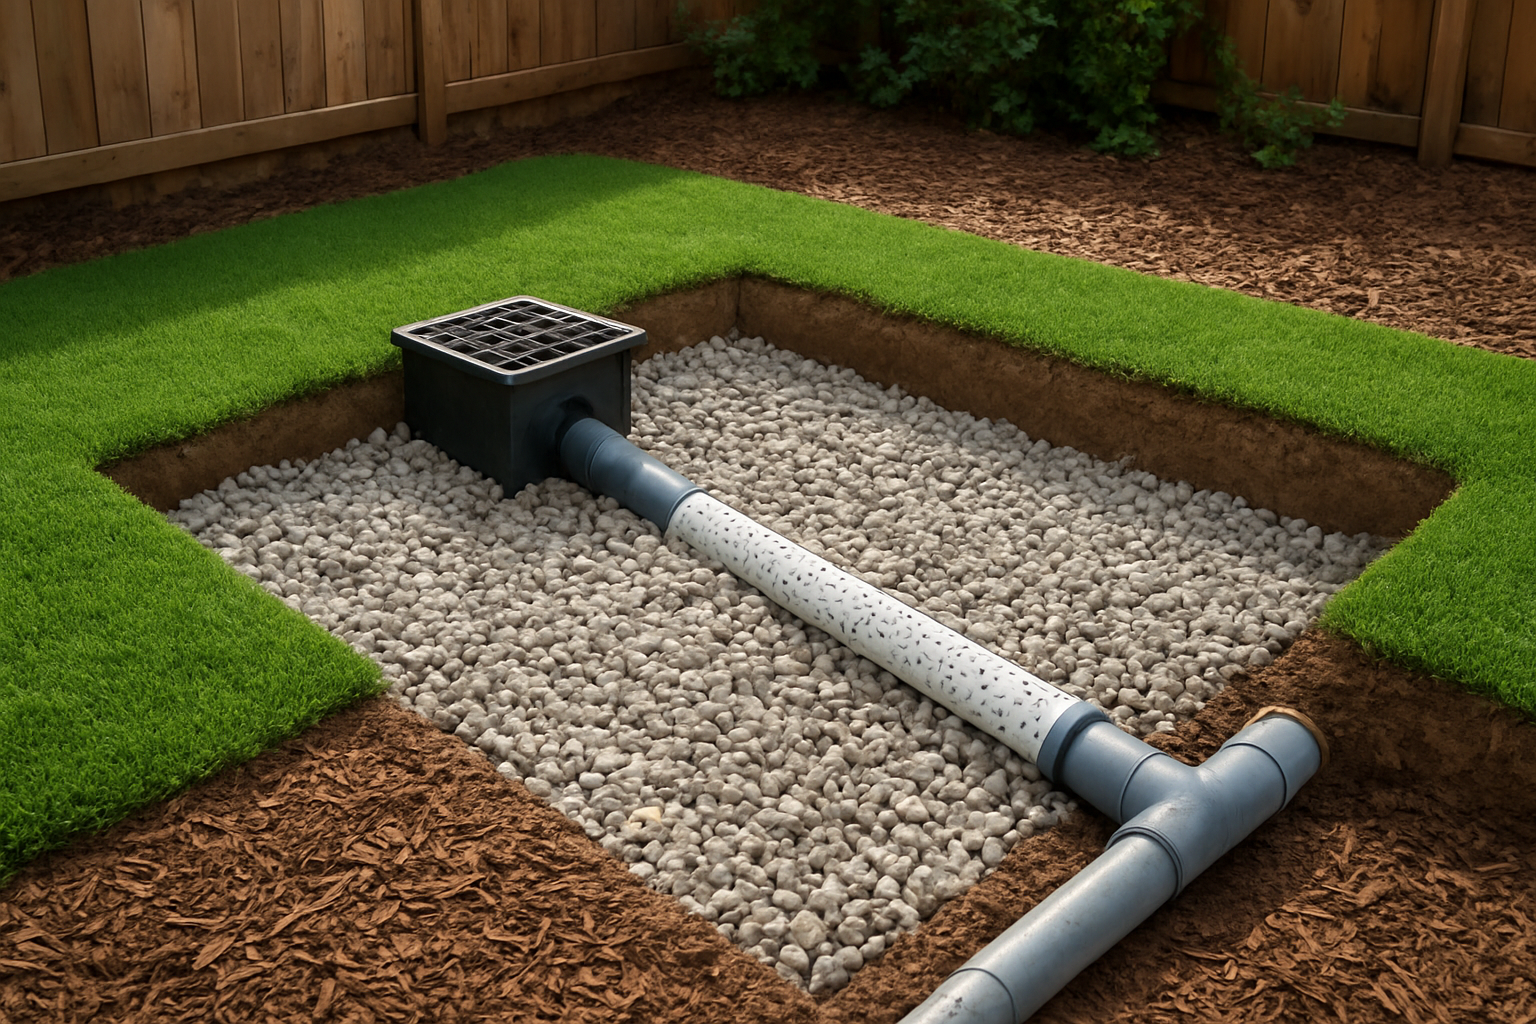
Choose between French drains and surface drains
French drains work best for areas with heavy clay soil or poor natural drainage, using perforated pipes surrounded by gravel to collect subsurface water. Surface drains excel in high-traffic areas, featuring grated covers that catch debris while allowing quick water removal. Consider your soil type and local rainfall when making your choice.
Connect to existing drainage or create a dry well
Connect your system to existing storm drains, downspout extensions, or your property’s drainage network if local codes permit. When connection isn’t possible, dig a dry well 3-4 feet deep and 2-3 feet wide, filling it with gravel to create an absorption point. Always check local regulations before connecting to municipal systems.
Add drainage pipes with proper pitch angles
Install drainage pipes with a minimum 1% slope (1 inch drop per 8 feet of pipe) to prevent standing water and clogs. Use 4-inch PVC pipes for main lines and 3-inch pipes for branches, wrapping joints with pipe tape for watertight seals. Test your pitch with water before backfilling to ensure proper flow direction and speed.
Prevent Odor Buildup with Smart Design Choices
Incorporate Odor-Absorbing Materials into the Base
Mix zeolite granules or activated charcoal into your base layer to neutralize ammonia naturally. These materials trap odor-causing compounds before they escape, creating a fresher environment. Apply a two-inch layer beneath your drainage gravel for maximum effectiveness without compromising water flow through your system.
Ensure Adequate Ventilation Around the Potty Area
Position your potty area away from enclosed corners and install lattice panels or decorative screens with gaps for airflow. Natural breezes help disperse odors quickly, preventing them from concentrating in one spot. Avoid solid fencing on all sides, which creates stagnant air pockets that trap smells.
Use Antimicrobial Treatments on Surfaces
Apply enzyme-based cleaners monthly to break down organic waste at the molecular level. These treatments target bacteria that produce strong odors, keeping your area fresh longer. Choose pet-safe products specifically designed for outdoor use that won’t wash away with rain or regular hosing.
Plan for Easy Cleaning and Maintenance Access
Design wide pathways around your potty area for comfortable access with cleaning equipment. Install a nearby water spigot and storage area for supplies within arm’s reach. Smooth, sloped surfaces make scrubbing easier, while removable sections allow you to deep clean hard-to-reach spots without major reconstruction projects.
Install UV Lighting to Naturally Eliminate Bacteria
Mount UV-C sanitizing lights on timers to run during peak bacteria growth hours, typically early morning and evening. These lights kill harmful microorganisms without chemicals, reducing odor sources naturally. Position lights to cover the entire potty surface while protecting them from direct water exposure with weatherproof housing.
Control Mud and Mess Formation
Create barriers between the potty area and lawn
Install physical barriers like landscape edging, decorative stones, or low fencing around your dog’s potty zone. These boundaries prevent muddy paws from tracking mess onto your clean grass and create a clear distinction between areas. Choose materials that complement your yard’s aesthetic while effectively containing waste and drainage materials within the designated space.
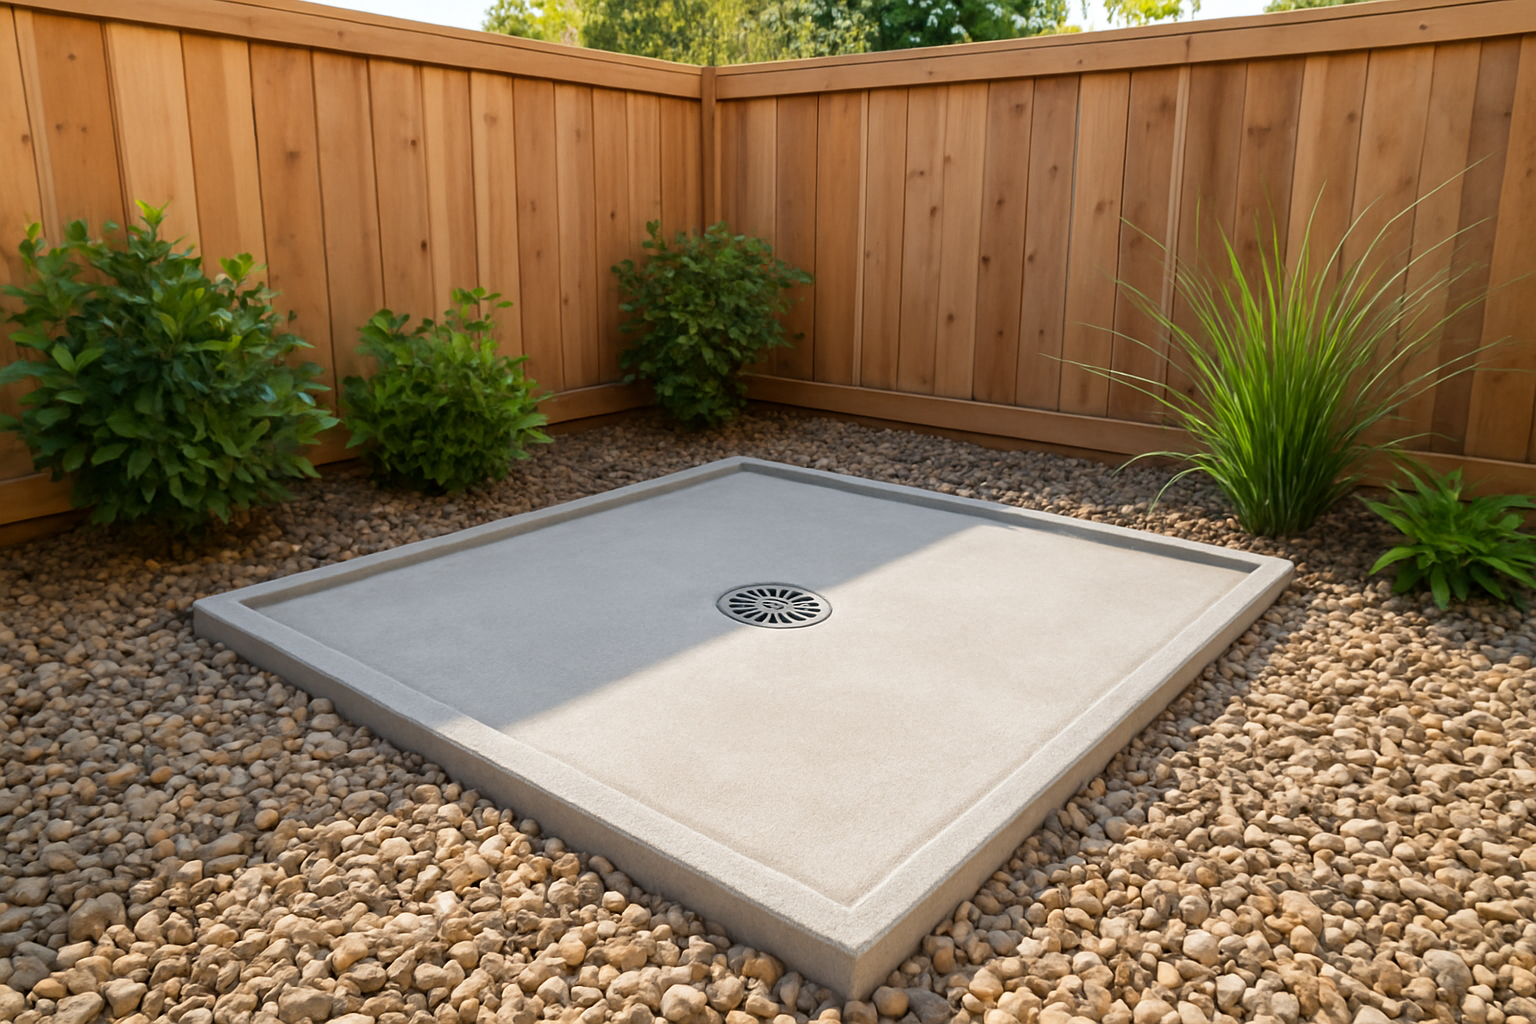
Use non-slip, easy-to-clean surface materials
Select surfaces that provide good traction for your dog while resisting stains and odors. Textured concrete, rubber mats, or specially designed pet turf work exceptionally well. Avoid smooth surfaces that become slippery when wet, and skip porous materials like untreated wood that absorb odors. Your chosen material should allow for quick hosing and scrubbing without deteriorating over time.
Install proper edging to contain loose materials
Secure edging keeps gravel, mulch, or other loose drainage materials from spreading throughout your yard. Use sturdy options like metal landscape edging, concrete borders, or treated lumber to create clean lines. Proper installation means burying the edging deep enough to prevent shifting while maintaining enough height above ground to contain your drainage materials effectively.
Maintain Your Drainage System for Long-Term Success
Establish a Regular Cleaning Schedule for Drains
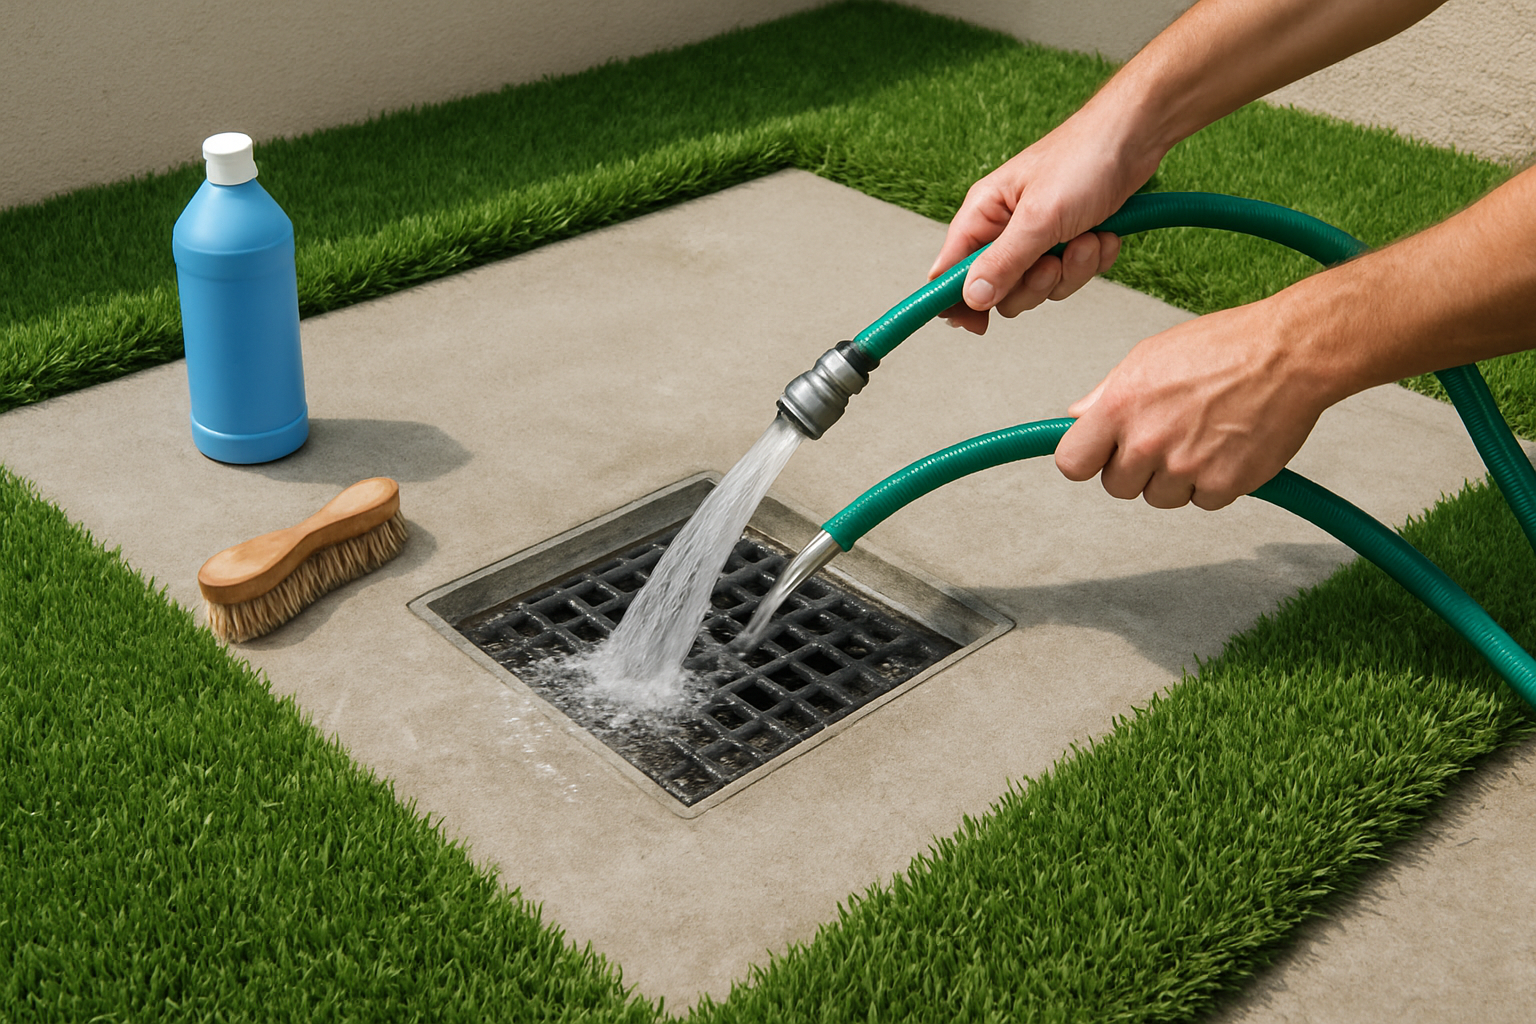
Clean your drain system every two weeks to prevent buildup and maintain optimal flow. Remove debris, hair, and organic matter that accumulates over time.
Monitor for Clogs and Clear Them Promptly
Watch for slow drainage or standing water after your dog uses the area. Use a drain snake or high-pressure hose to clear blockages before they become major problems.
Replace or Refresh Surface Materials as Needed
Refresh gravel, sand, or artificial turf every 6-12 months depending on usage. Replace worn materials that no longer provide adequate drainage or odor control for your pet area.
Inspect Drainage Performance After Heavy Rains
Check your system after storms to ensure water flows properly through all drain components. Look for pooling, backflow, or erosion that might compromise your carefully designed dog potty area’s effectiveness.
Creating a functional dog potty area with proper drainage takes some planning, but the payoff is huge. When you choose the right spot, install quality drainage, and use smart materials like gravel or artificial turf, you’ll eliminate most of the common problems that make outdoor dog areas unpleasant. Good drainage stops water from pooling, antimicrobial treatments keep smells under control, and the right surface materials prevent muddy paw prints from tracking through your home.
Regular maintenance is what keeps everything working smoothly for years to come. Clean your drainage system monthly, refresh your surface materials when needed, and stay on top of waste removal. Your dog will have a comfortable, clean space to do their business, and you’ll save yourself hours of cleanup while protecting your yard from damage. Start with a solid foundation and proper materials, and you’ll wonder why you waited so long to tackle this project.


