How to Build a DIY Chain Link Dog Kennel Step by Step

Building a chain link dog kennel yourself saves money and gives you complete control over your pet’s outdoor space. This guide is perfect for dog owners who want a secure, durable enclosure without paying contractor prices.
You’ll learn how to create a professional-quality kennel that keeps your dog safe while giving them room to play and exercise. We’ll walk you through selecting the right materials and tools for your specific needs, then show you how to plan and measure your kennel design to fit your yard perfectly.
The step-by-step process covers everything from preparing a solid foundation to installing the chain link framework that forms your kennel’s structure. You’ll also discover how to add safety features and finishing touches that make your DIY kennel both functional and long-lasting.
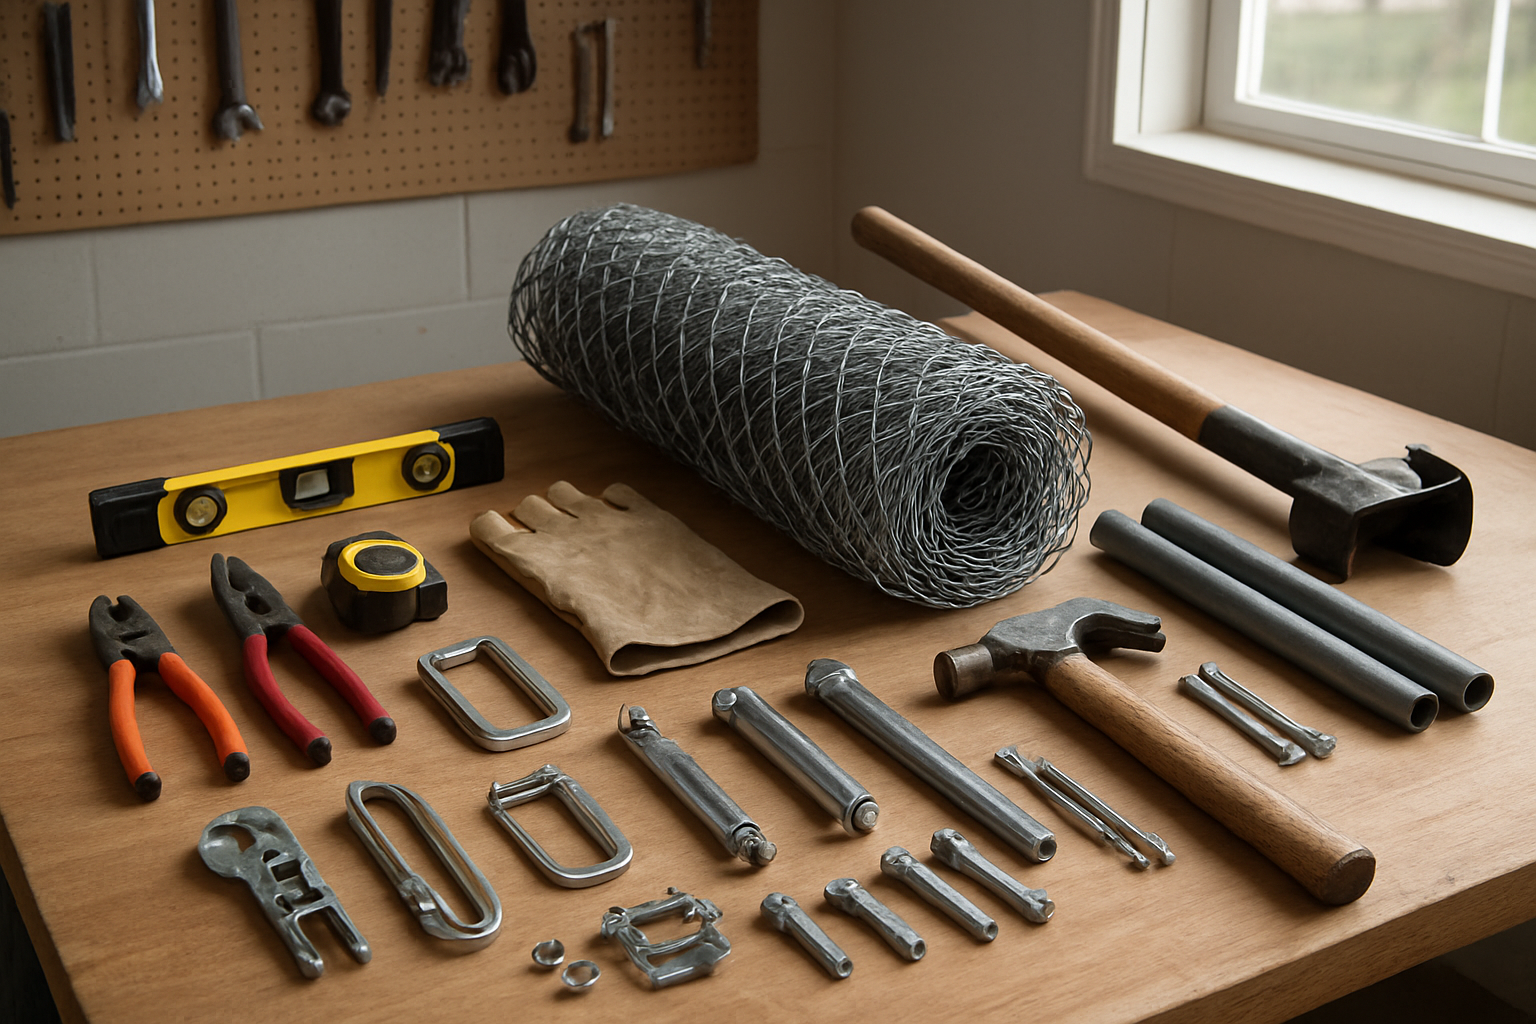
Essential Tools and Materials for Your Dog Kennel Project
You Might Also Love These Ideas


Must-have power tools and hand tools for efficient construction
You’ll need a post-hole digger or power auger to create precise holes for your fence posts. A cordless drill with various bits handles hardware installation, while a circular saw or angle grinder cuts chain link mesh to size. Keep a level, measuring tape, pliers, and adjustable wrenches handy for alignment and tightening connections throughout your build.
Chain link fencing materials and hardware specifications
Your material list starts with galvanized chain link fabric in 4-6 foot heights with 2-inch diamond mesh patterns for optimal durability. Purchase galvanized steel terminal posts (corner and end posts) and line posts spaced 6-8 feet apart. You’ll need tension bands, rail caps, tie wires, gate hinges, and a spring-loaded latch system for your kennel entrance.
Foundation materials for long-lasting stability
Concrete mix forms the backbone of your kennel’s stability – plan for one 80-pound bag per post hole. Gravel provides proper drainage around each post, while landscape fabric prevents weed growth beneath your kennel floor. Consider adding concrete blocks or pavers for a clean, washable surface that keeps your dog comfortable and makes cleaning easier.
Safety equipment to protect yourself during construction
Your safety gear checklist includes work gloves to protect against sharp chain link edges and safety glasses to shield your eyes from metal fragments. Steel-toed boots prevent foot injuries when handling heavy posts and concrete bags. Keep a first aid kit nearby, and wear long pants to avoid cuts from wire mesh during installation and stretching processes.
Planning Your Kennel Design and Measurements
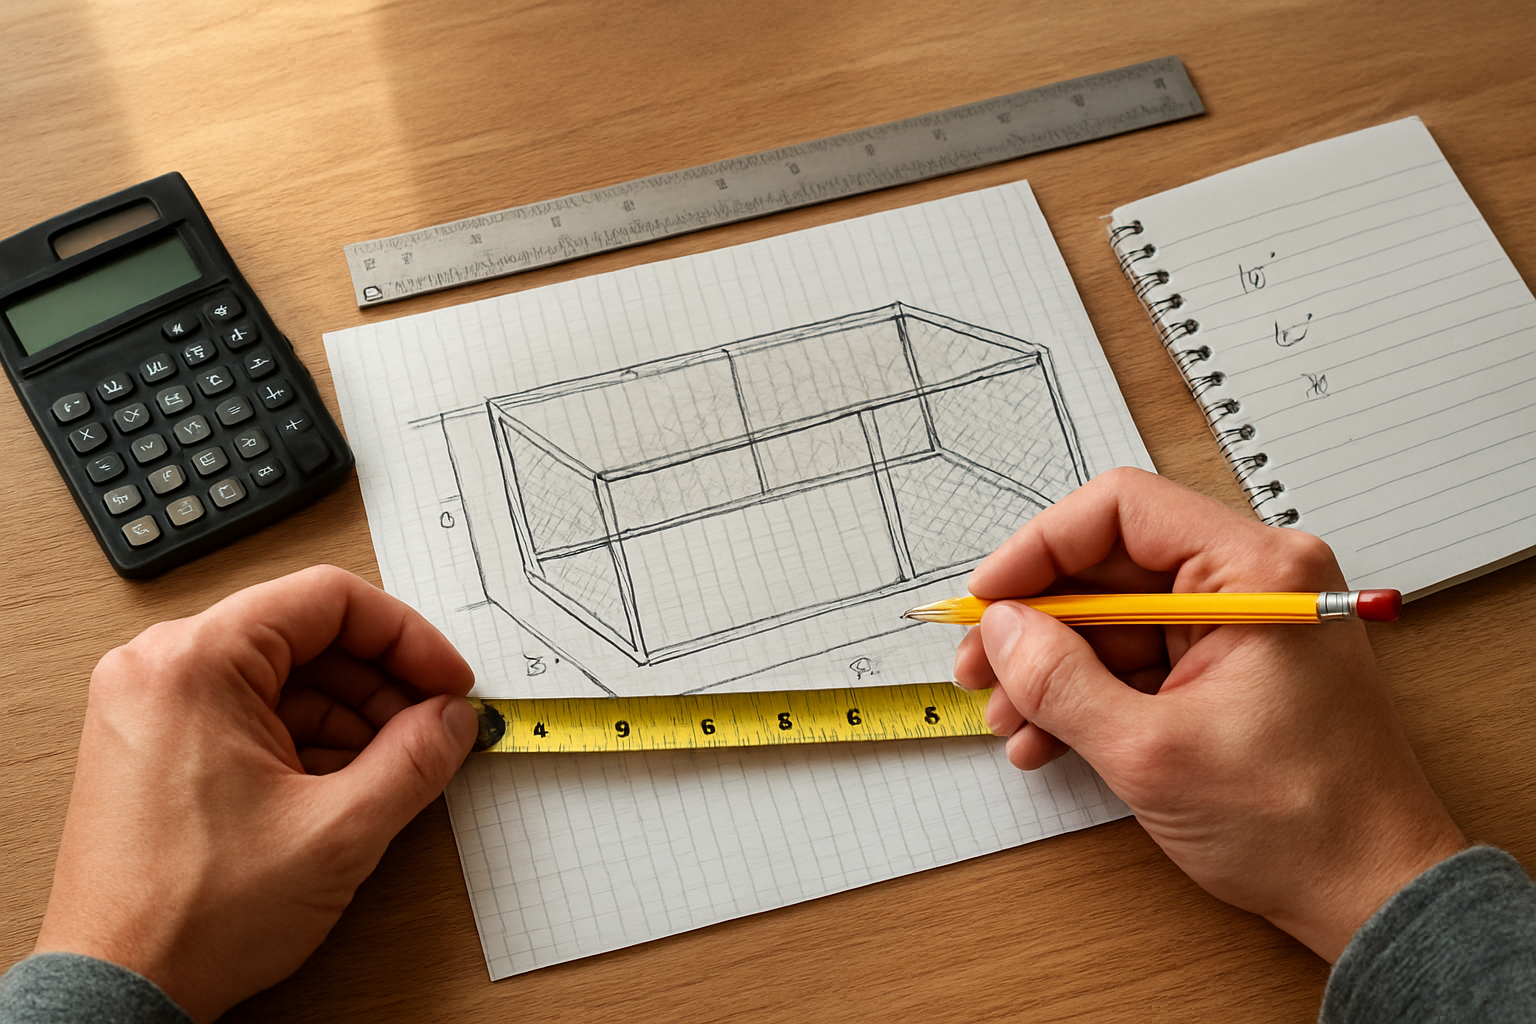
Determining the optimal kennel size for your dog breed
Your dog’s breed and size directly impact how much space they need to move comfortably. Small breeds like Beagles need at least 6×10 feet, while large breeds like German Shepherds require 10×20 feet minimum. Consider your dog’s adult size, activity level, and how much time they’ll spend in the kennel daily.
Selecting the perfect location in your yard
Choose level ground with good drainage to prevent water pooling during rain. Pick a spot with partial shade to keep your dog cool, but avoid areas under large trees where branches could fall. Stay at least 3 feet away from property lines and check local zoning requirements. Make sure you can easily access the kennel for cleaning and maintenance.
Creating accurate measurements and marking your construction area
Measure twice and mark your corners with spray paint or stakes and string. Use a measuring tape to ensure your dimensions match your planned design exactly. Check that your marked area is square by measuring diagonally – both diagonal measurements should be equal. Clear any grass, rocks, or debris from the marked construction zone before you start building.
Preparing the Foundation and Ground Work
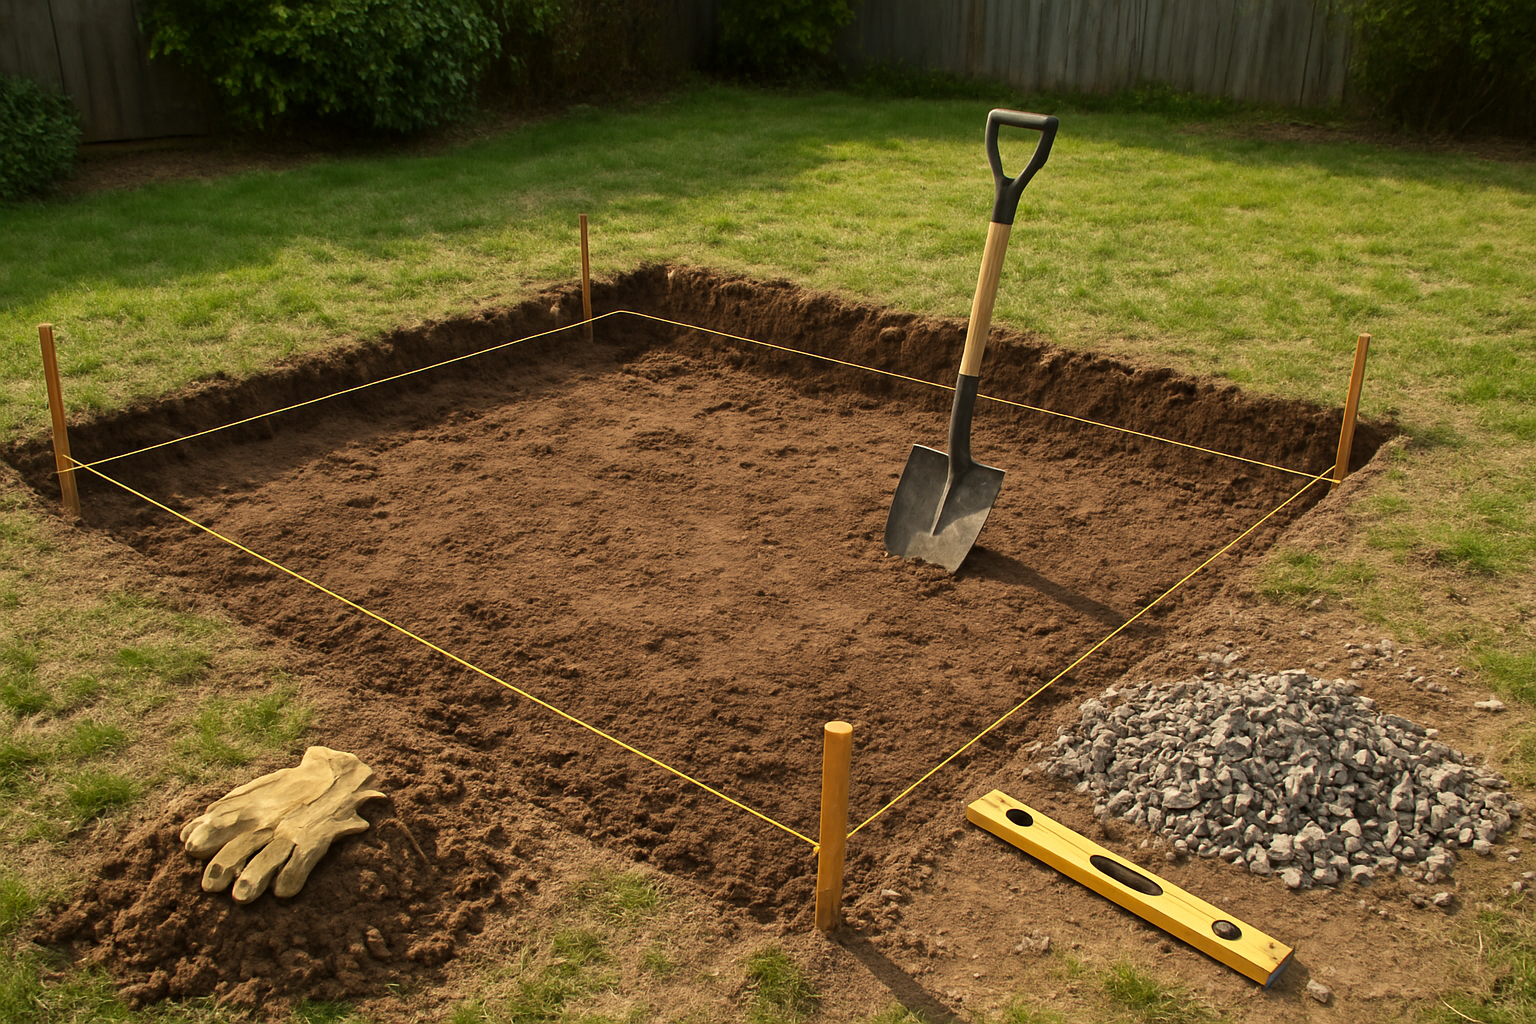
Excavating and leveling the kennel area properly
Start by marking your kennel’s perimeter with spray paint or stakes and string. Remove all grass, weeds, and debris from the area, then excavate 4-6 inches deep for proper foundation depth. Use a long level or transit to ensure the ground slopes slightly away from the center for drainage. Compact loose soil with a plate compactor to create a stable base that won’t shift over time.
Installing drainage solutions to prevent water buildup
Dig drainage trenches around your kennel’s perimeter, sloping them away from the enclosure at a 1-inch drop per 8 feet of length. Install perforated drainage pipes wrapped in landscape fabric to prevent clogging. Fill trenches with gravel before backfilling with soil. Consider adding a French drain system if your area experiences heavy rainfall or has poor natural drainage conditions.
Laying concrete footings for maximum stability
Dig post holes 2-3 feet deep and 8-10 inches wide for each corner and gate post location. Mix concrete using a 1:2:3 ratio of cement, sand, and gravel, adding water gradually until you achieve a thick, workable consistency. Pour concrete around each post, ensuring they’re plumb and properly aligned. Allow 24-48 hours for concrete to cure completely before proceeding with fence installation work.
Setting up proper ground covering for your dog’s comfort
Choose ground covering based on your dog’s size and habits – pea gravel works well for most breeds while preventing mud and providing drainage. Install landscape fabric beneath gravel to suppress weeds and maintain cleanliness. For comfort, consider rubber mats in high-traffic areas or where your dog typically rests. Avoid materials like wood chips that can harbor pests or create splinters.
Installing the Chain Link Framework Structure
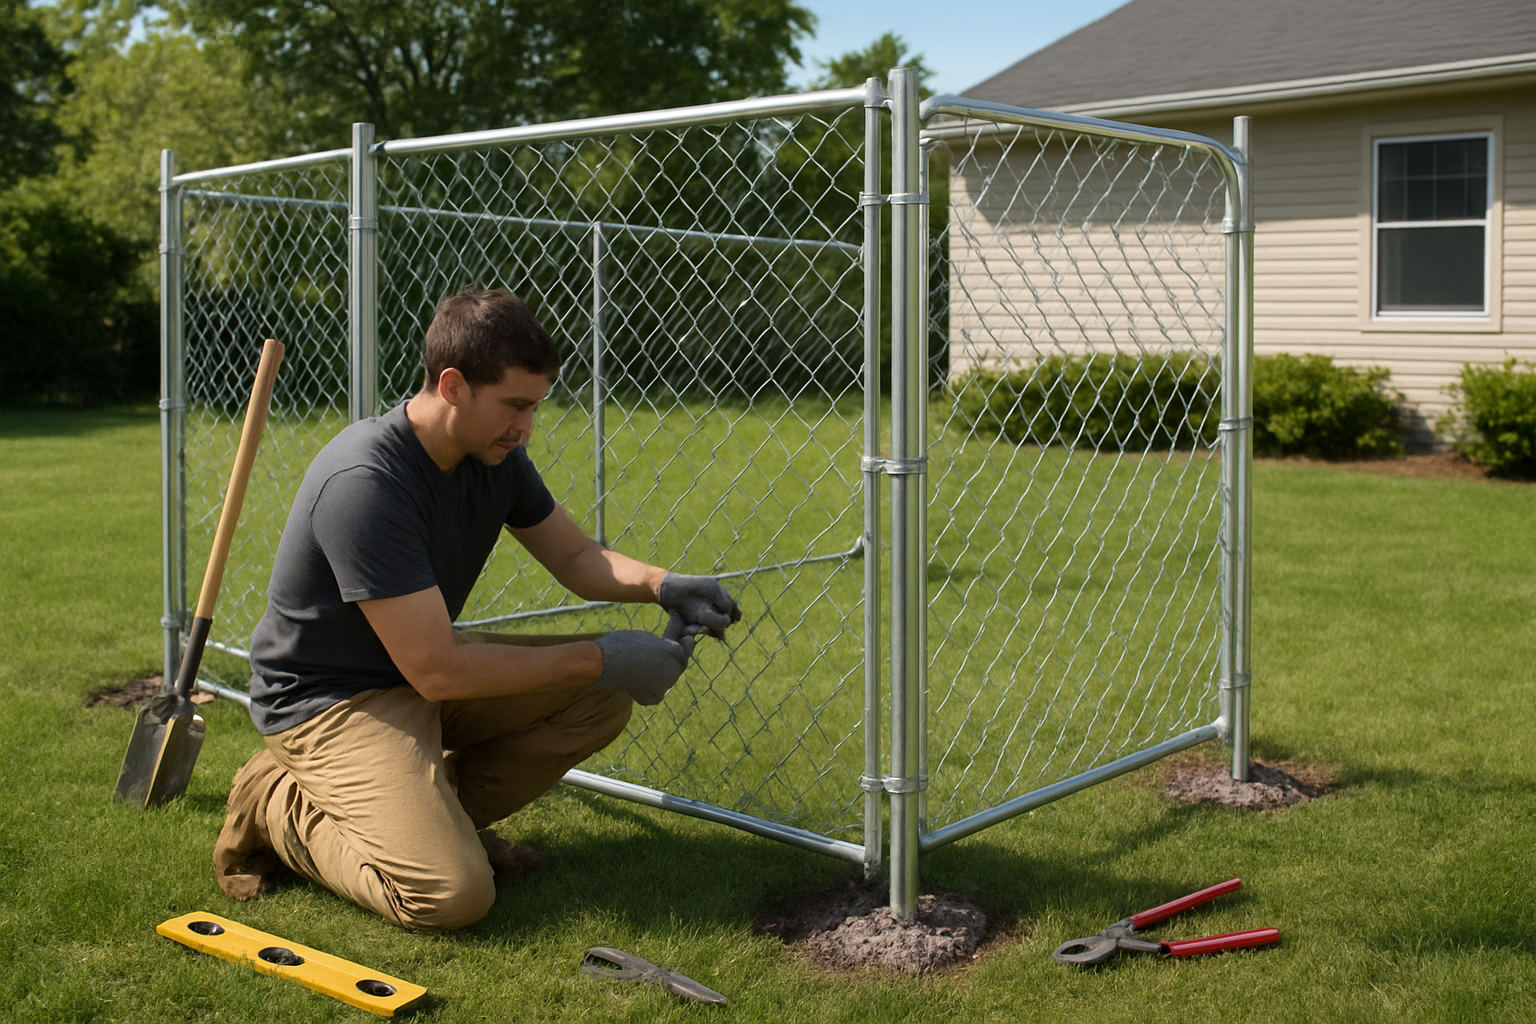
Setting Corner and Gate Posts with Precision
Start by marking your corner post locations with spray paint, ensuring perfect 90-degree angles using the 3-4-5 triangle method. Dig holes 2-3 feet deep and 6 inches wide for corner posts, making them one-third deeper than fence height. Set posts in concrete, checking alignment with a level and string line. Allow 24-48 hours for concrete to cure before proceeding. Gate posts require extra reinforcement with additional concrete and cross-bracing.
Stretching and Securing the Chain Link Mesh Panels
Unroll your chain link fabric along the fence line, keeping it flat against the ground. Attach one end to your starting post using tension bands and carriage bolts, spacing them every 12-15 inches. Use a come-along or fence stretcher to pull the fabric tight, eliminating any sag or wrinkles. Secure the mesh to each line post with tie wires every 12 inches, wrapping them clockwise around both the fabric and post. Trim excess material with bolt cutters, leaving 2-3 inches for final adjustments.
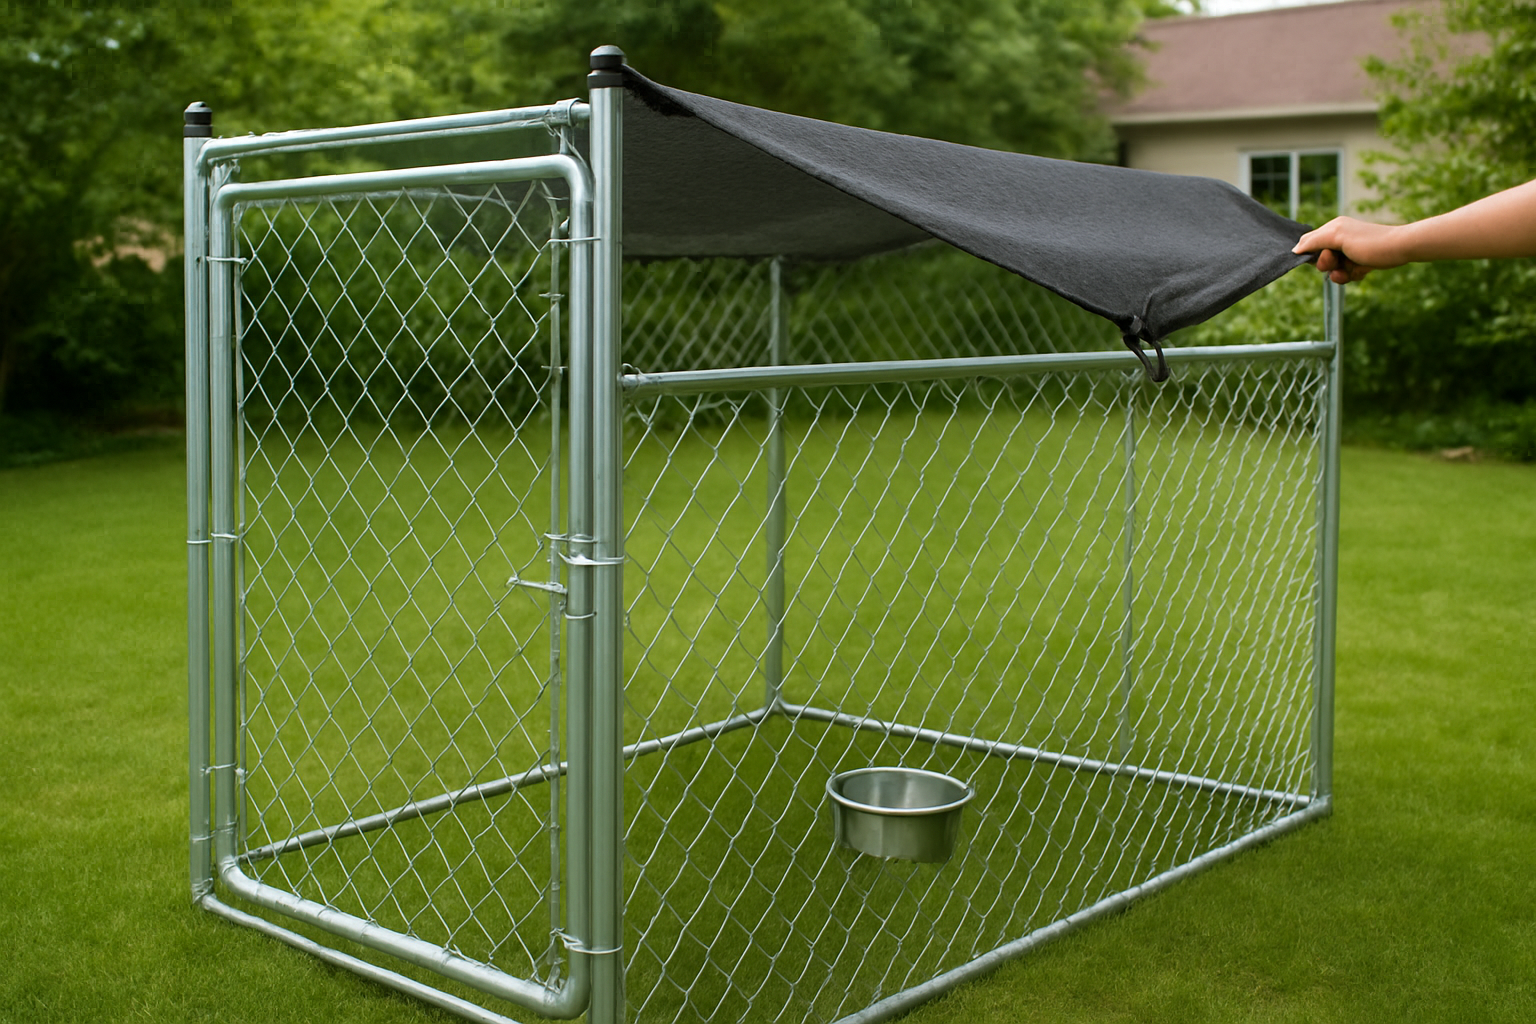
Adding the Roof Framework for Weather Protection
Install roof support posts at 6-8 foot intervals, extending them 8-10 feet above ground level. Create a peaked roof structure using 2×4 pressure-treated lumber, connecting ridge beams with metal brackets for stability. Cover the framework with galvanized corrugated roofing panels, overlapping seams by at least 2 inches. Secure panels with roofing screws and rubber washers to prevent leaks. Add guttering along the roof edges to direct rainwater away from your kennel area.
Adding Essential Features for Safety and Convenience
Installing a Secure Gate with Reliable Locking Mechanisms
Your gate serves as the primary entry point, so choose a heavy-duty chain link gate that matches your fence height. Install sturdy hinges using galvanized bolts and ensure the gate frame aligns perfectly with your fence posts. Mount a spring-loaded latch or padlock-compatible lock for security. Test the gate swing multiple times to confirm smooth operation and proper closure. Add a gate stop or chain to prevent over-swinging that could damage the hinges.
Creating Proper Ventilation and Shade Elements
Position your kennel to take advantage of natural wind patterns and morning shade. Install a partial roof covering using corrugated metal or outdoor fabric over 30-40% of the kennel area. This creates a cool retreat zone while maintaining airflow. Consider adding windbreaks on the side facing prevailing winds using privacy slats or tarps. Elevated platforms or dog houses provide additional shade options and keep your pet off hot or cold ground surfaces.
Adding Feeding and Watering Station Attachments
Mount feeding bowls at an appropriate height using bracket systems that attach directly to the chain link. Stainless steel or heavy ceramic bowls work best as they resist tipping and are easy to clean. Install an automatic waterer or mount a large water bowl in a shaded corner. Create a designated feeding area by placing rubber mats underneath to catch spills and protect the ground. Position food and water stations away from the gate area to prevent interference during entry and exit.
Implementing Safety Features to Prevent Escapes
Check your fence line for gaps larger than your dog’s head and install additional mesh or blocking as needed. Bury the bottom edge of your chain link 4-6 inches underground or add a concrete footer to prevent digging escapes. Install coyote rollers or angled extensions at the top if you have a climbing breed. Regularly inspect all connections, latches, and fence integrity. Remove any objects near the fence that your dog could use as stepping stones to jump over.


